Mechanics
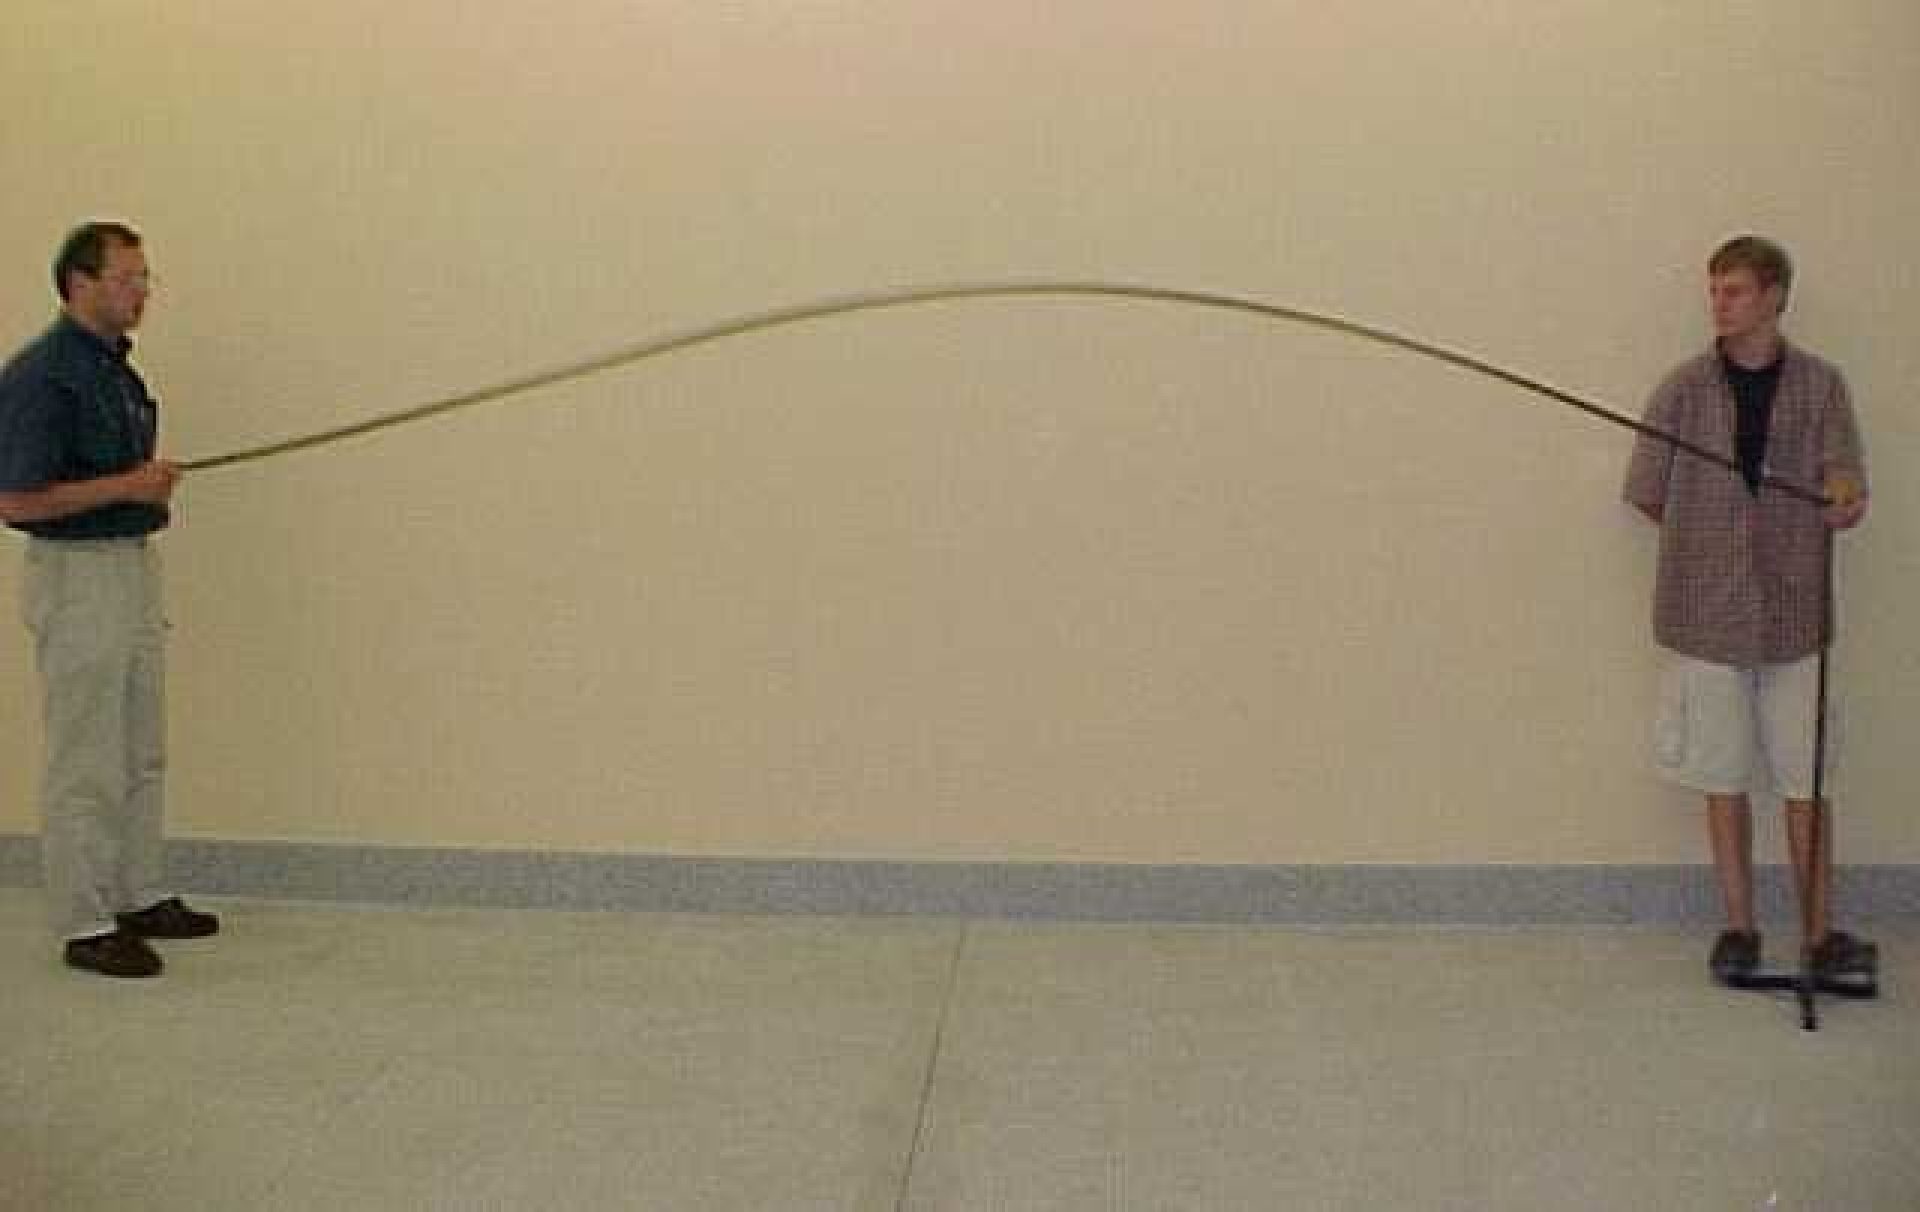
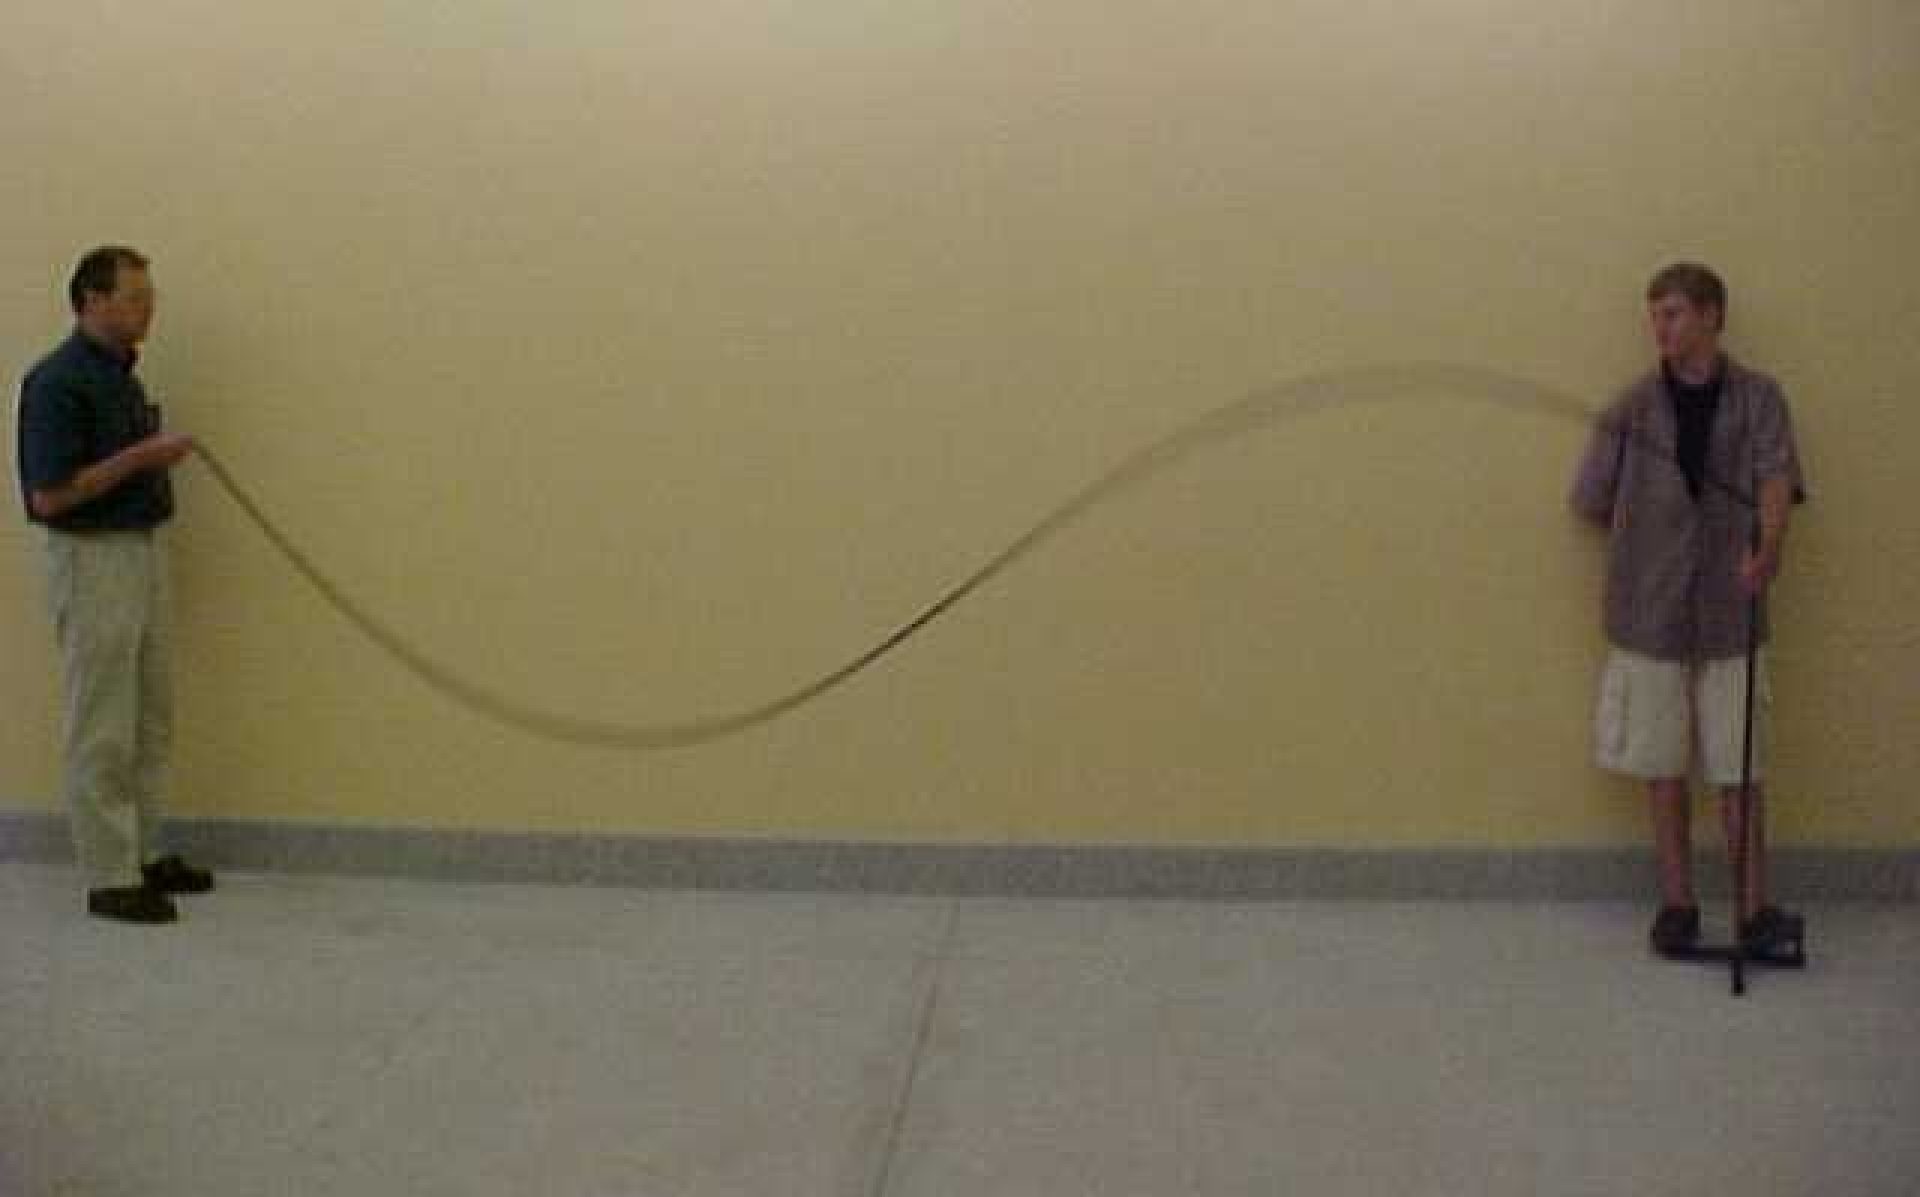
M-W1 : Standing Waves (I)
Unit
Waves
Purpose
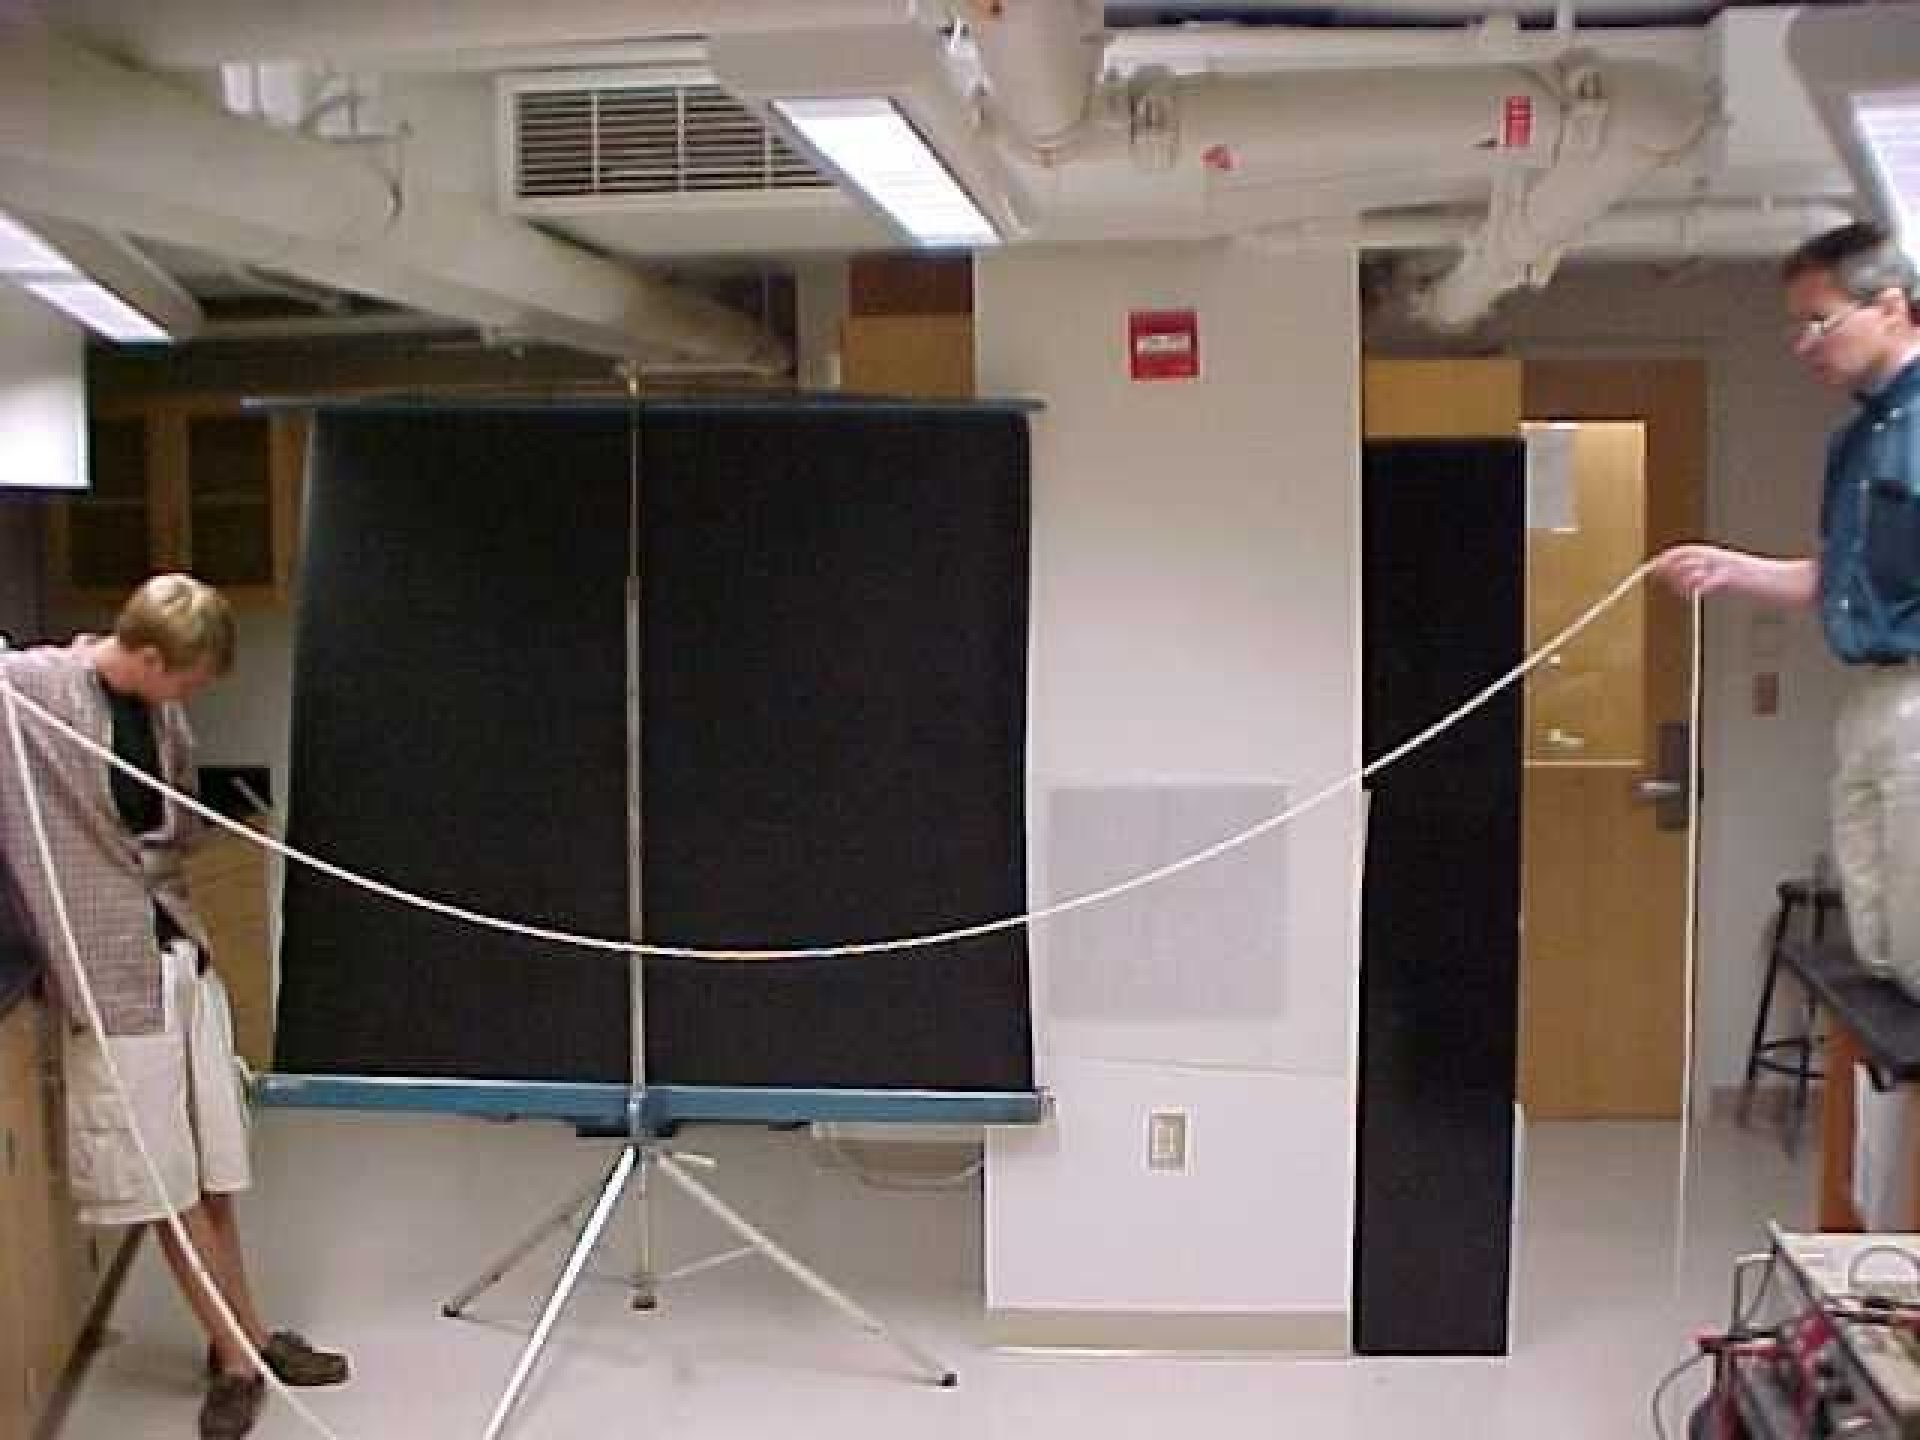
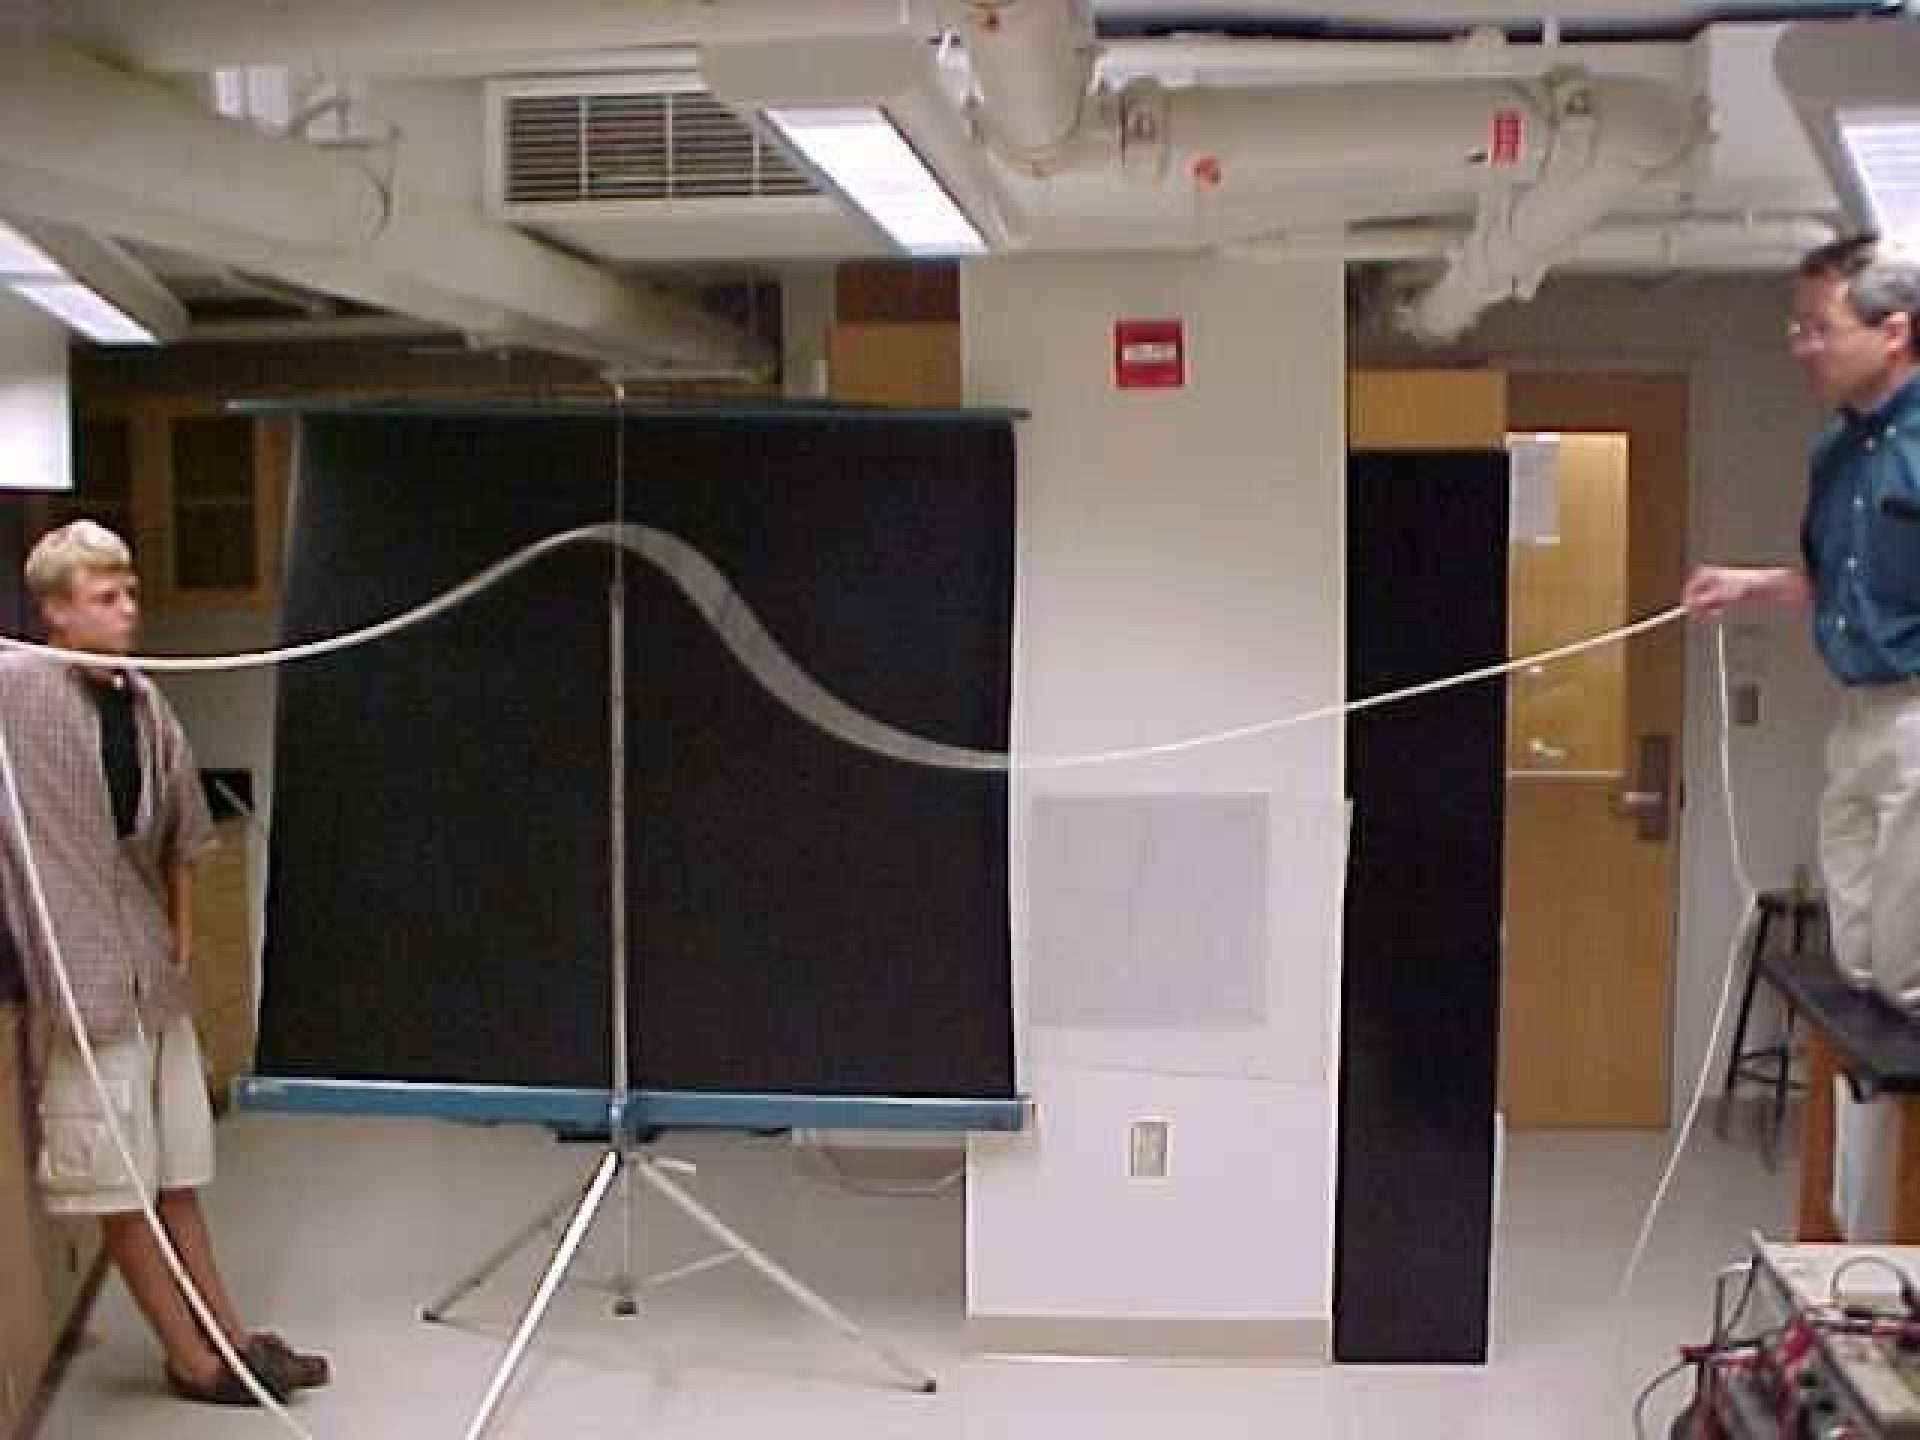
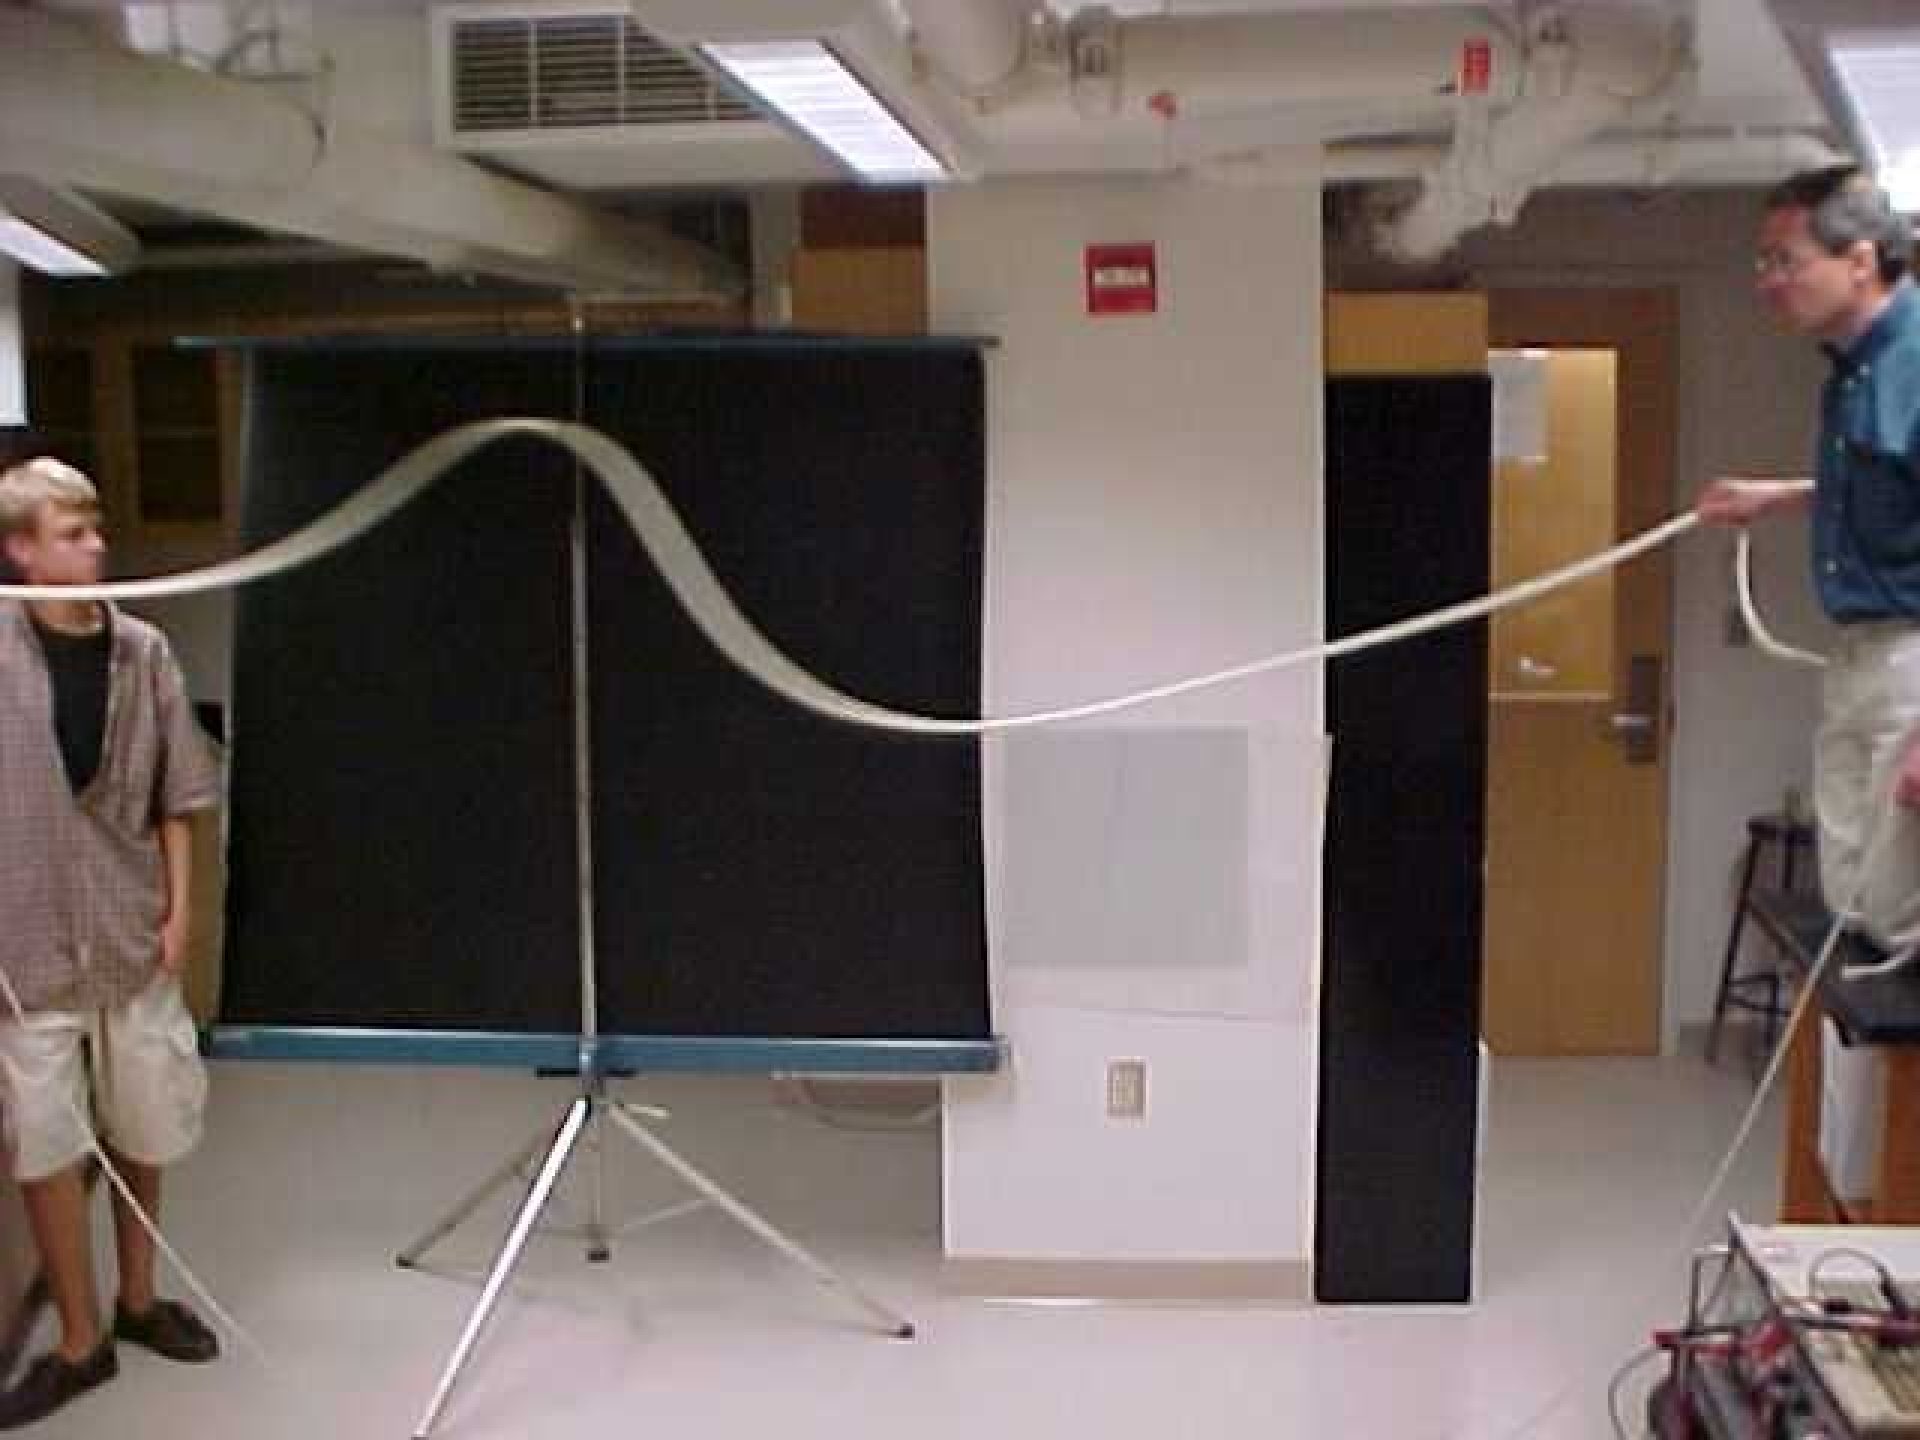
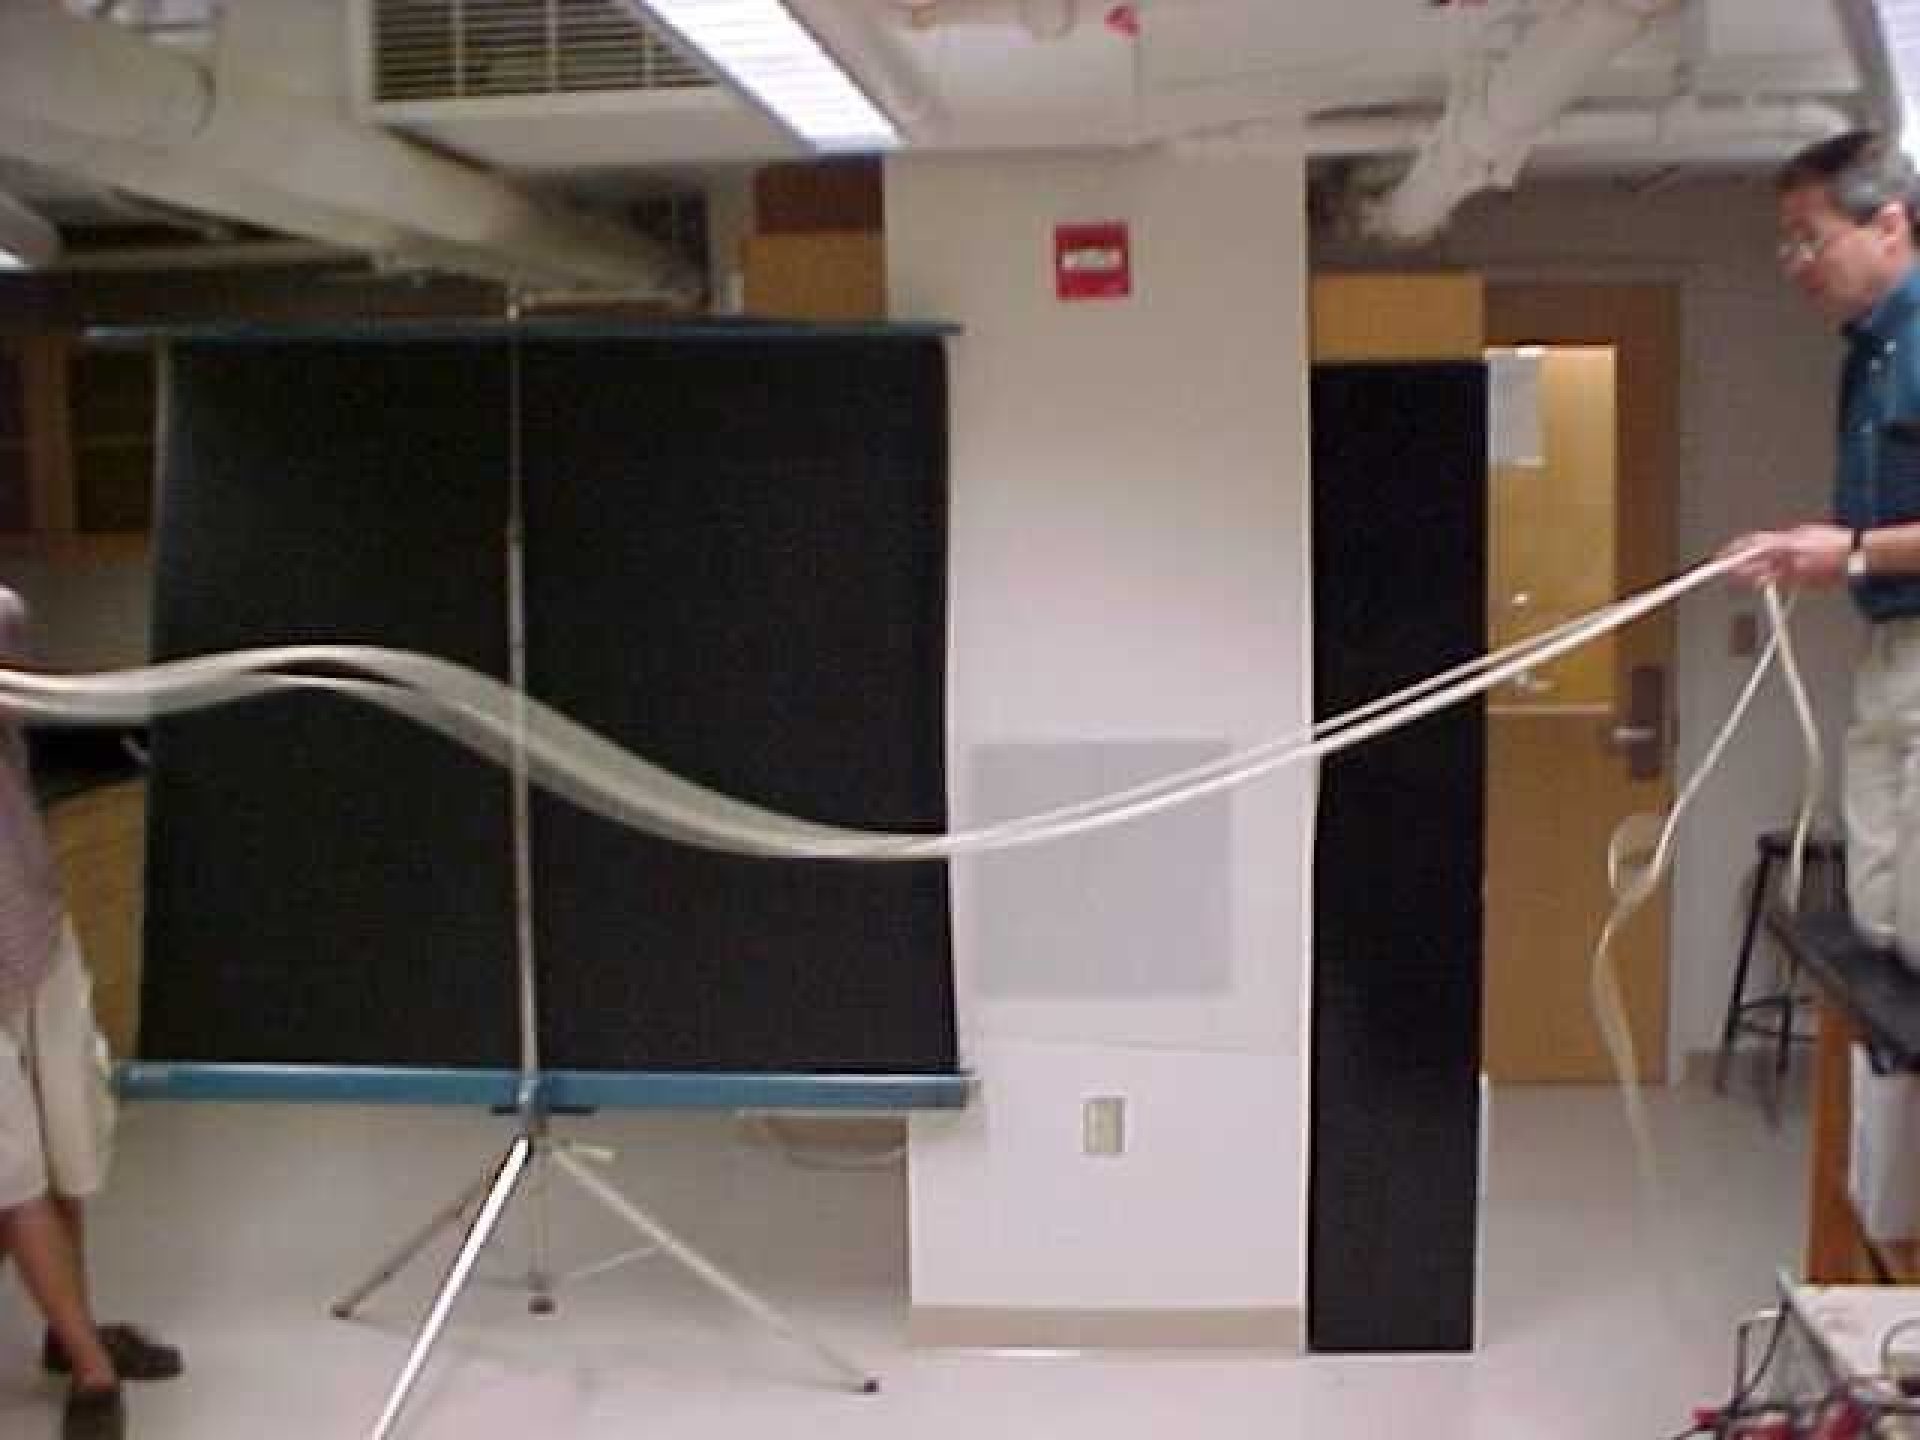
Show transverse standing waves
Equipment
- Six-feet coil-spring
- Small clamp
Suggestions
Demonstrate
- Traveling pulse, reflected pulse
- Speed of a pulse as a function of tension
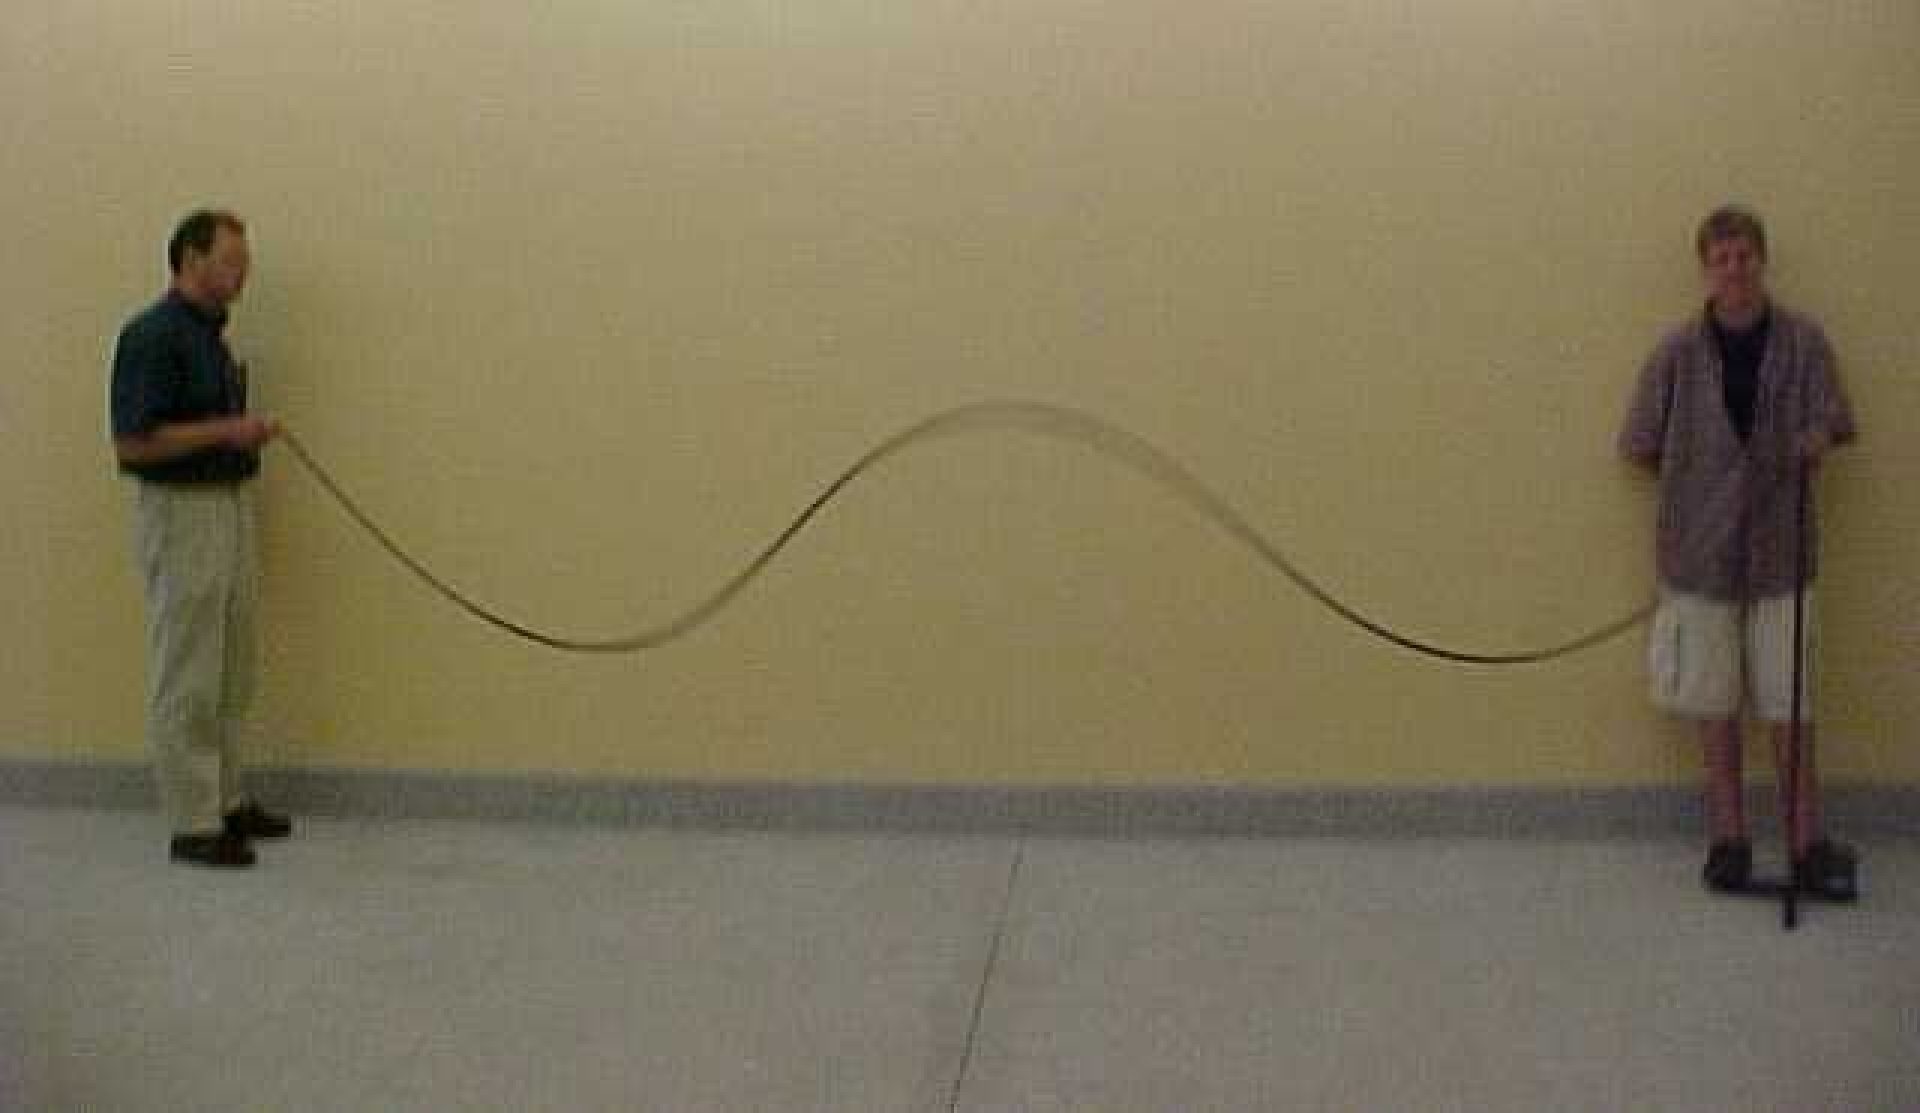
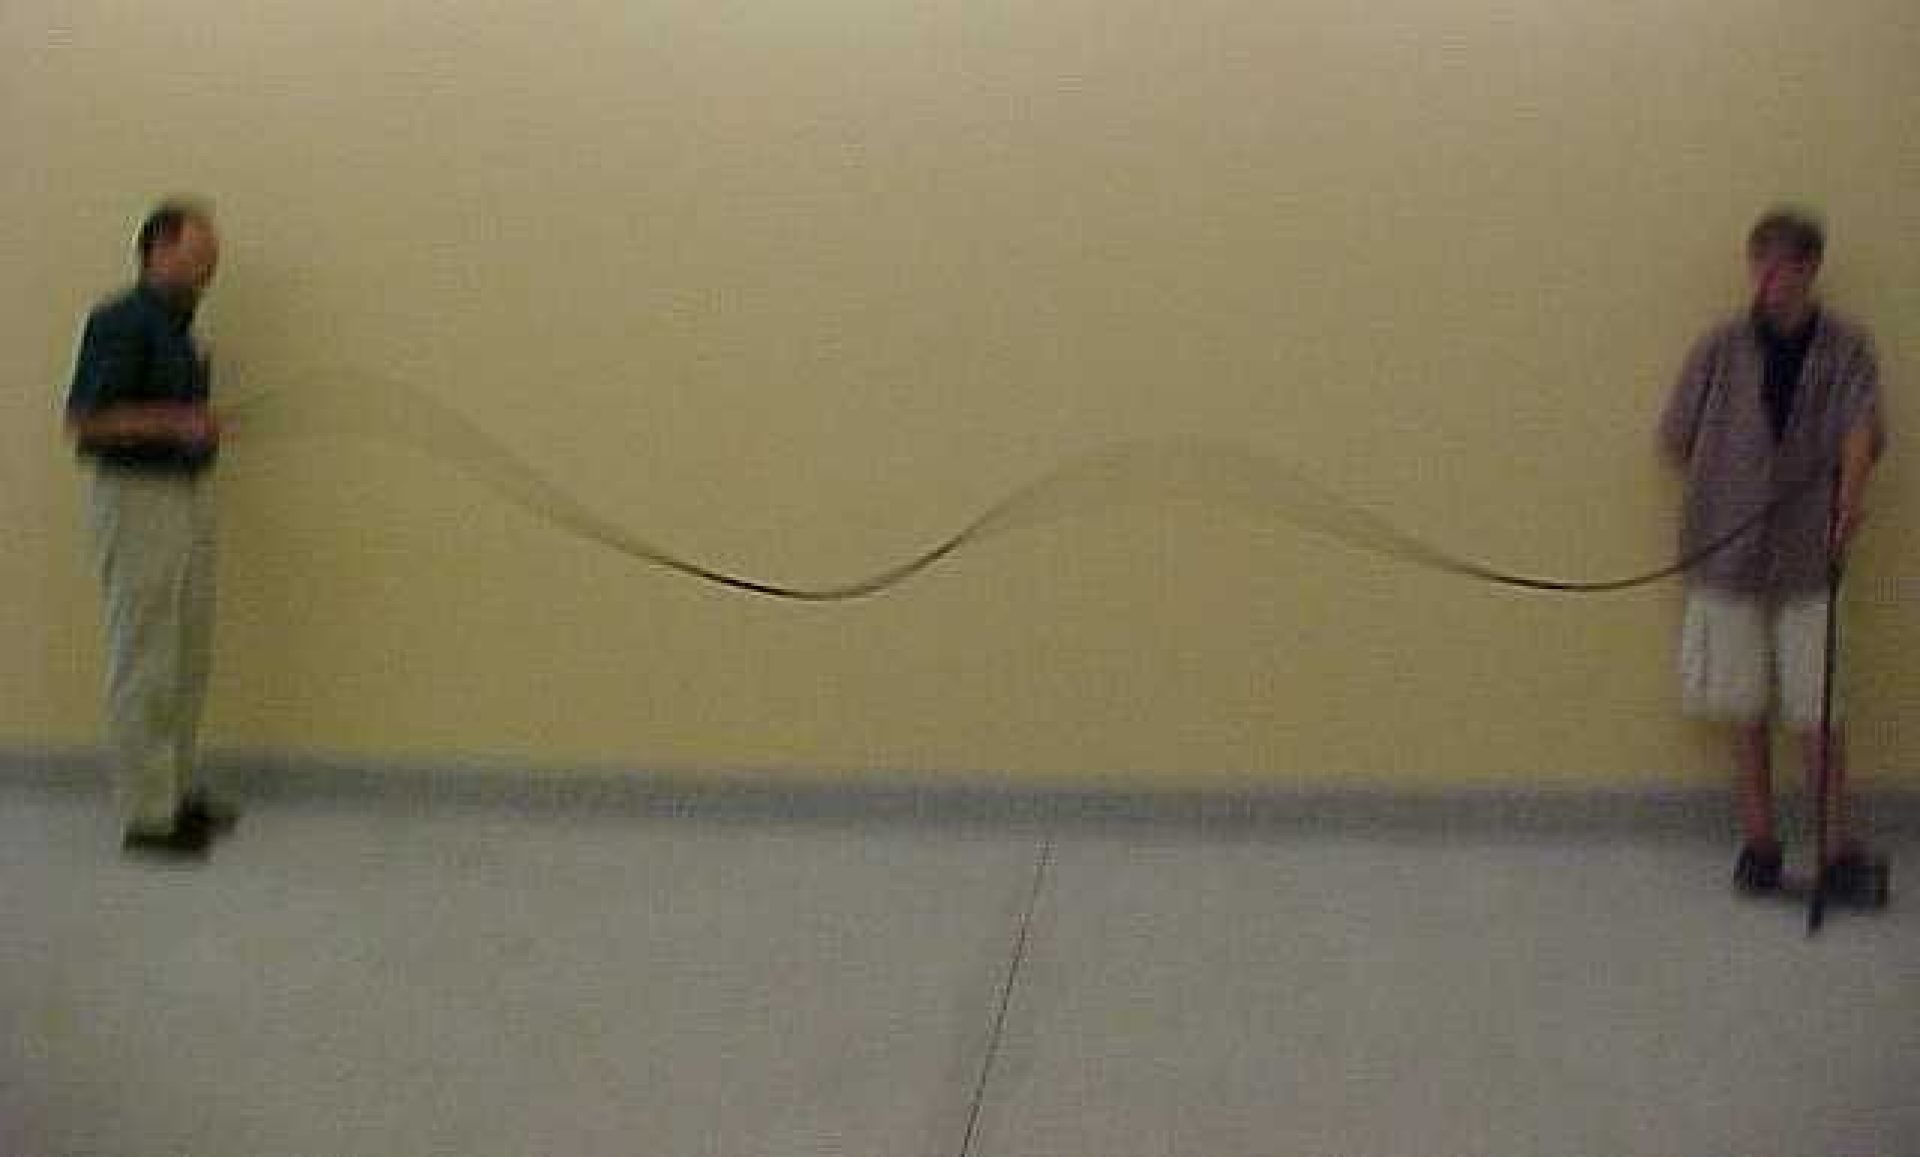
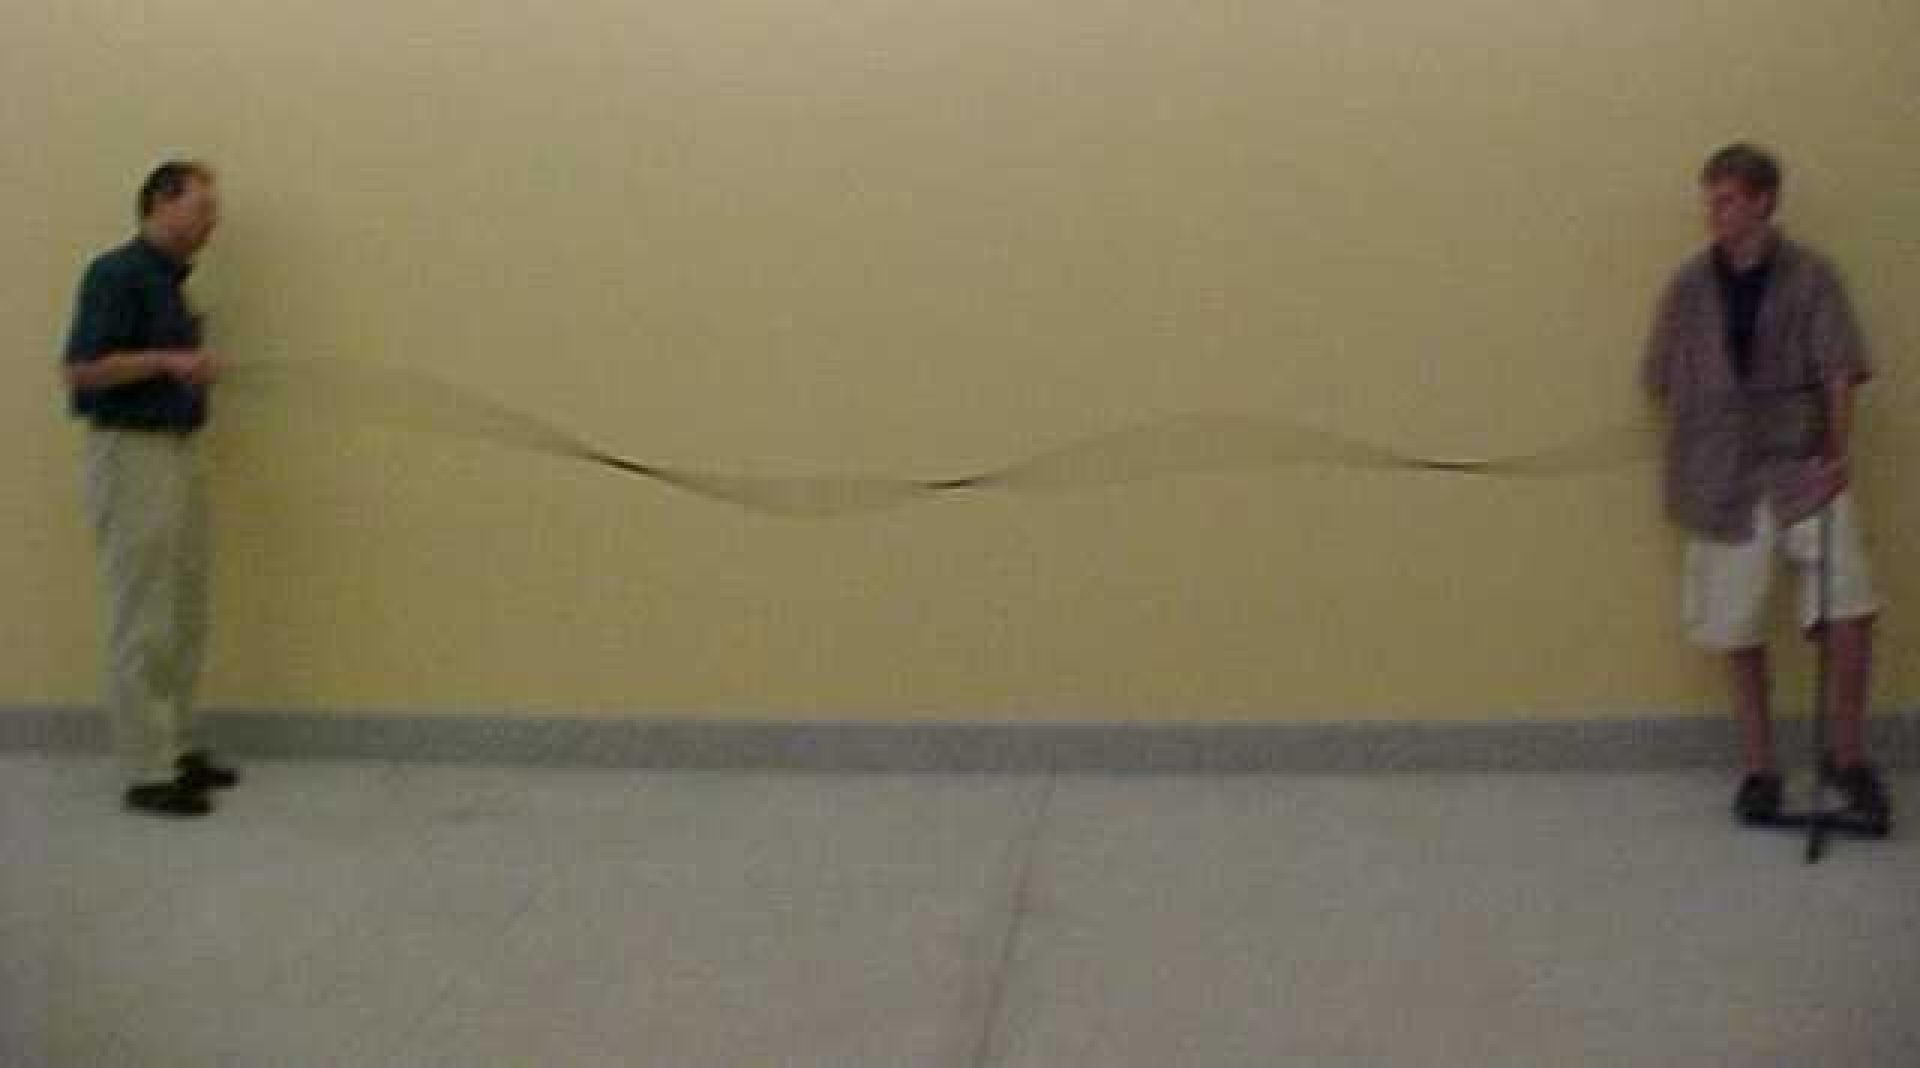
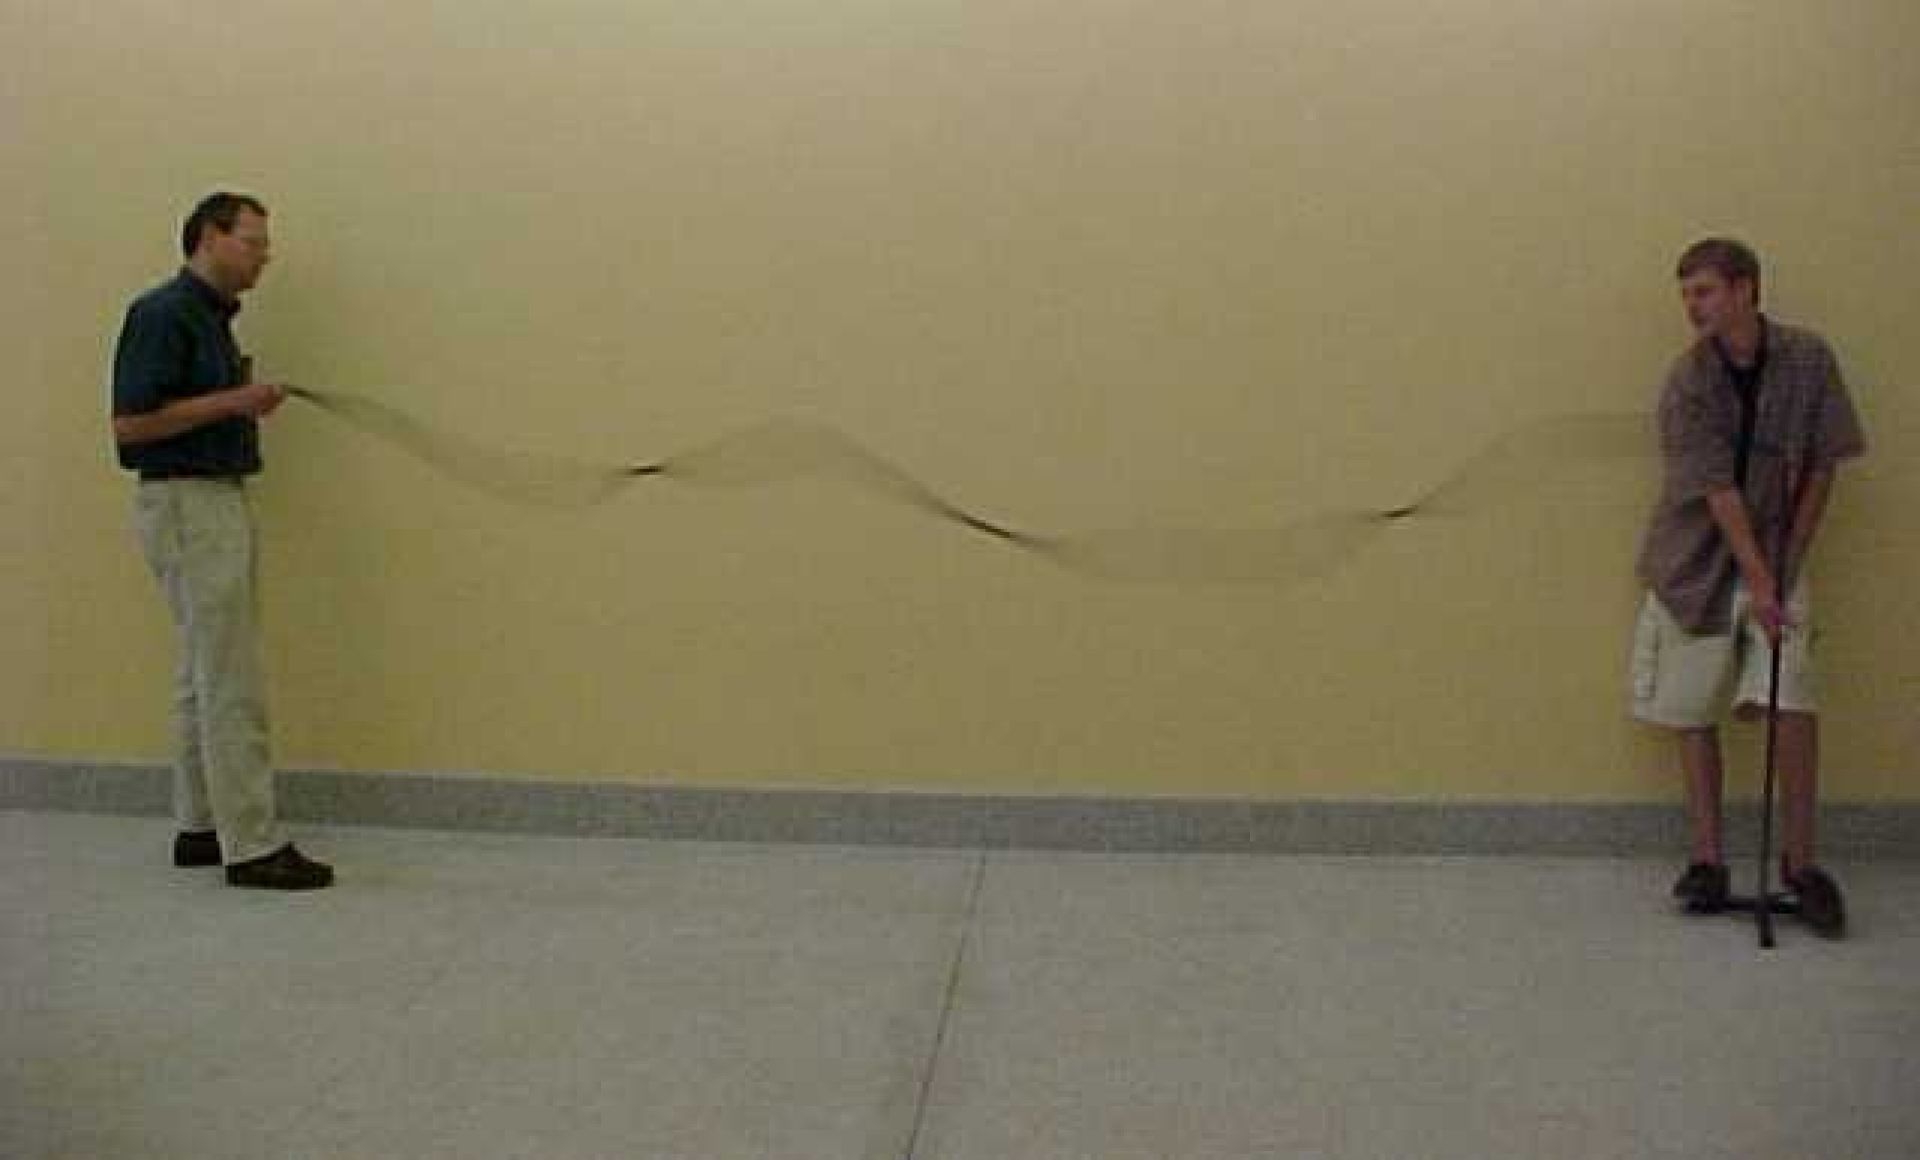
- Standing waves (two fixed ends) (one to five antinodes can be reliably produced)
Discussion
- 2 nodes, 1 antinode
- 3 nodes, 2 antinodes
- 4 nodes, 3 antinodes
- 5 nodes, 4 antinodes
- nodes, antinodes
- nodes, antinodes
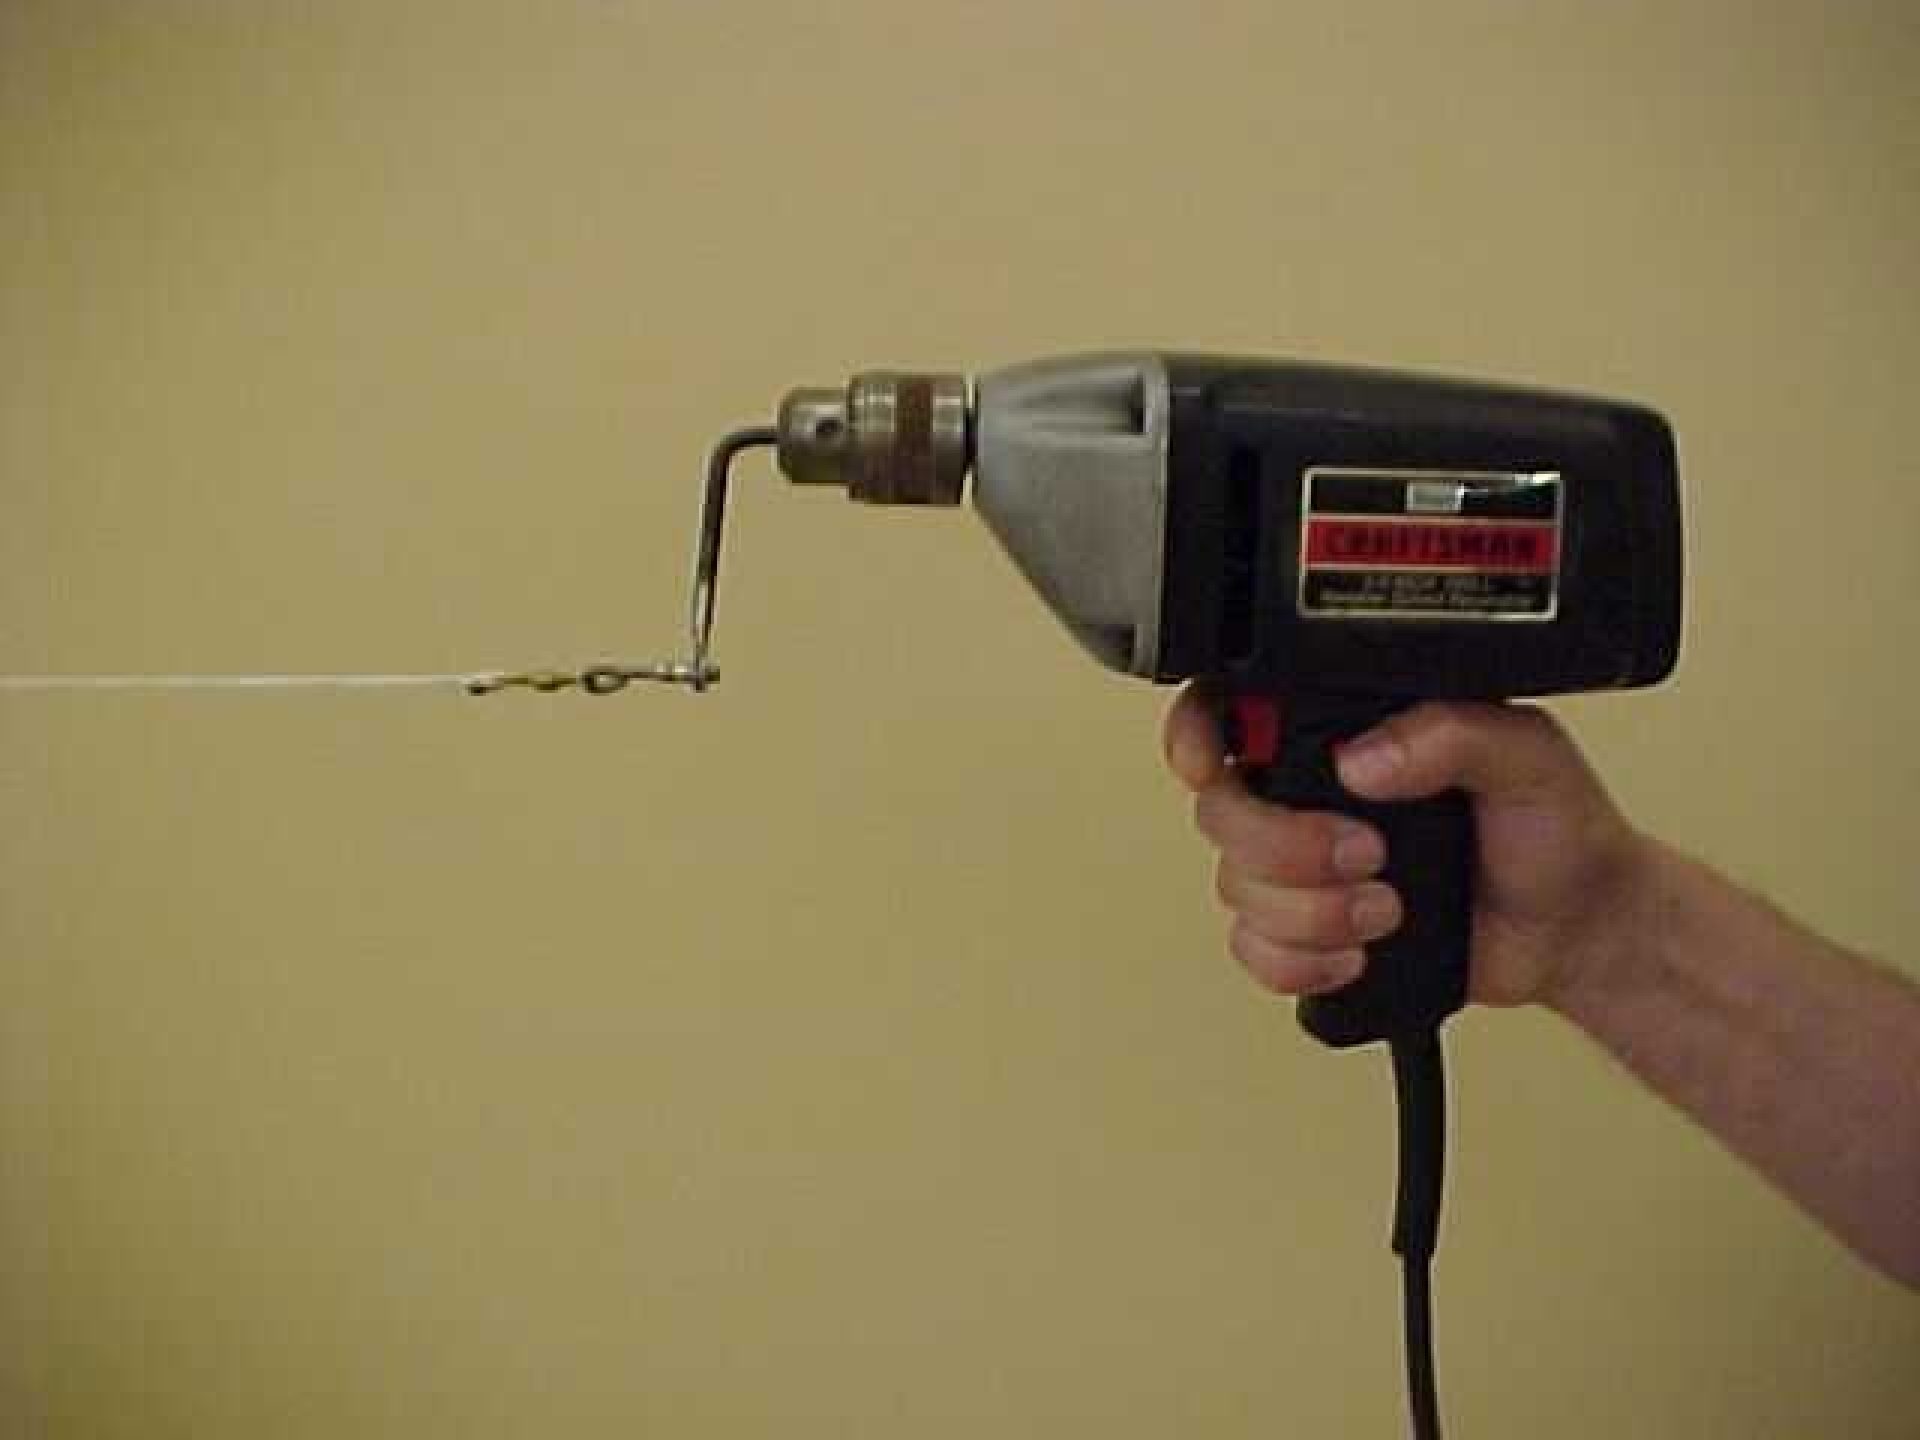
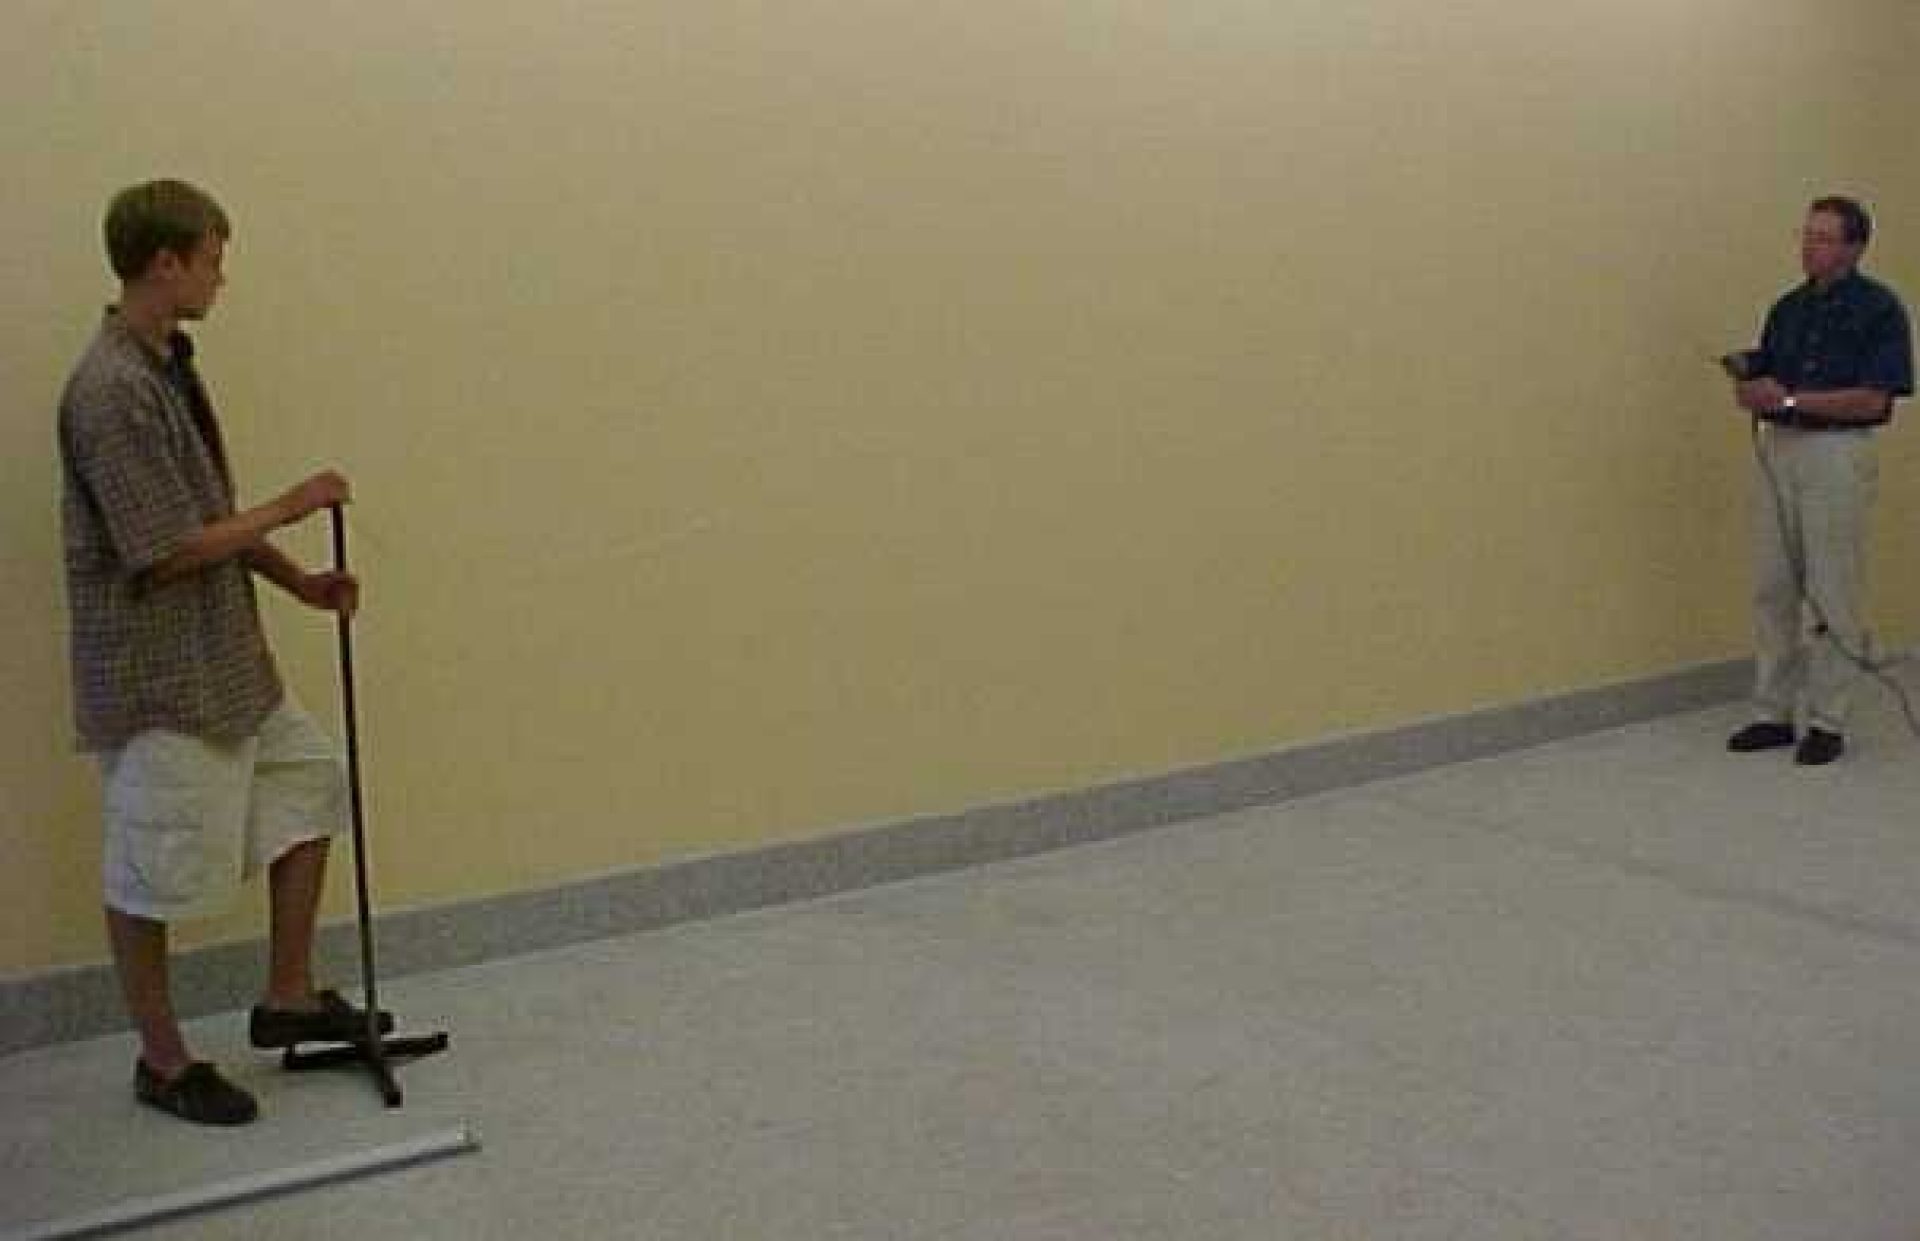
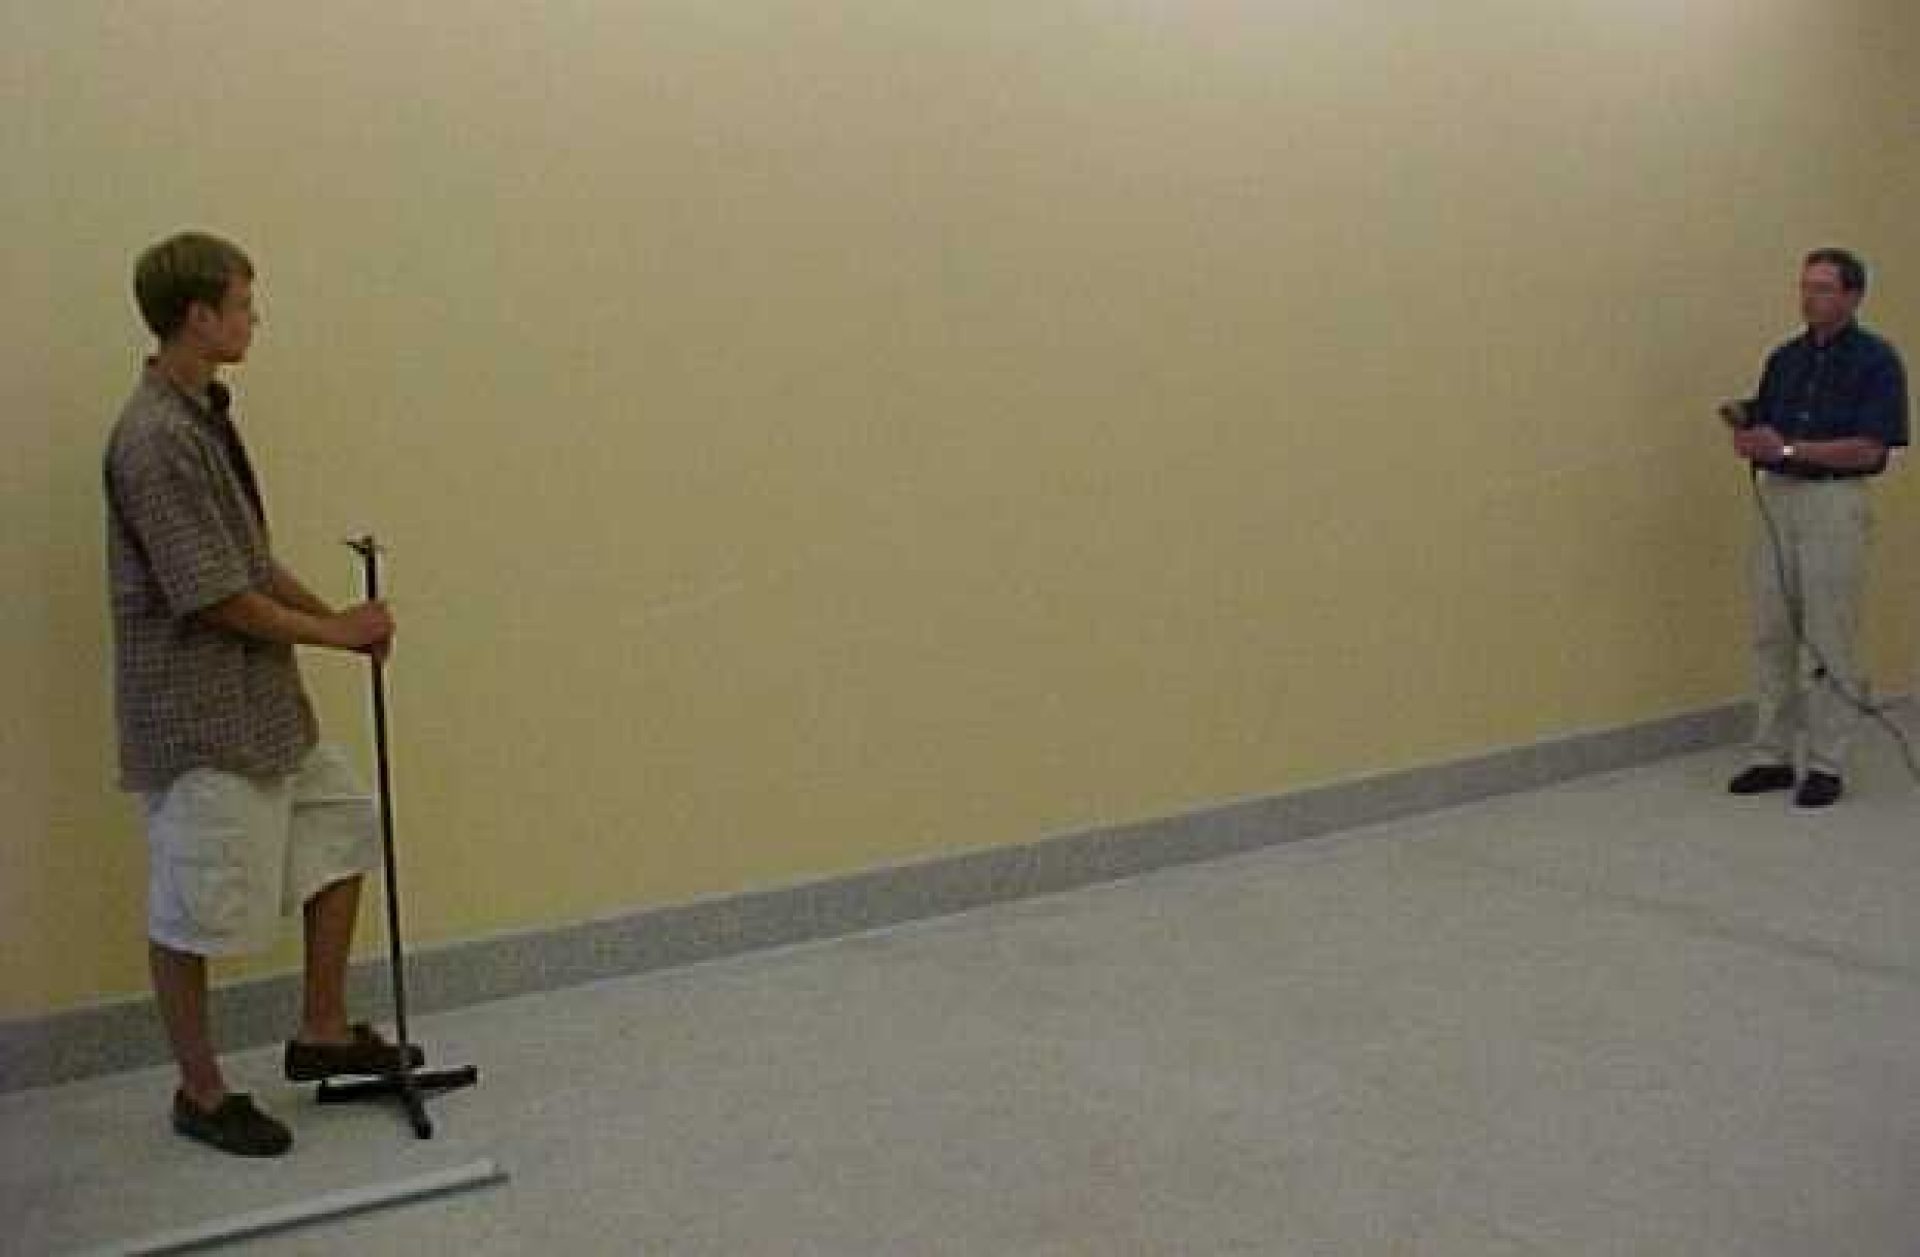
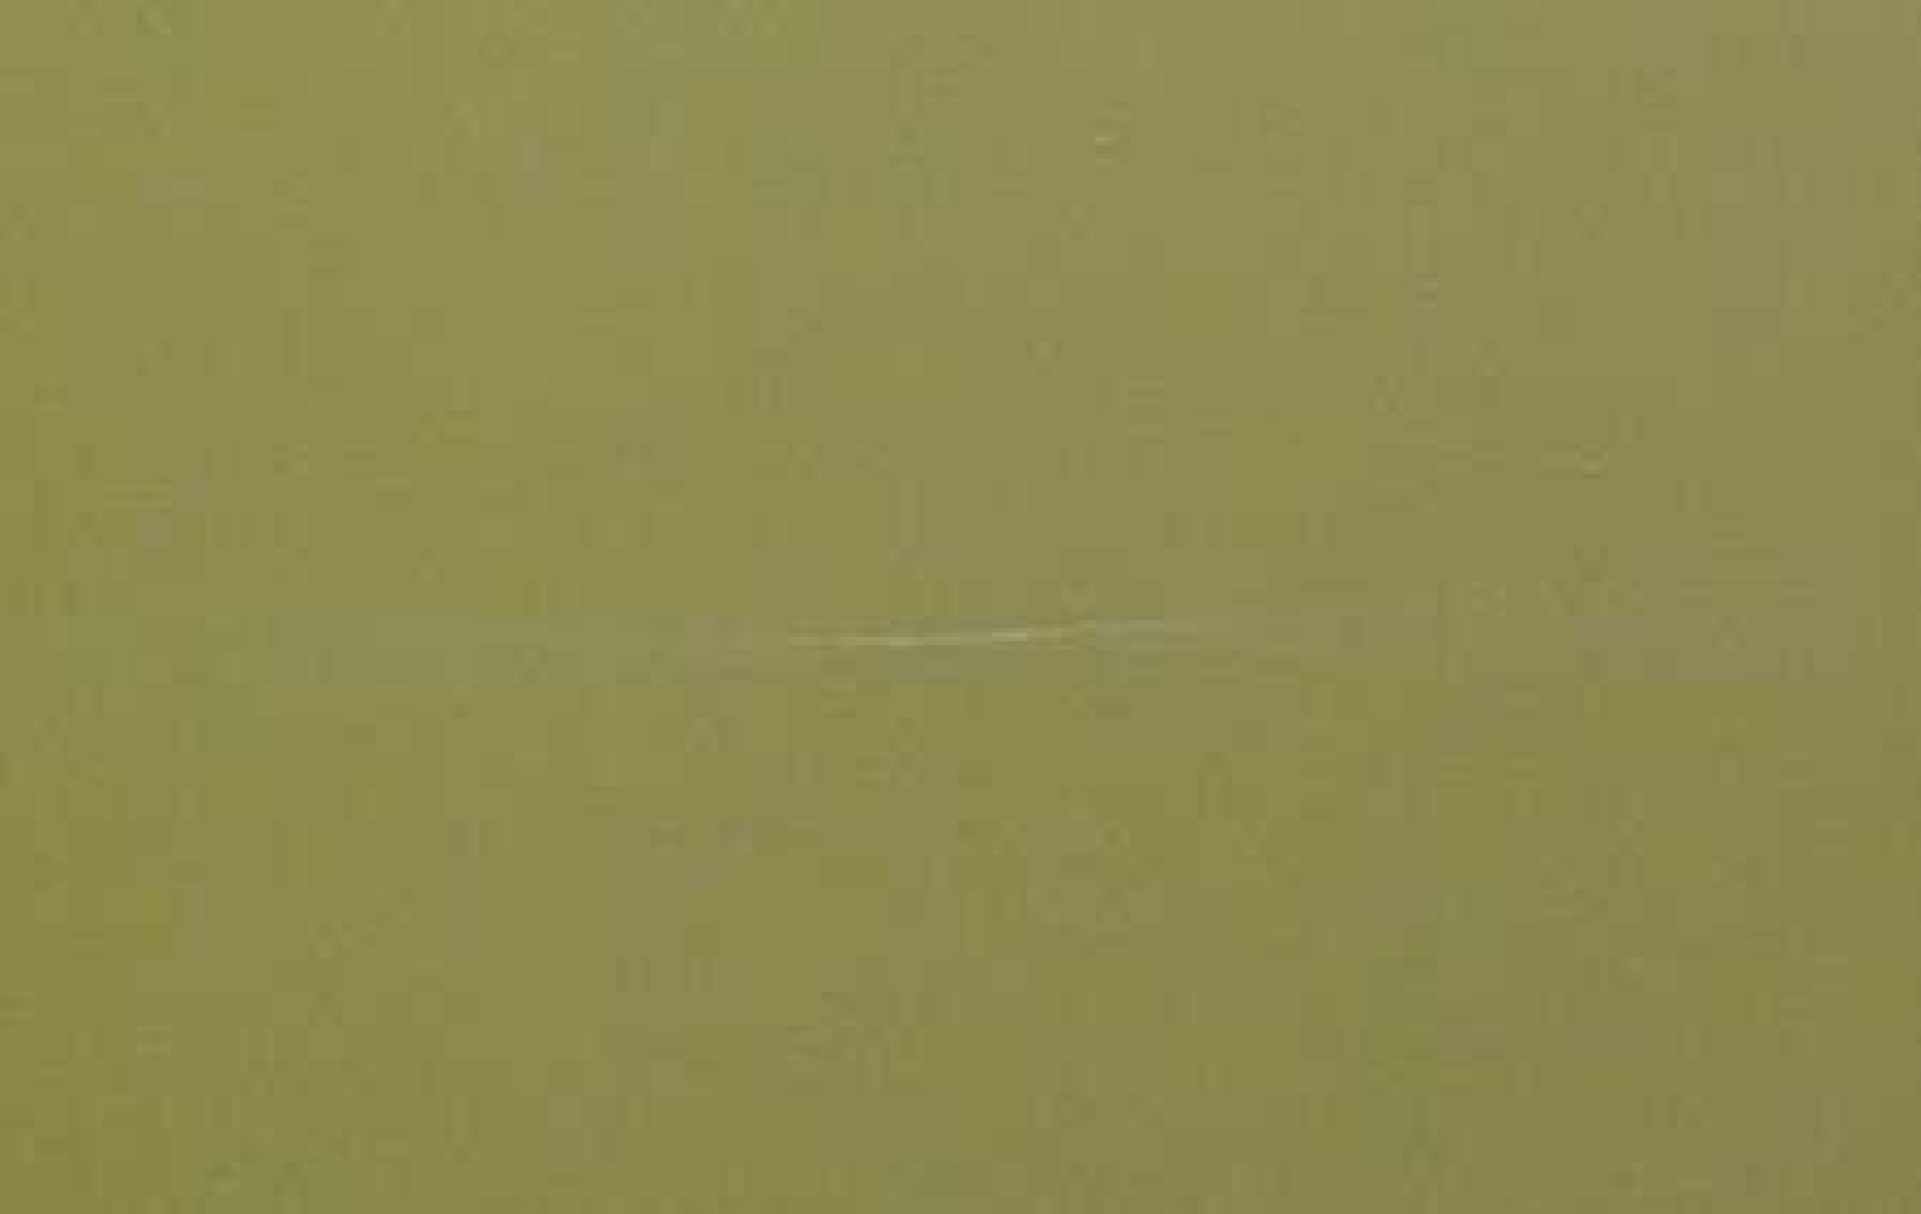
M-W2 : Standing Waves (II)
Unit
Waves
Purpose
Demonstrate standing waves, the effect of tension in a string on wave speed, the role of frequency
Equipment
- Cenco wave demonstrator
- Clamp or knob
- Hand drill with variable speed
Suggestions
- At a fixed rate of rotation, vary the tension
- Change the speed, adjust the tension to the nearest standing wave; repeat.
Discussion
See attached
M-W3 : Pulse on String
Unit
Transverse Waves
Purpose
Compare waves speed for two different strings
Equipment
- Two strings of different mass density
- Clamp to secure one end of strings
Suggestions
Set the strings in parallel and ask students to predict on which will a pulse travel faster if
- Strings loose
- Strings taut with the same tension
Discussion
M-W4 : Travelling Wave
Unit
Waves
Purpose
Illustrates the nature of a transverse wave and rolling water wave
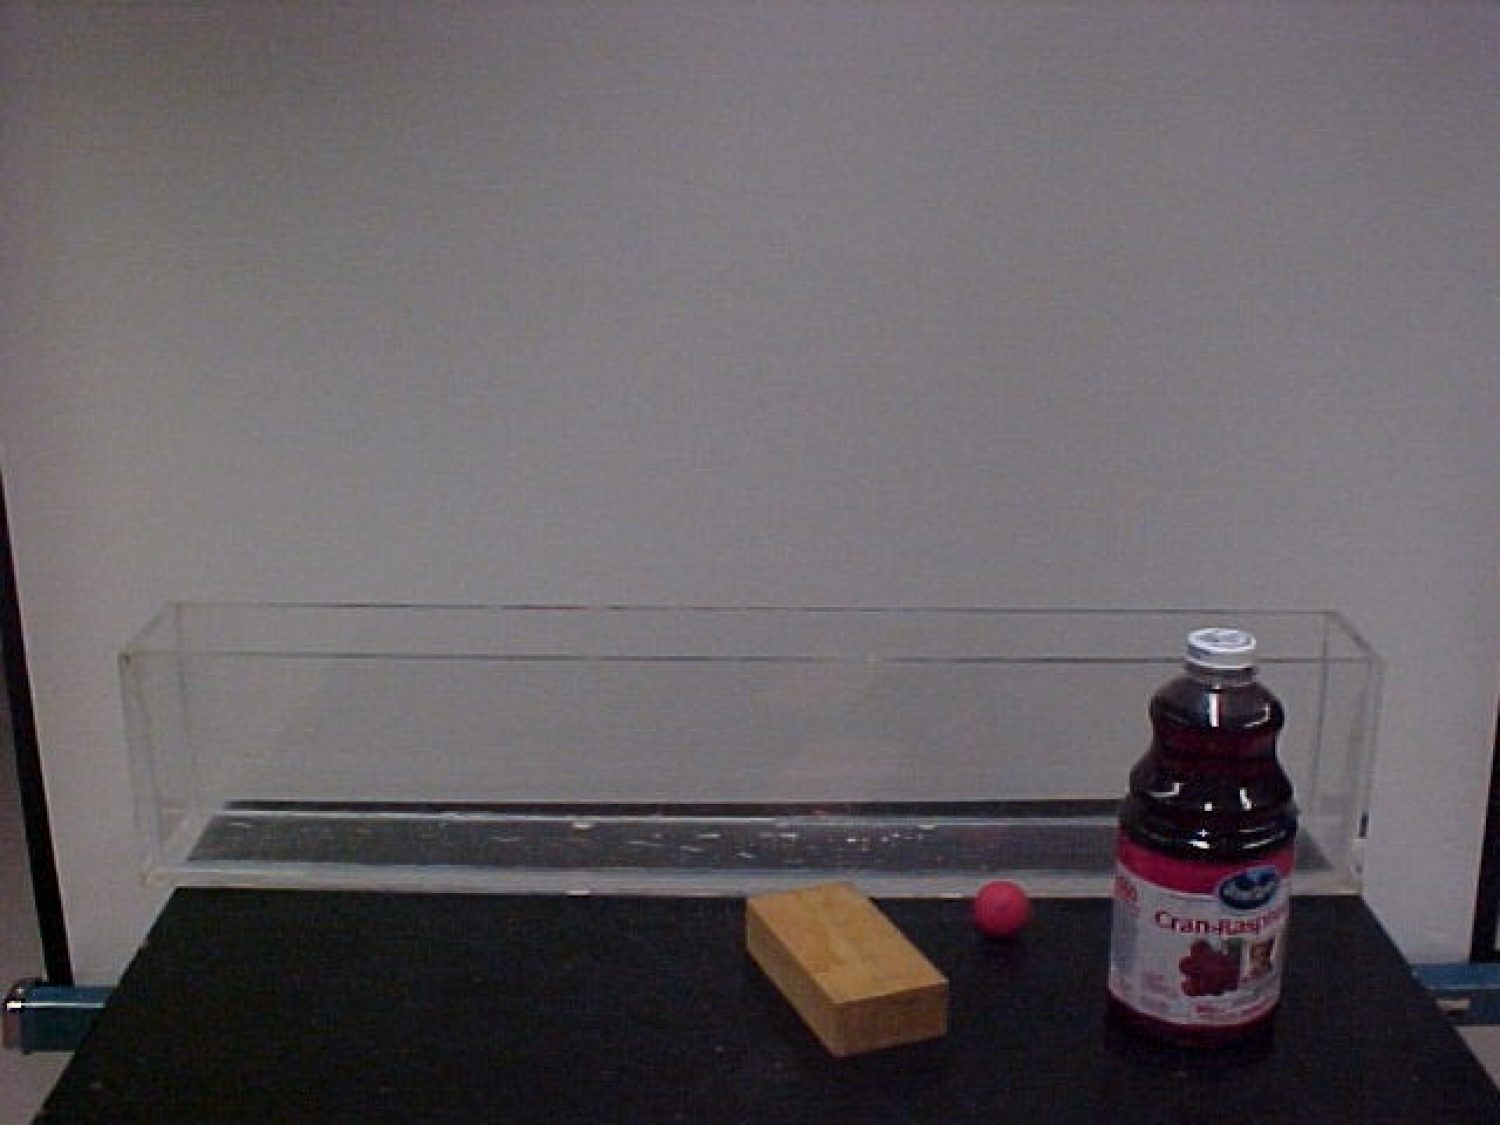
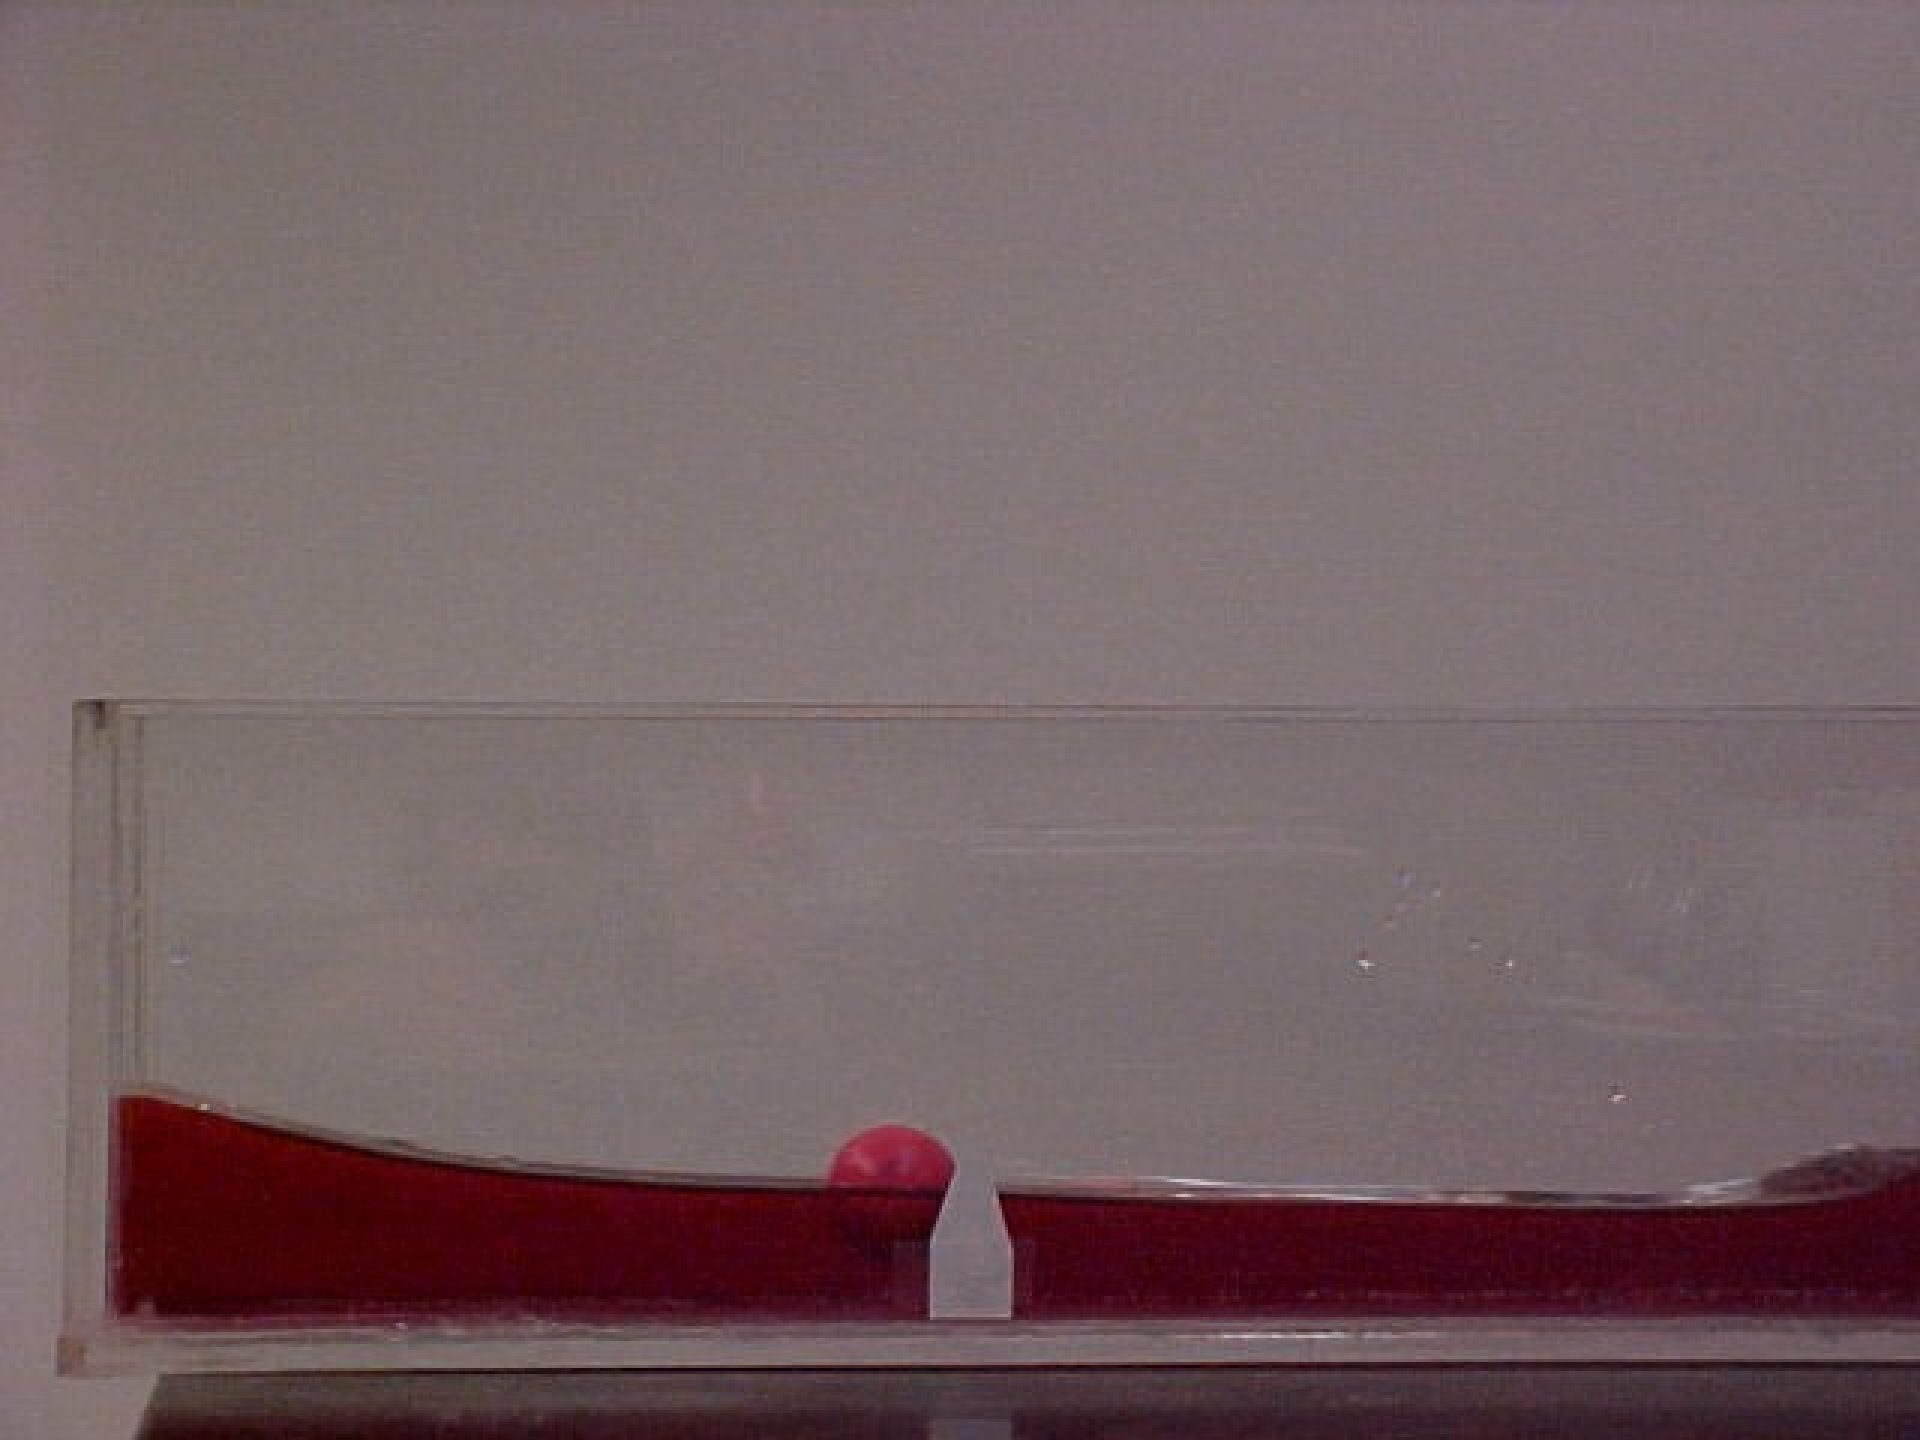
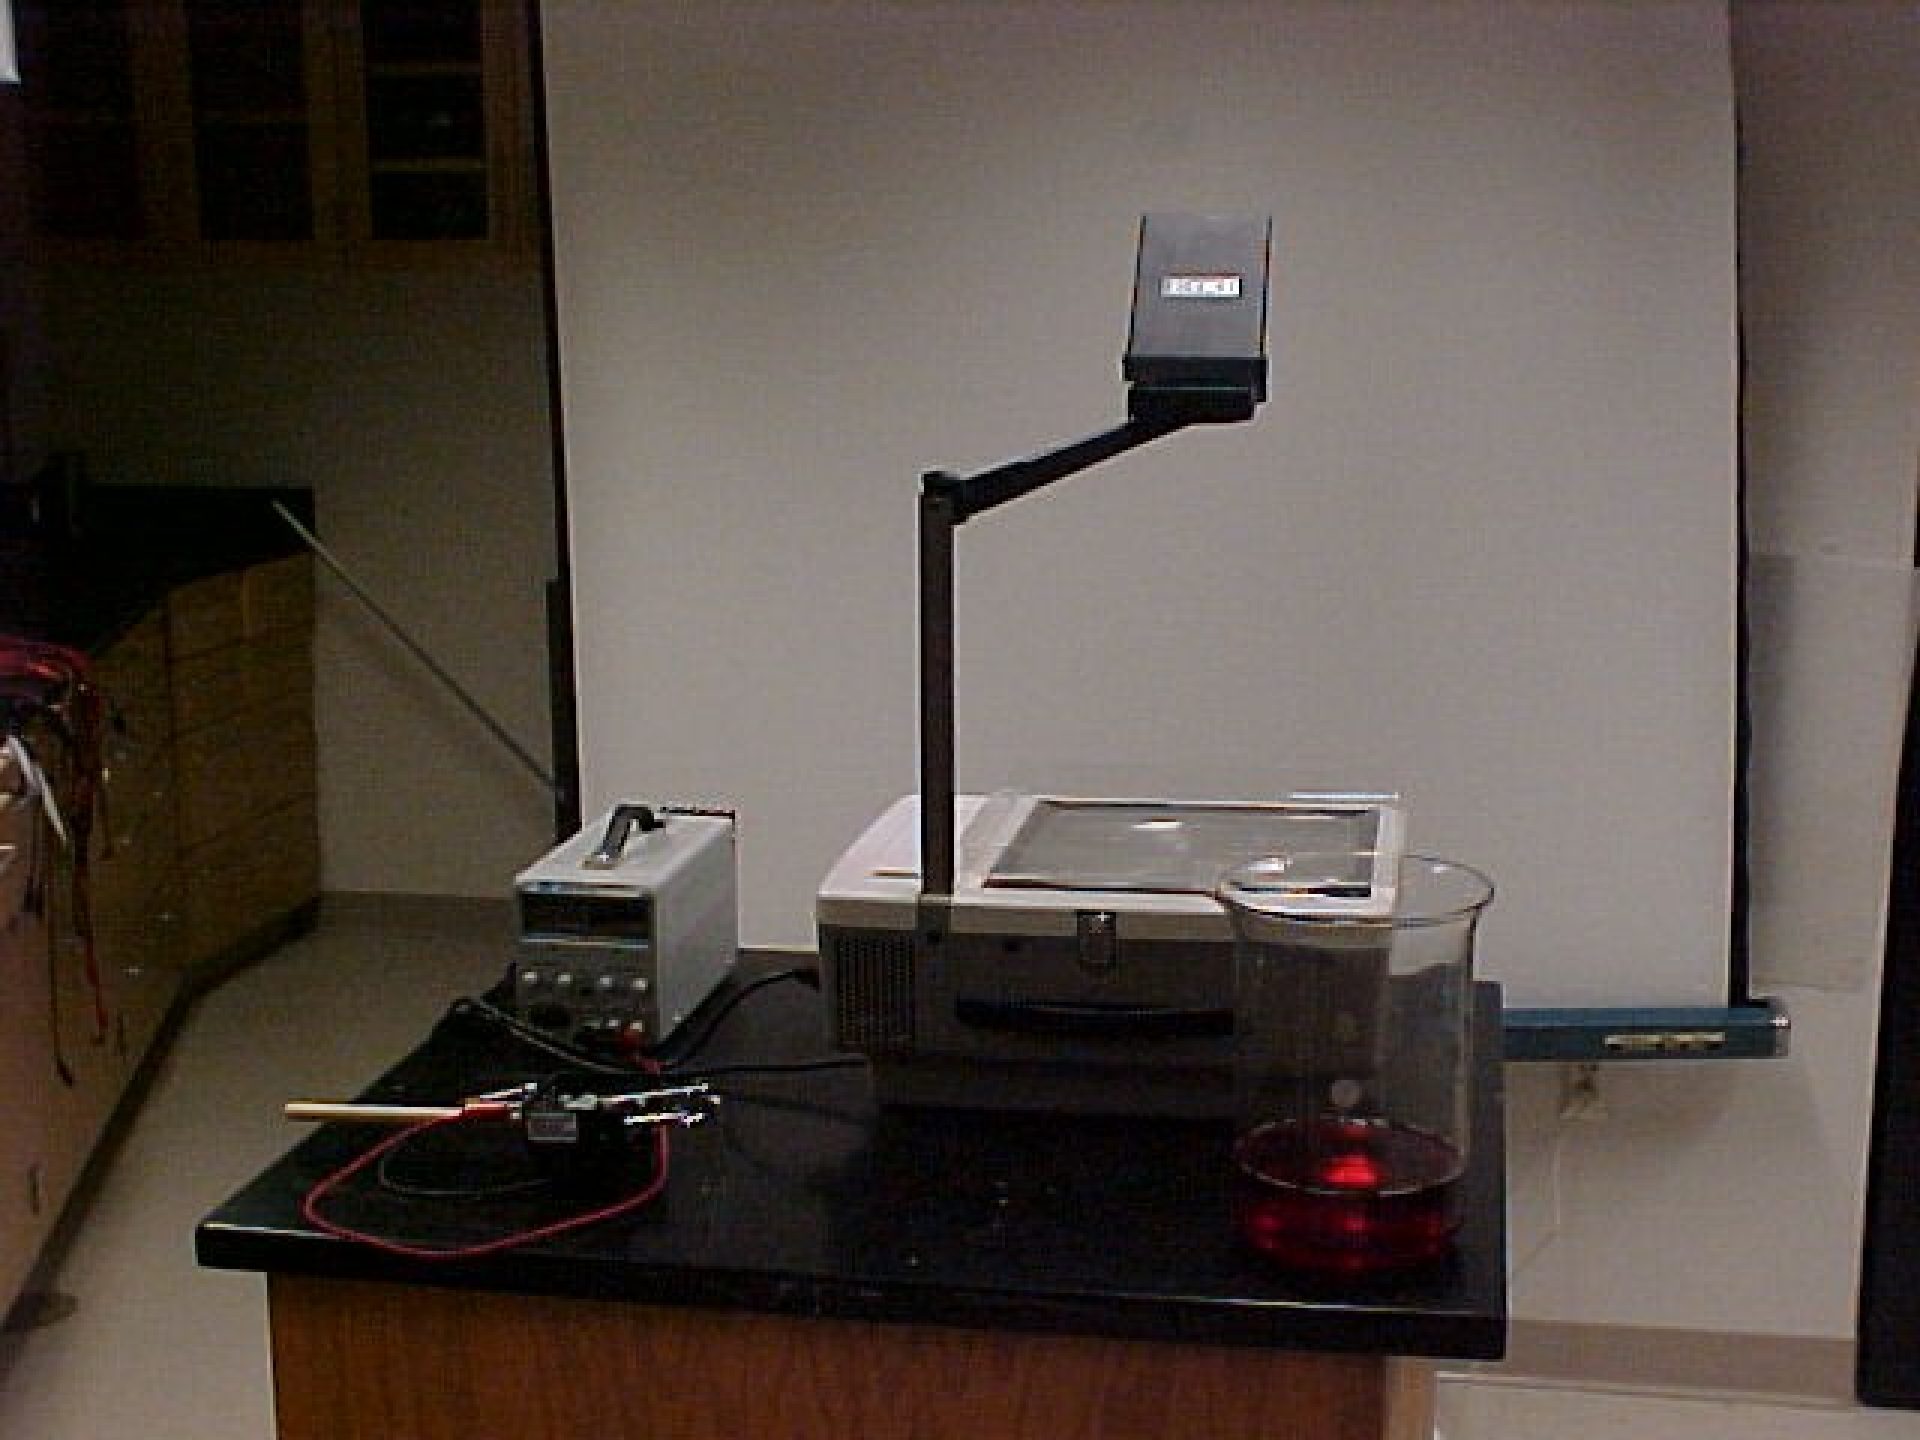
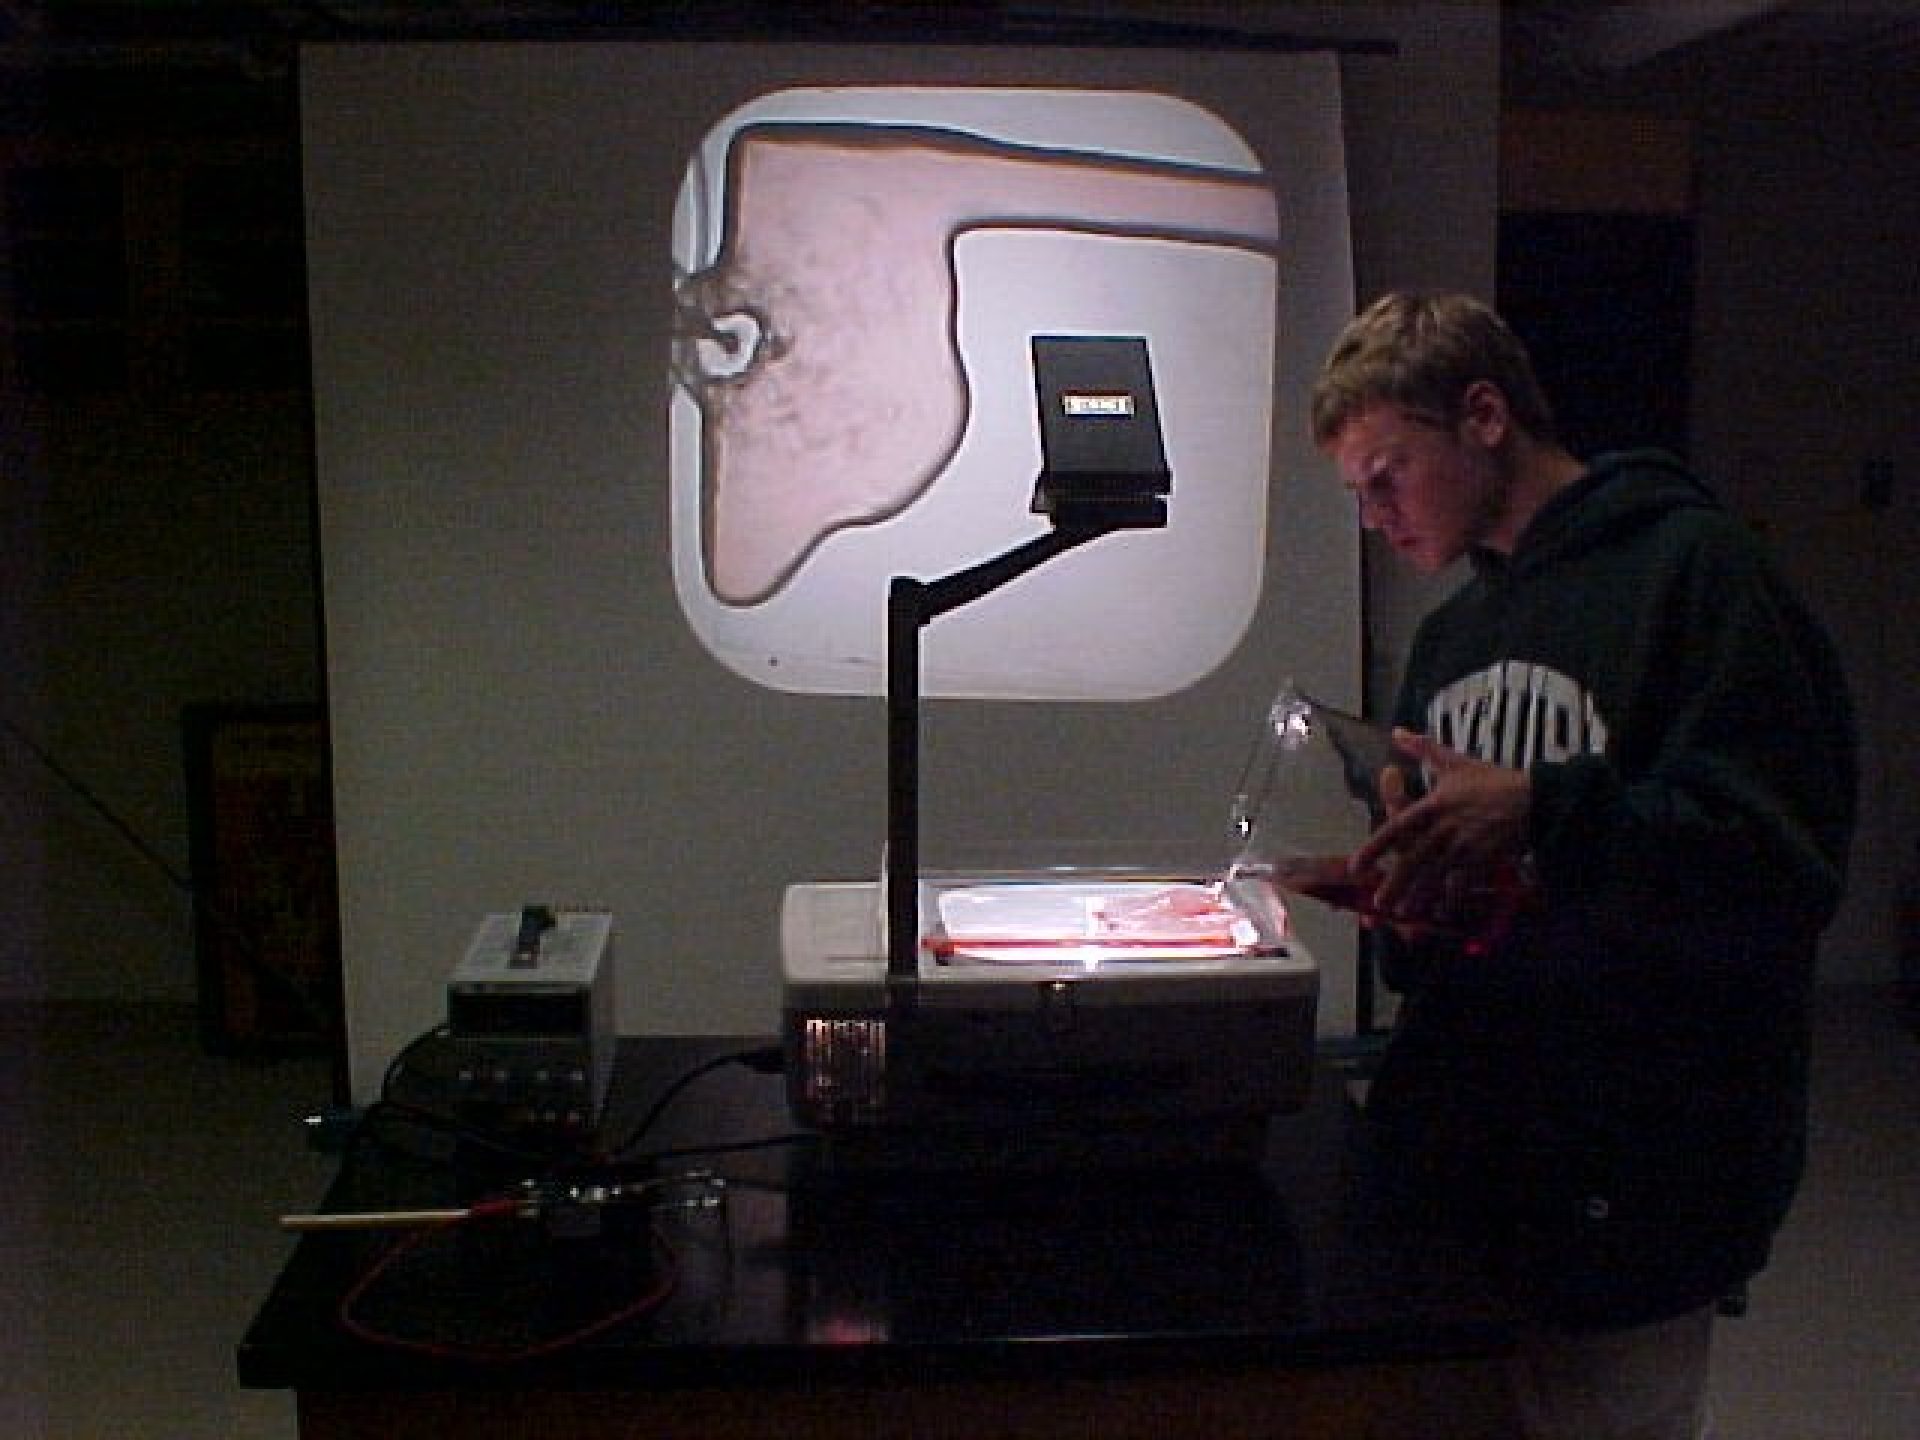
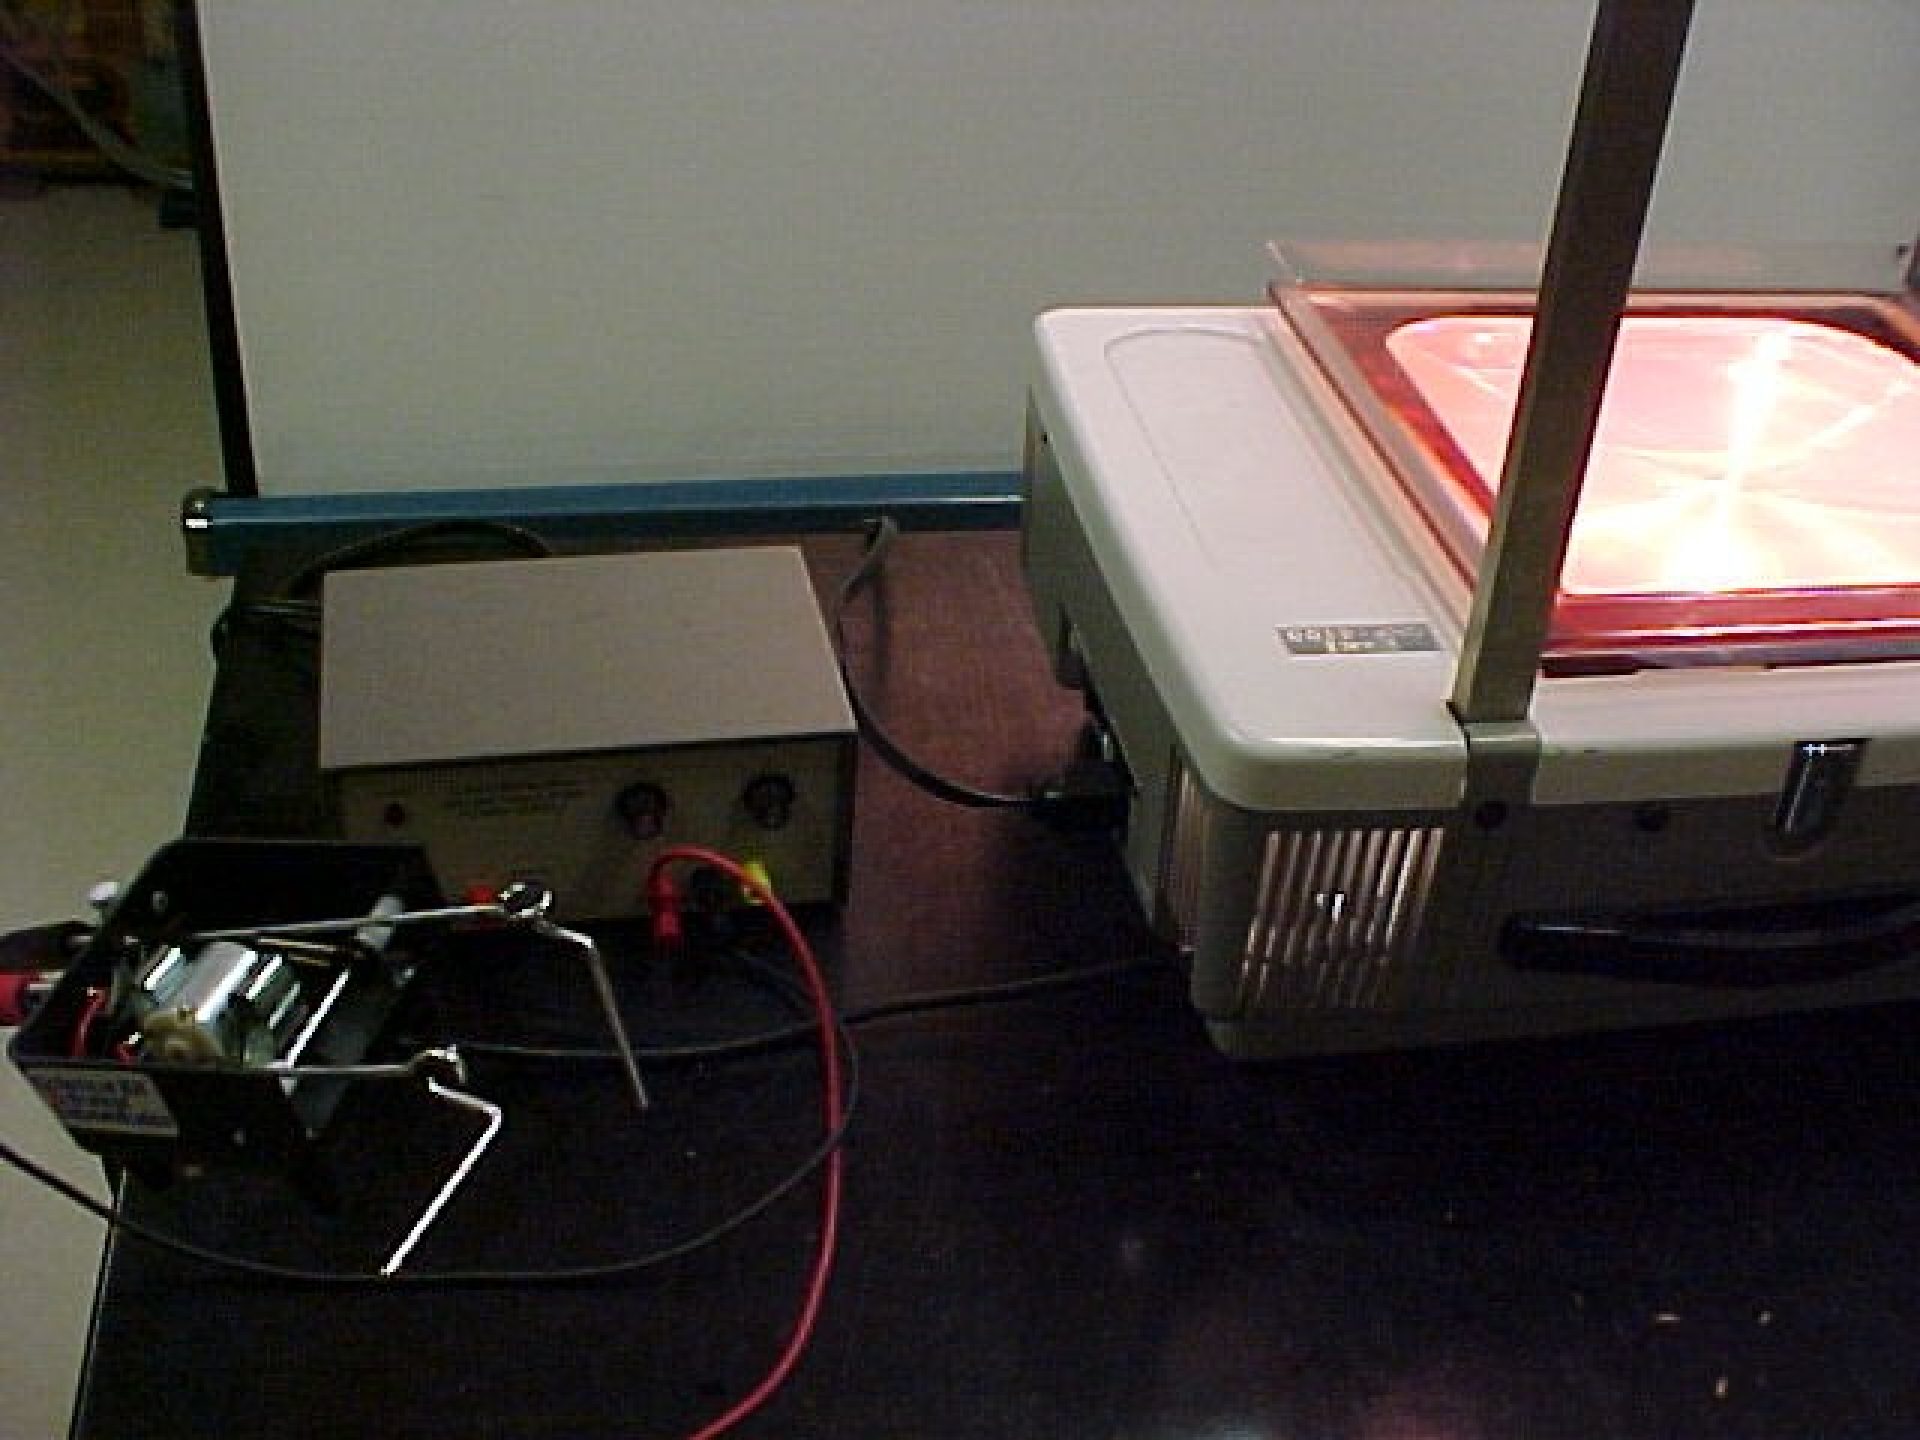
Equipment
- Plexi-glass water tank
- Cranberry juice or dye
- Red marker ball
- Wooden block to create a wave
- White paper marker arrow to indicate the position of the ball
Suggestions
Discussion
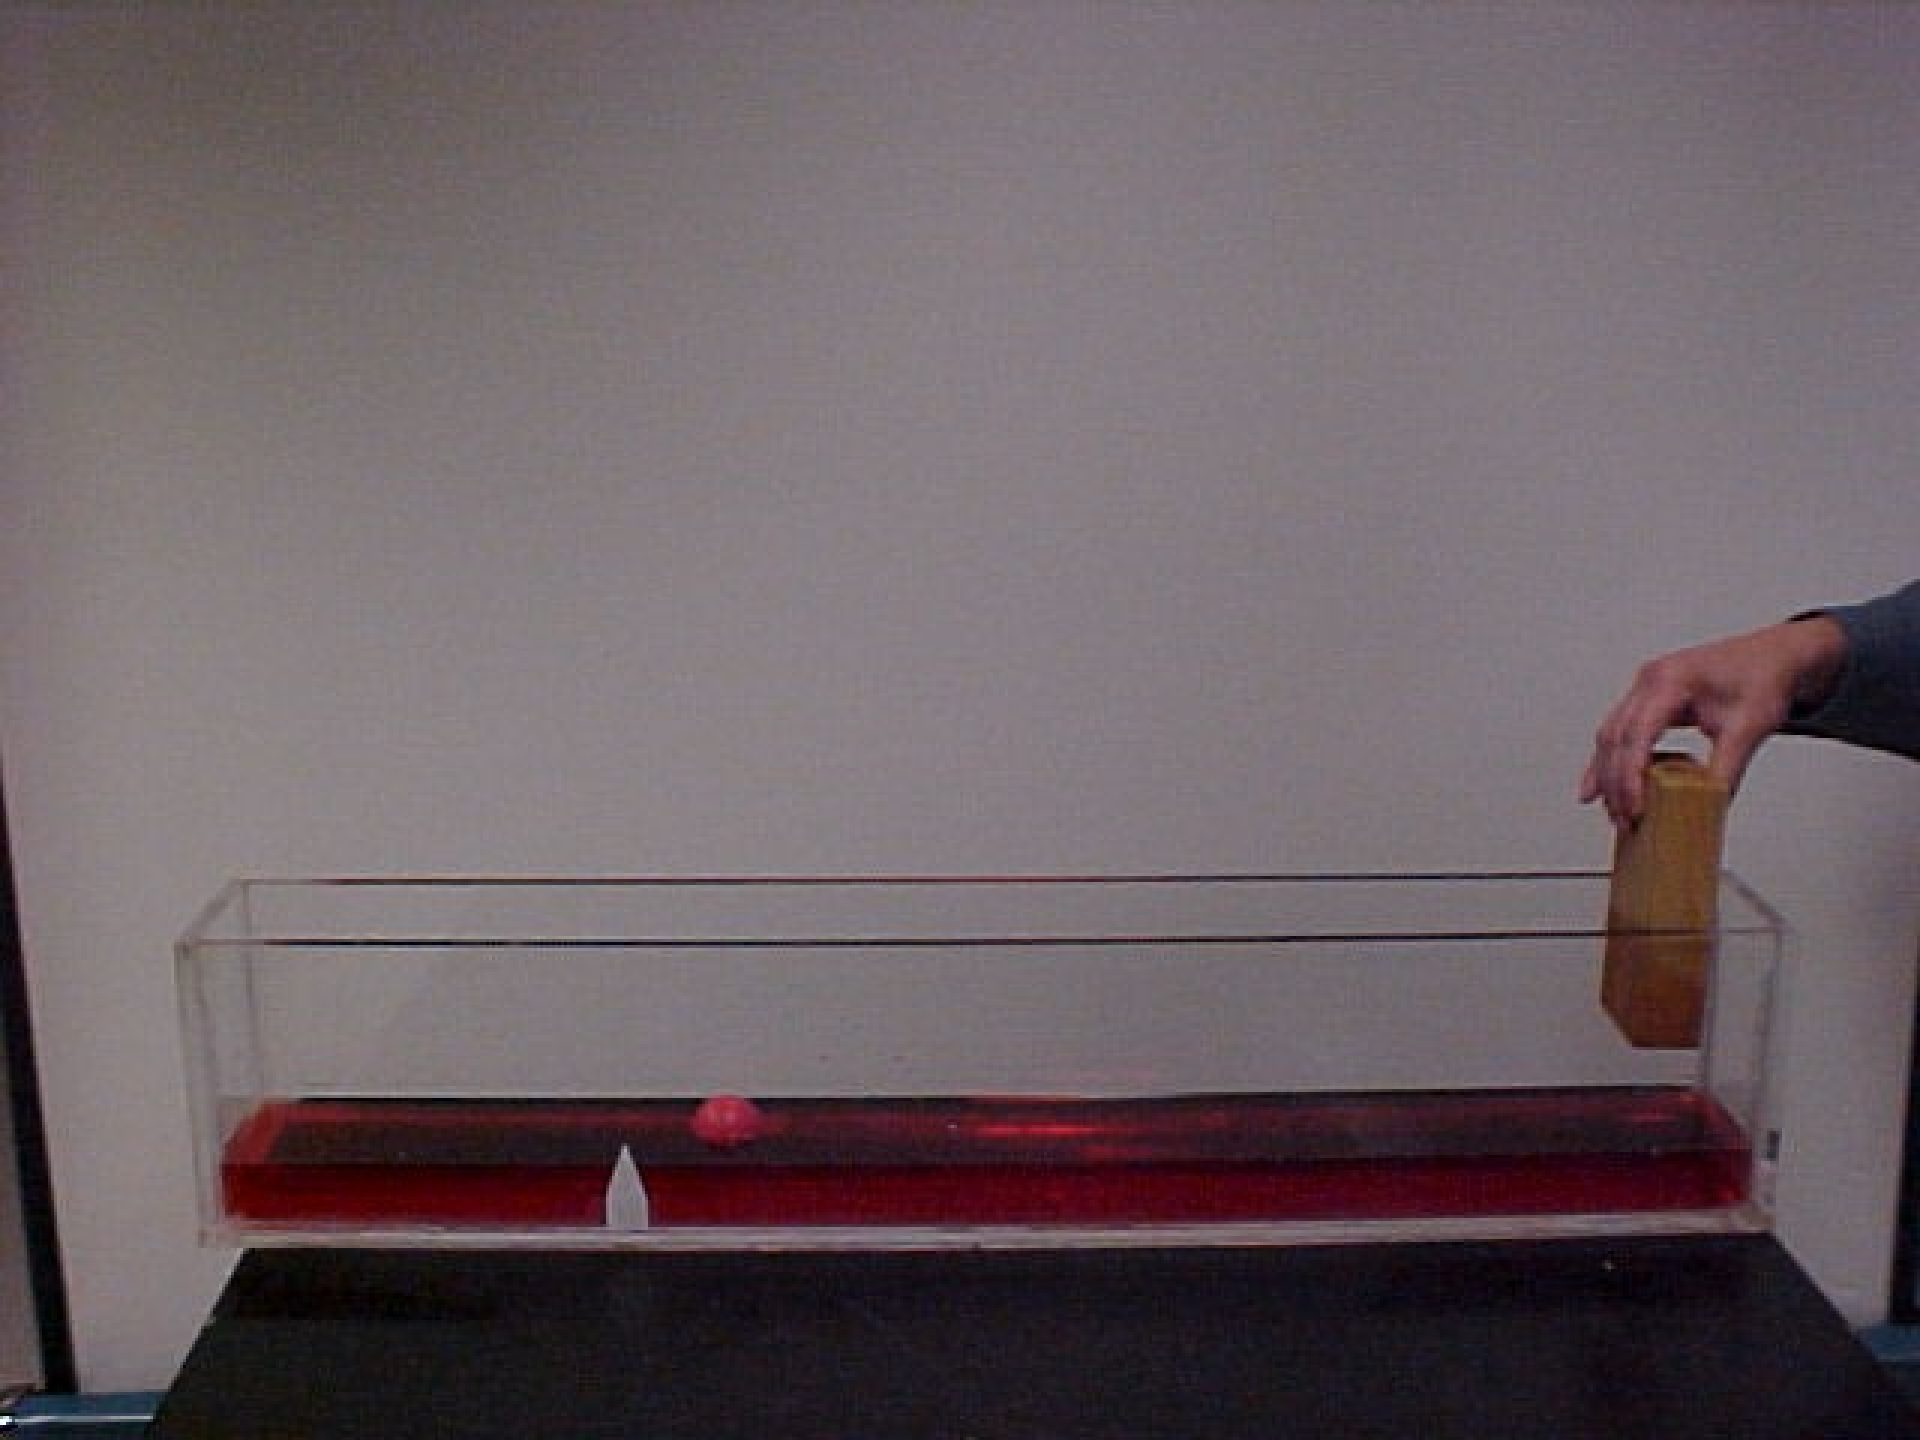
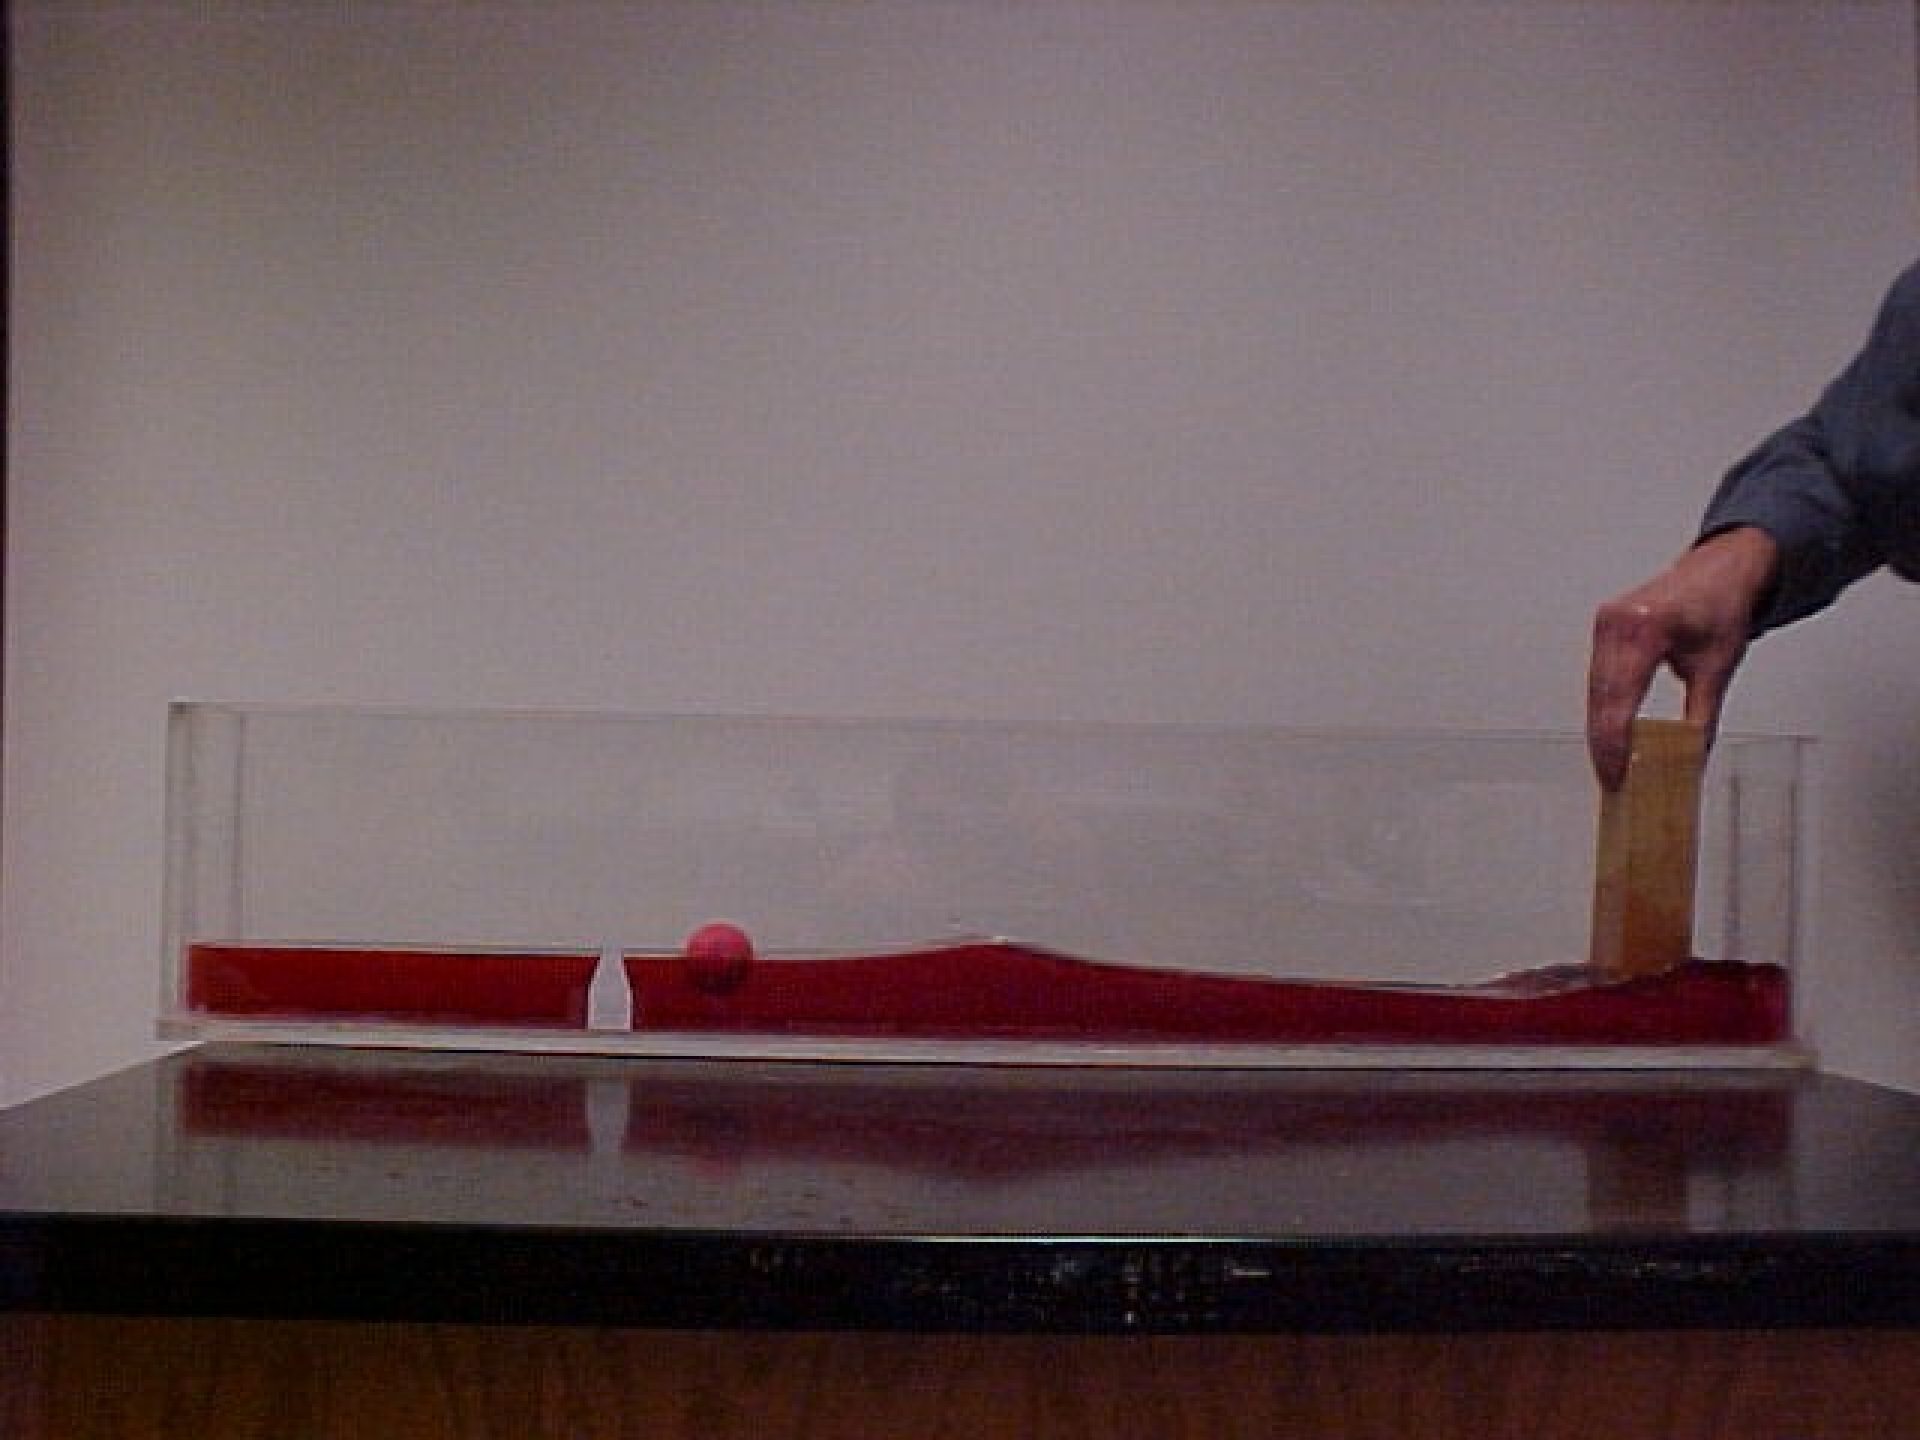
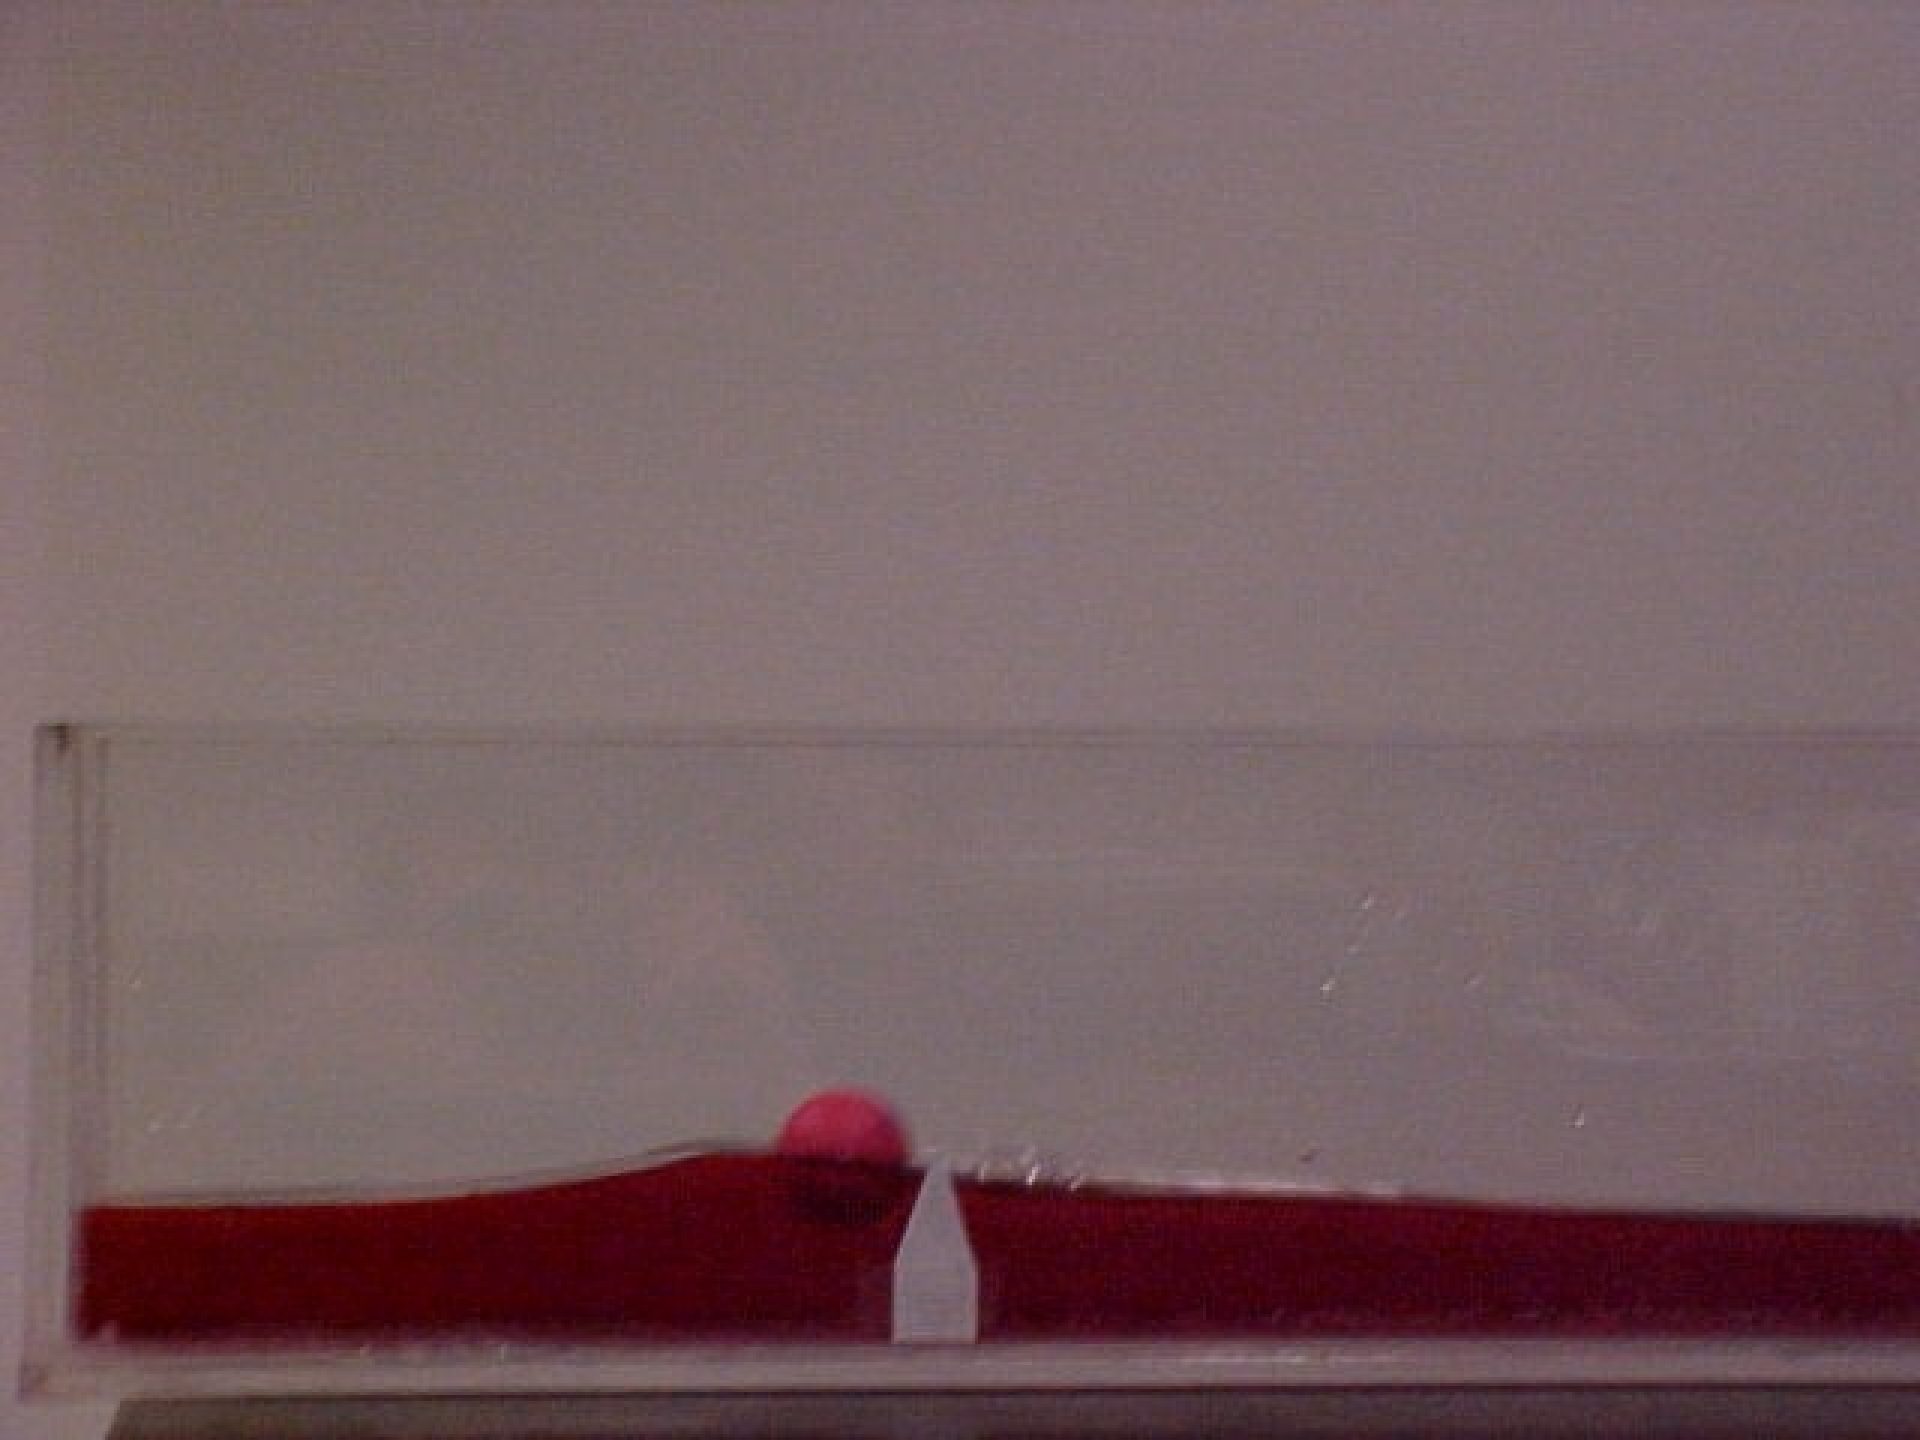
- Set-up
- Block to be plunged into tank to initiate a wave
- A wave pulse is sent
- A wave crest passes by the ball, but does not move the ball horizontally
- A wave crest reaches the edge of the tank; the marker ball is still oriented with the paper arrow
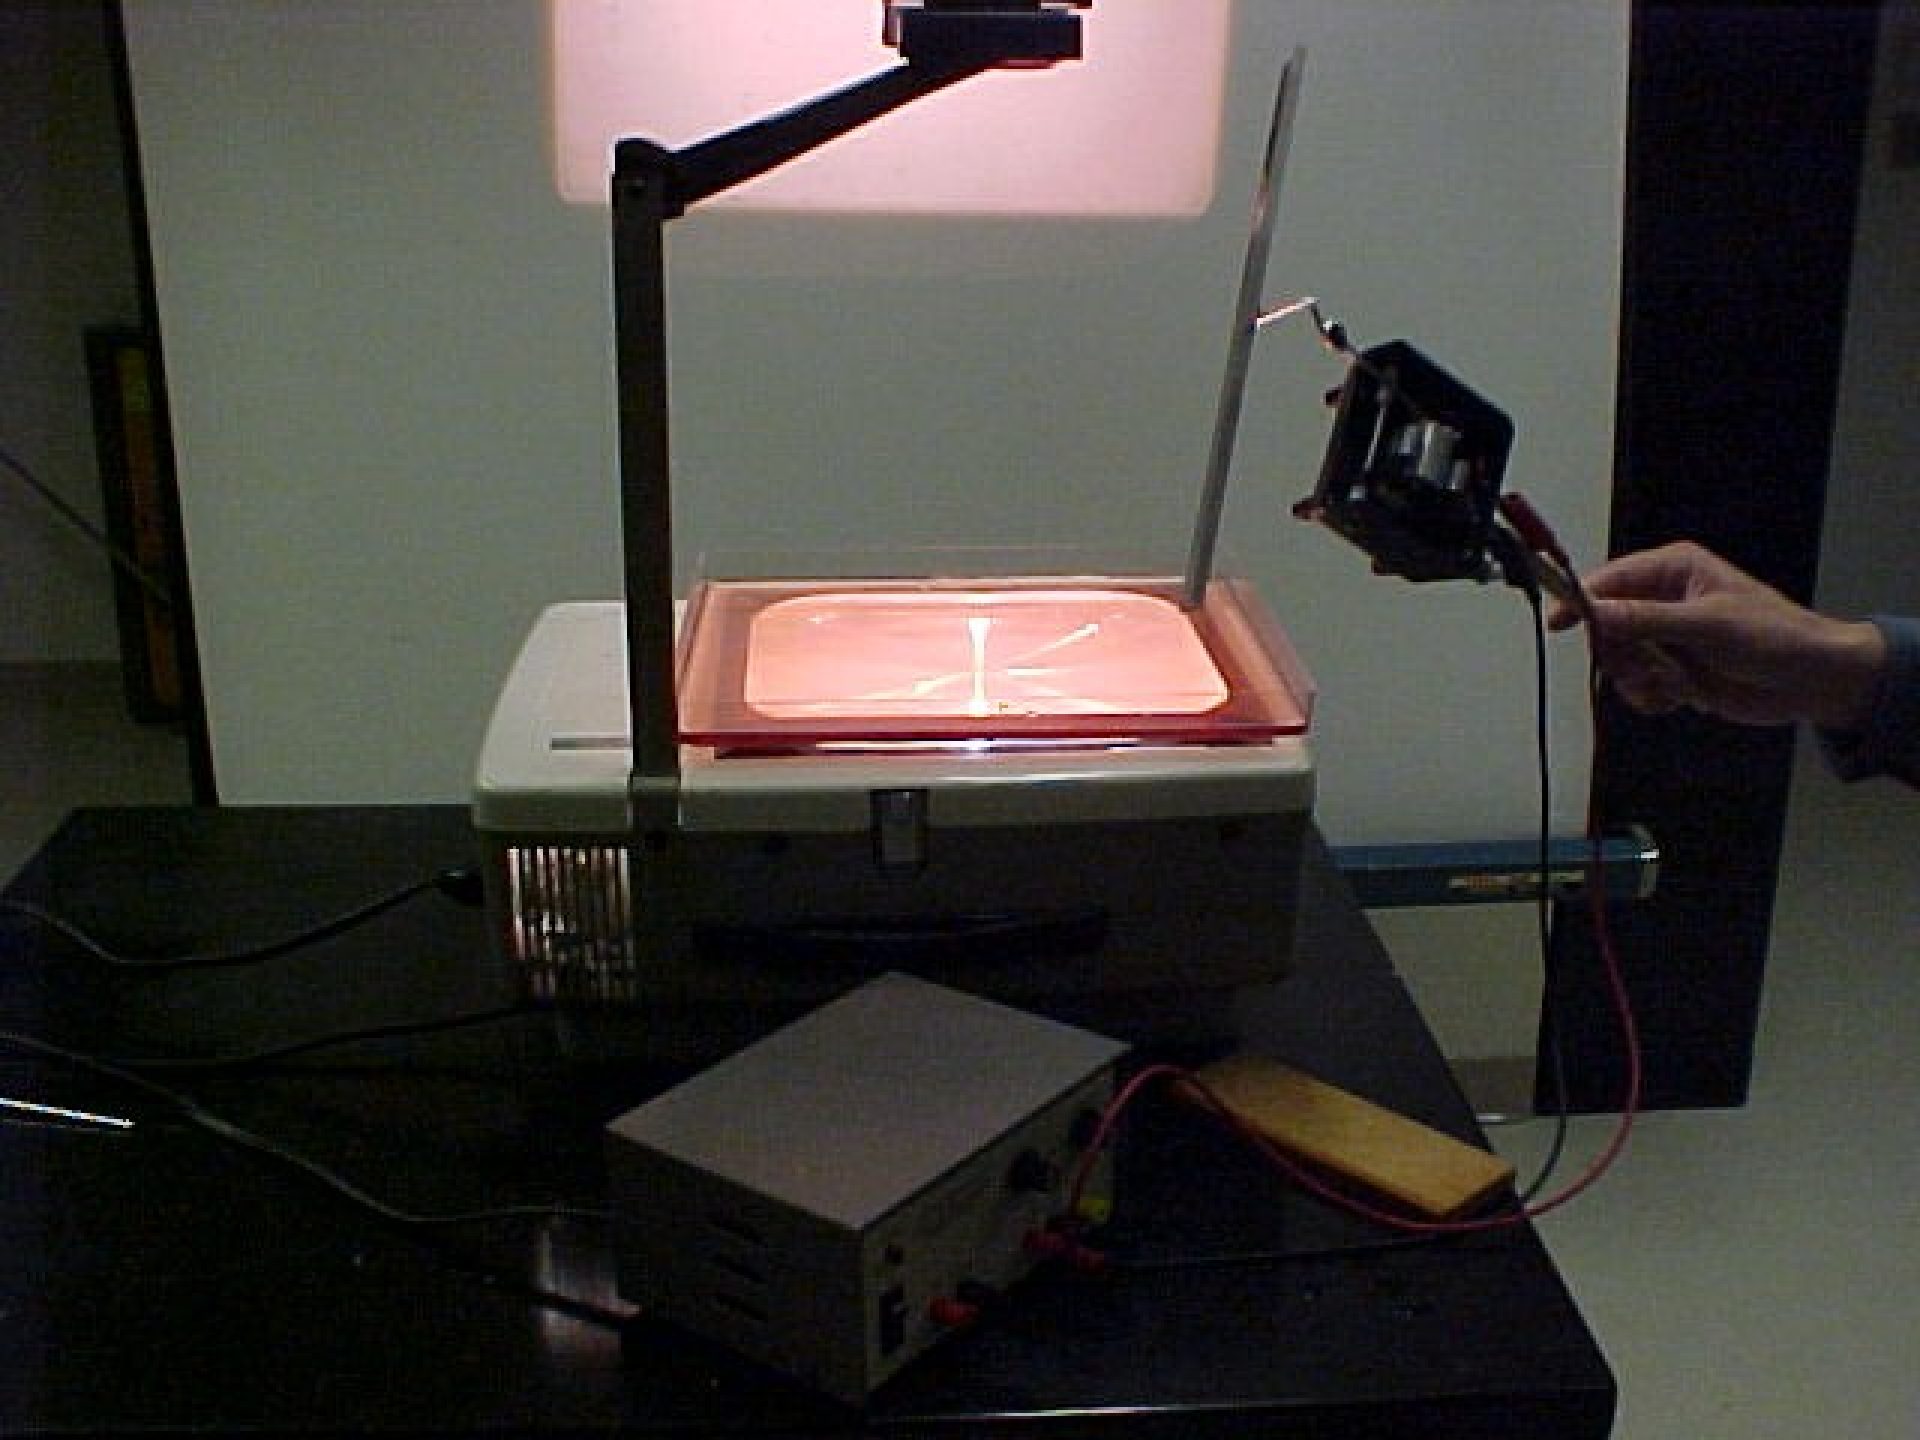
M-W5 : Small Ripple Tank
Unit
Water Waves
Purpose
Illustrate circular and planar waves, interference, reflection
Equipment
- Ripple tank
- Wave generator
- Accessories: probs, barriers, wetting agent (soap)
- Stand with a clamp
- Variable low-voltage power supply (0-6V, 0-1A)
- Overhead projector
Suggestions
See the attached instructions
Discussions
See attached
- Set-up
- Pouring in the water colored with cranberry juice
- Close-up of the hand-held wave generator
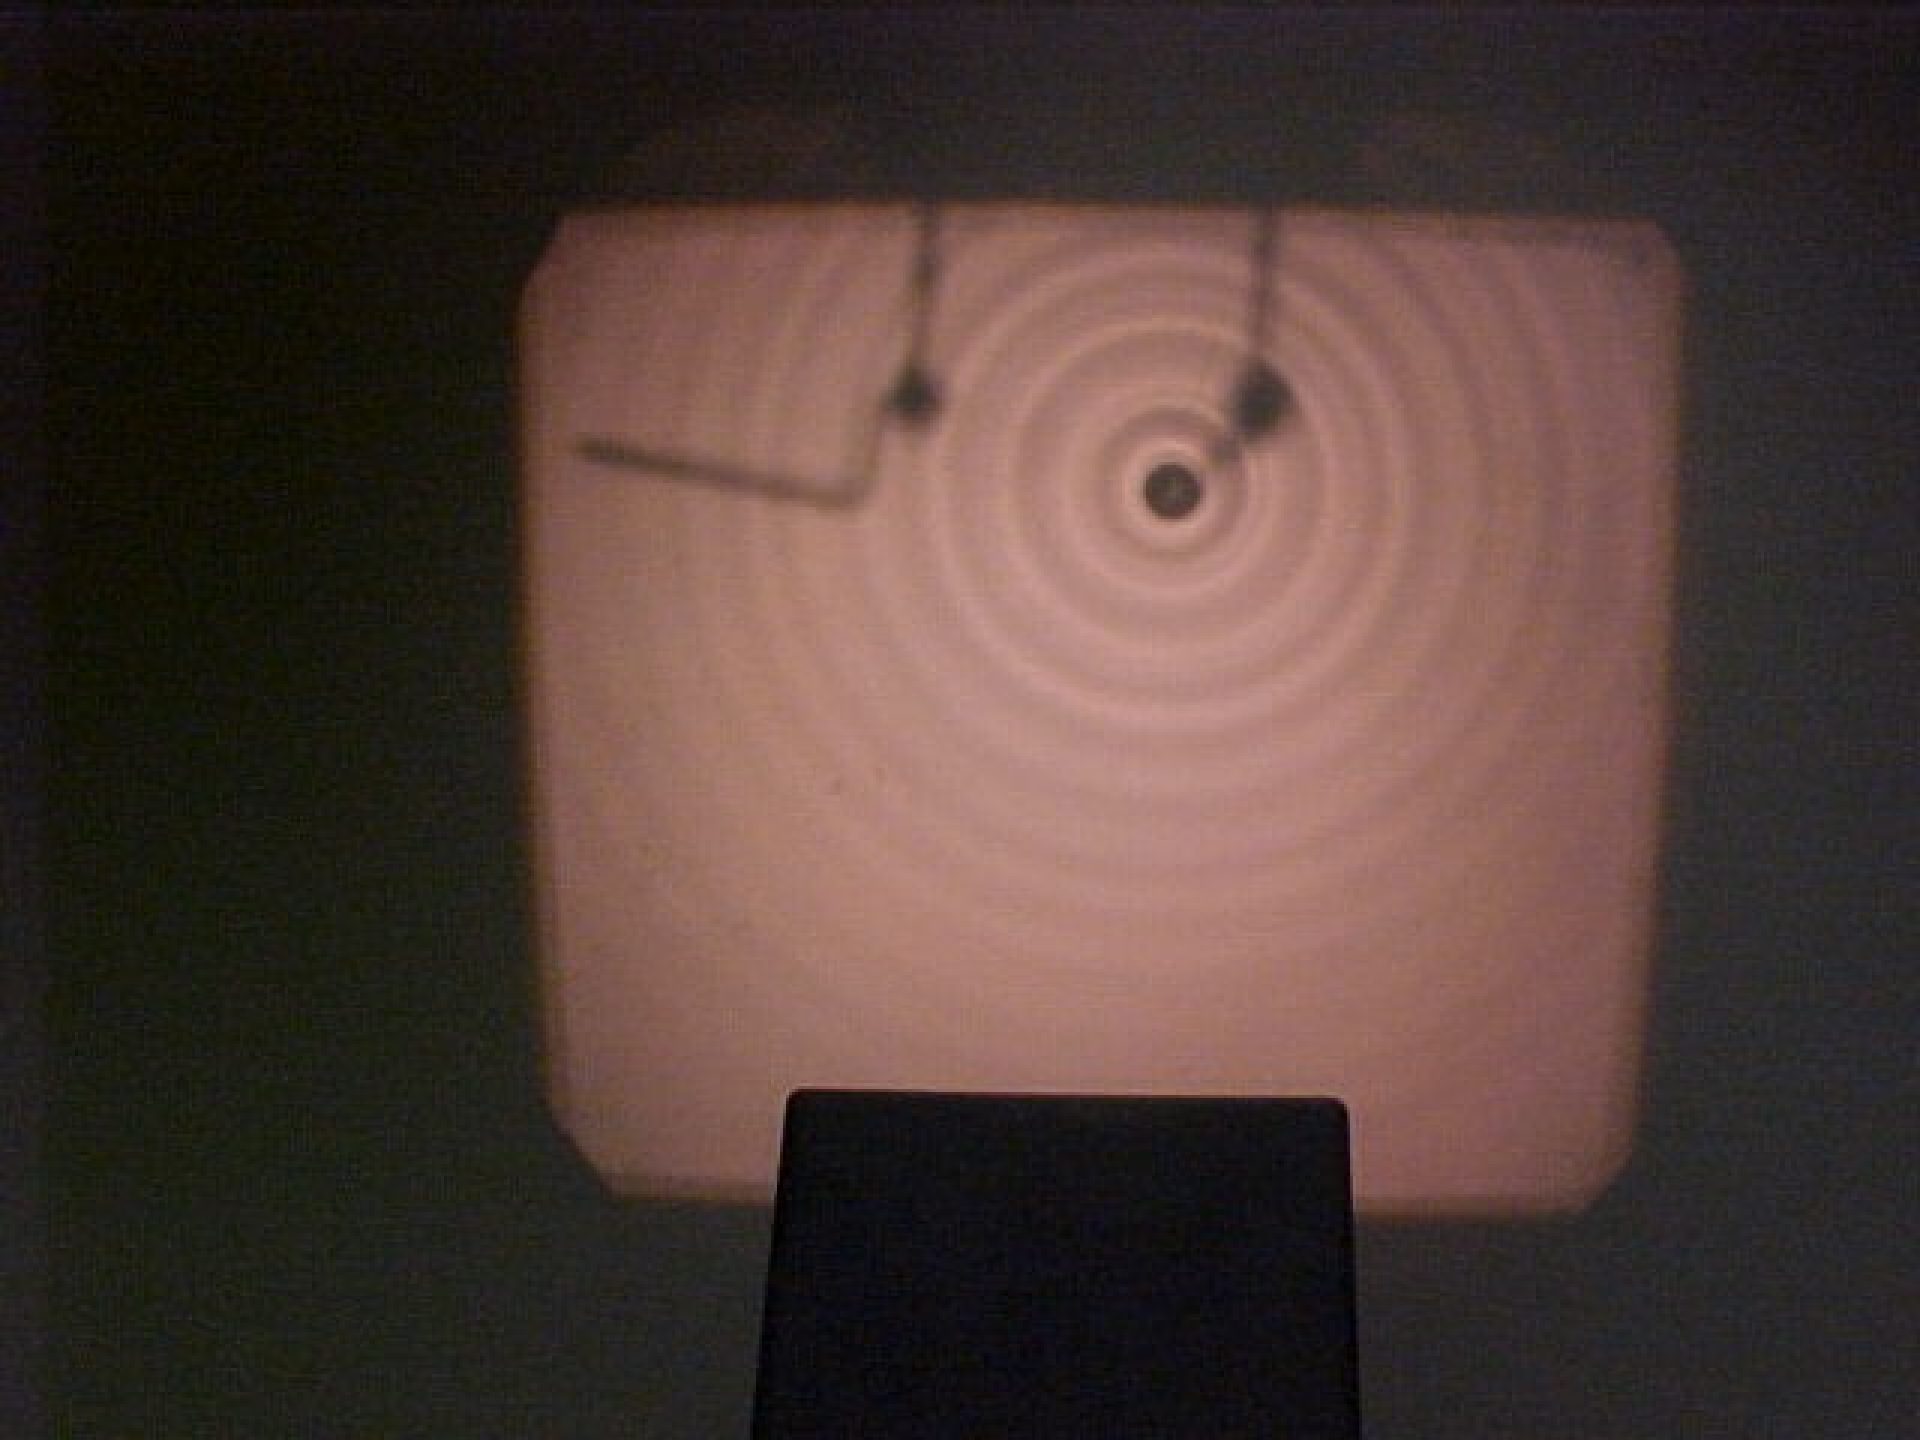
- One Huygens source
- Two Huygens sources
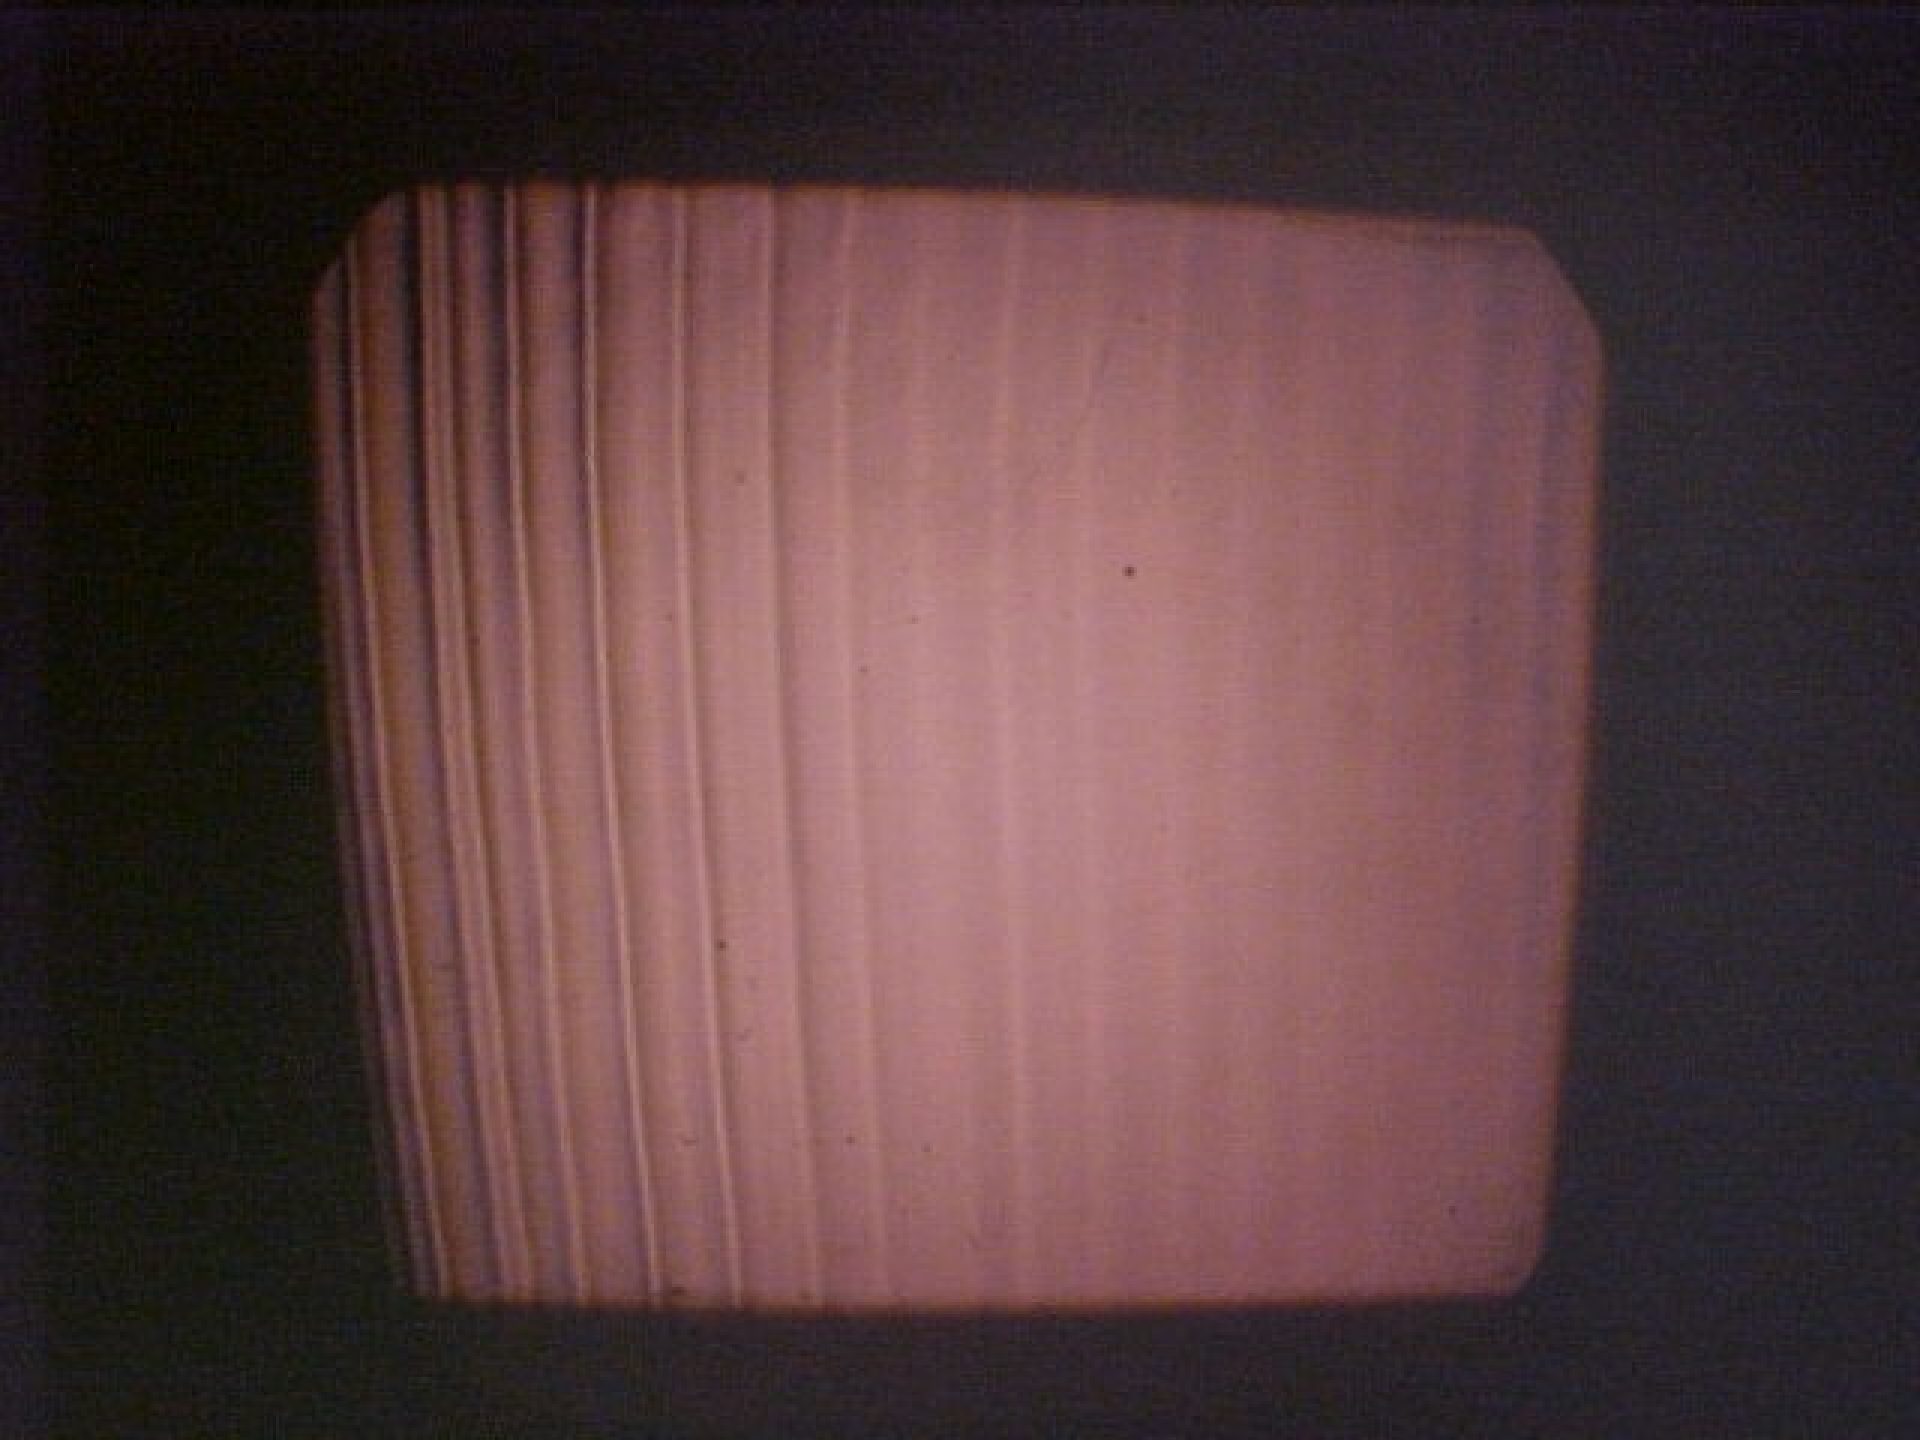
- Hand-held wave generator with attachment for a planar wave
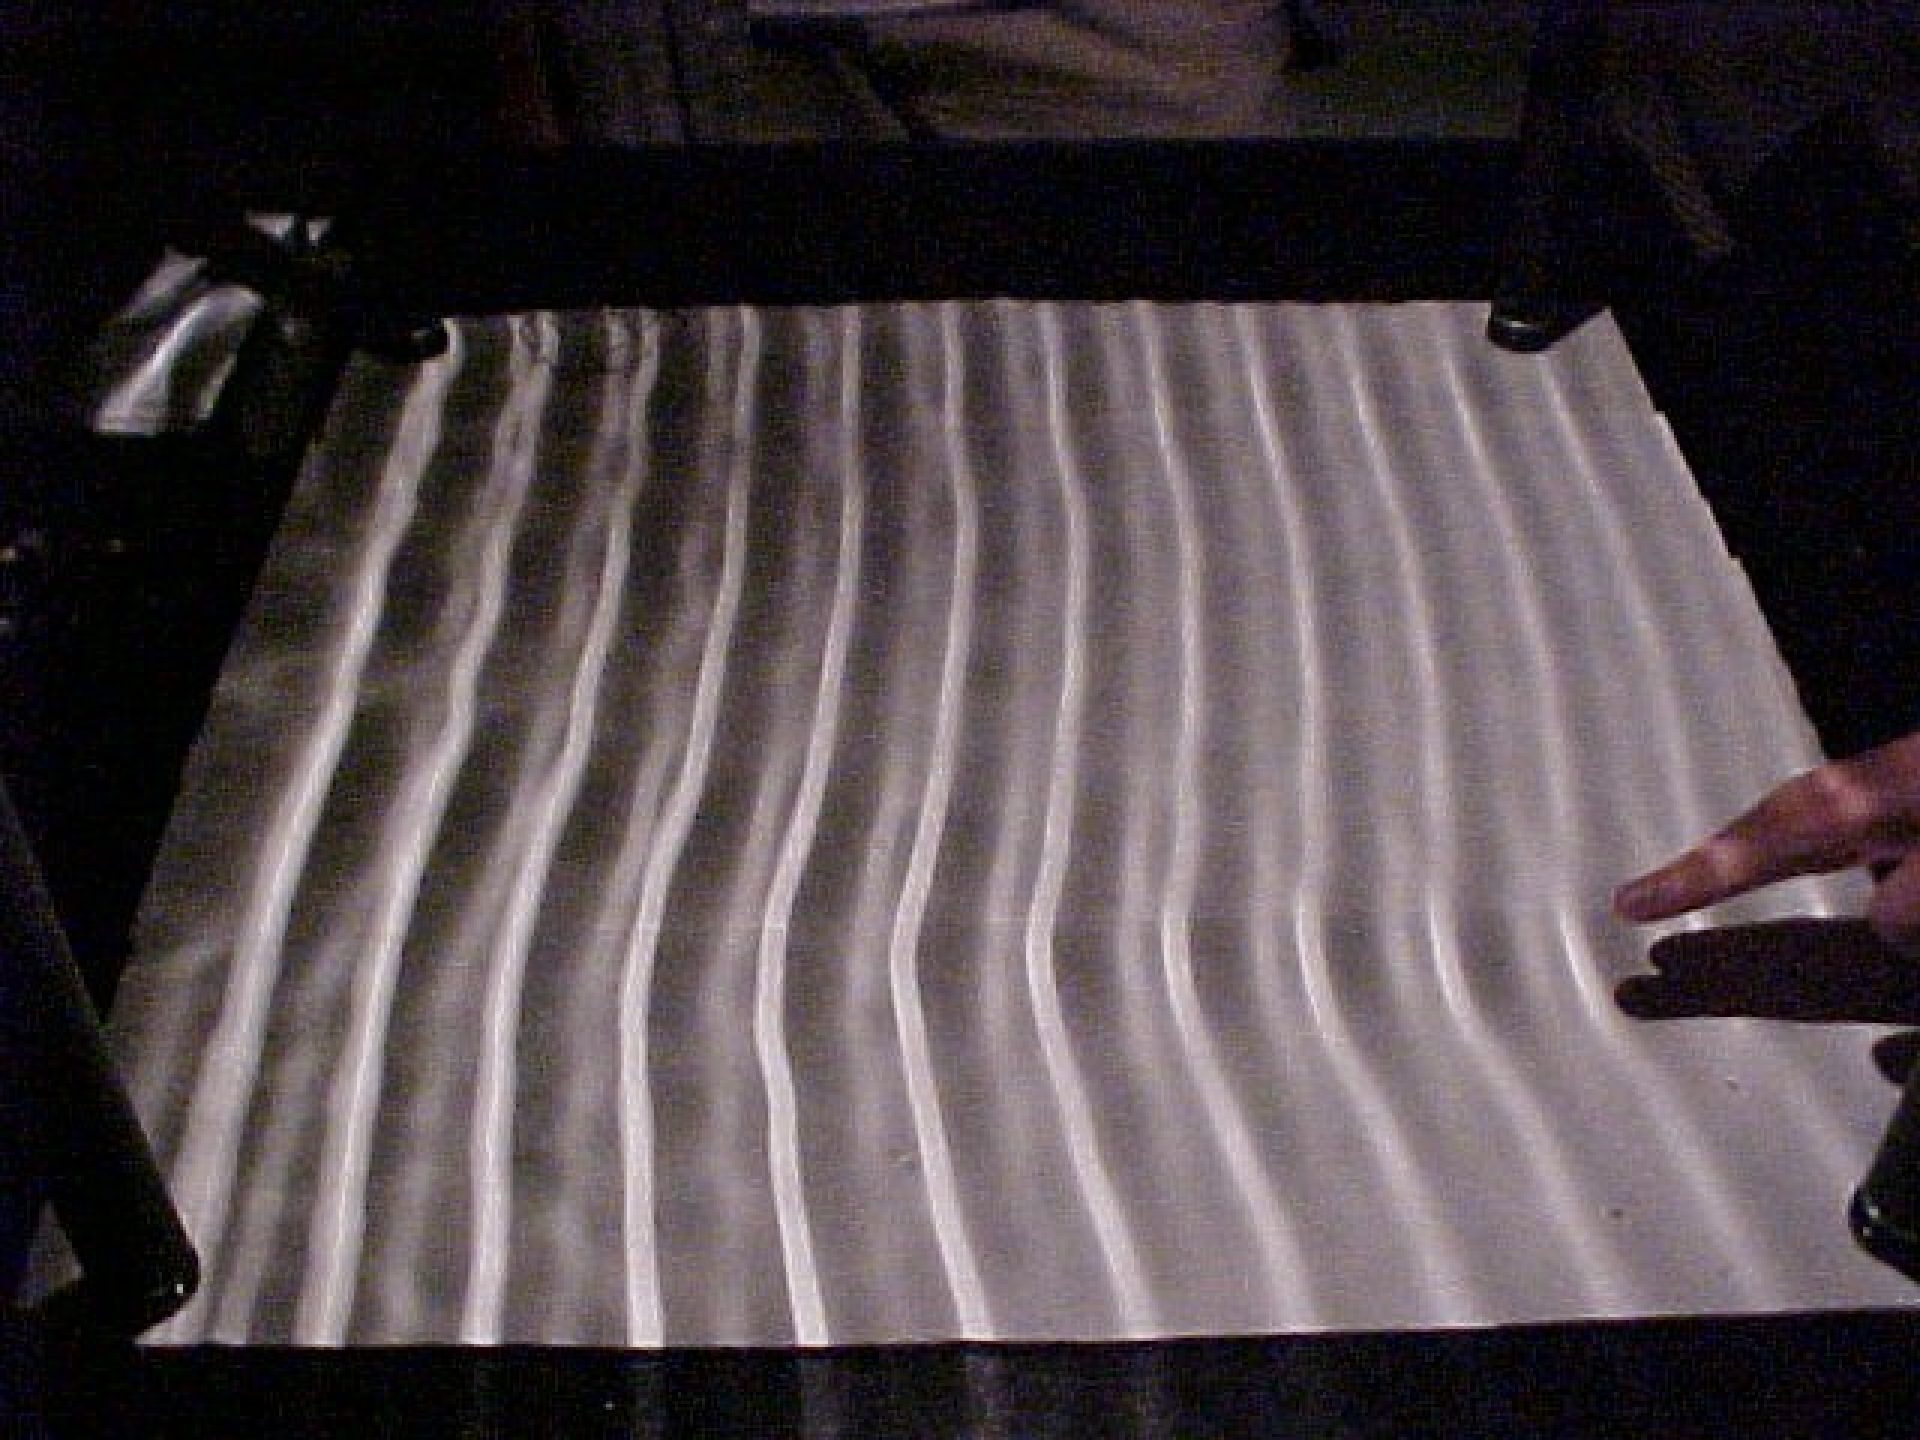
- Planar wave

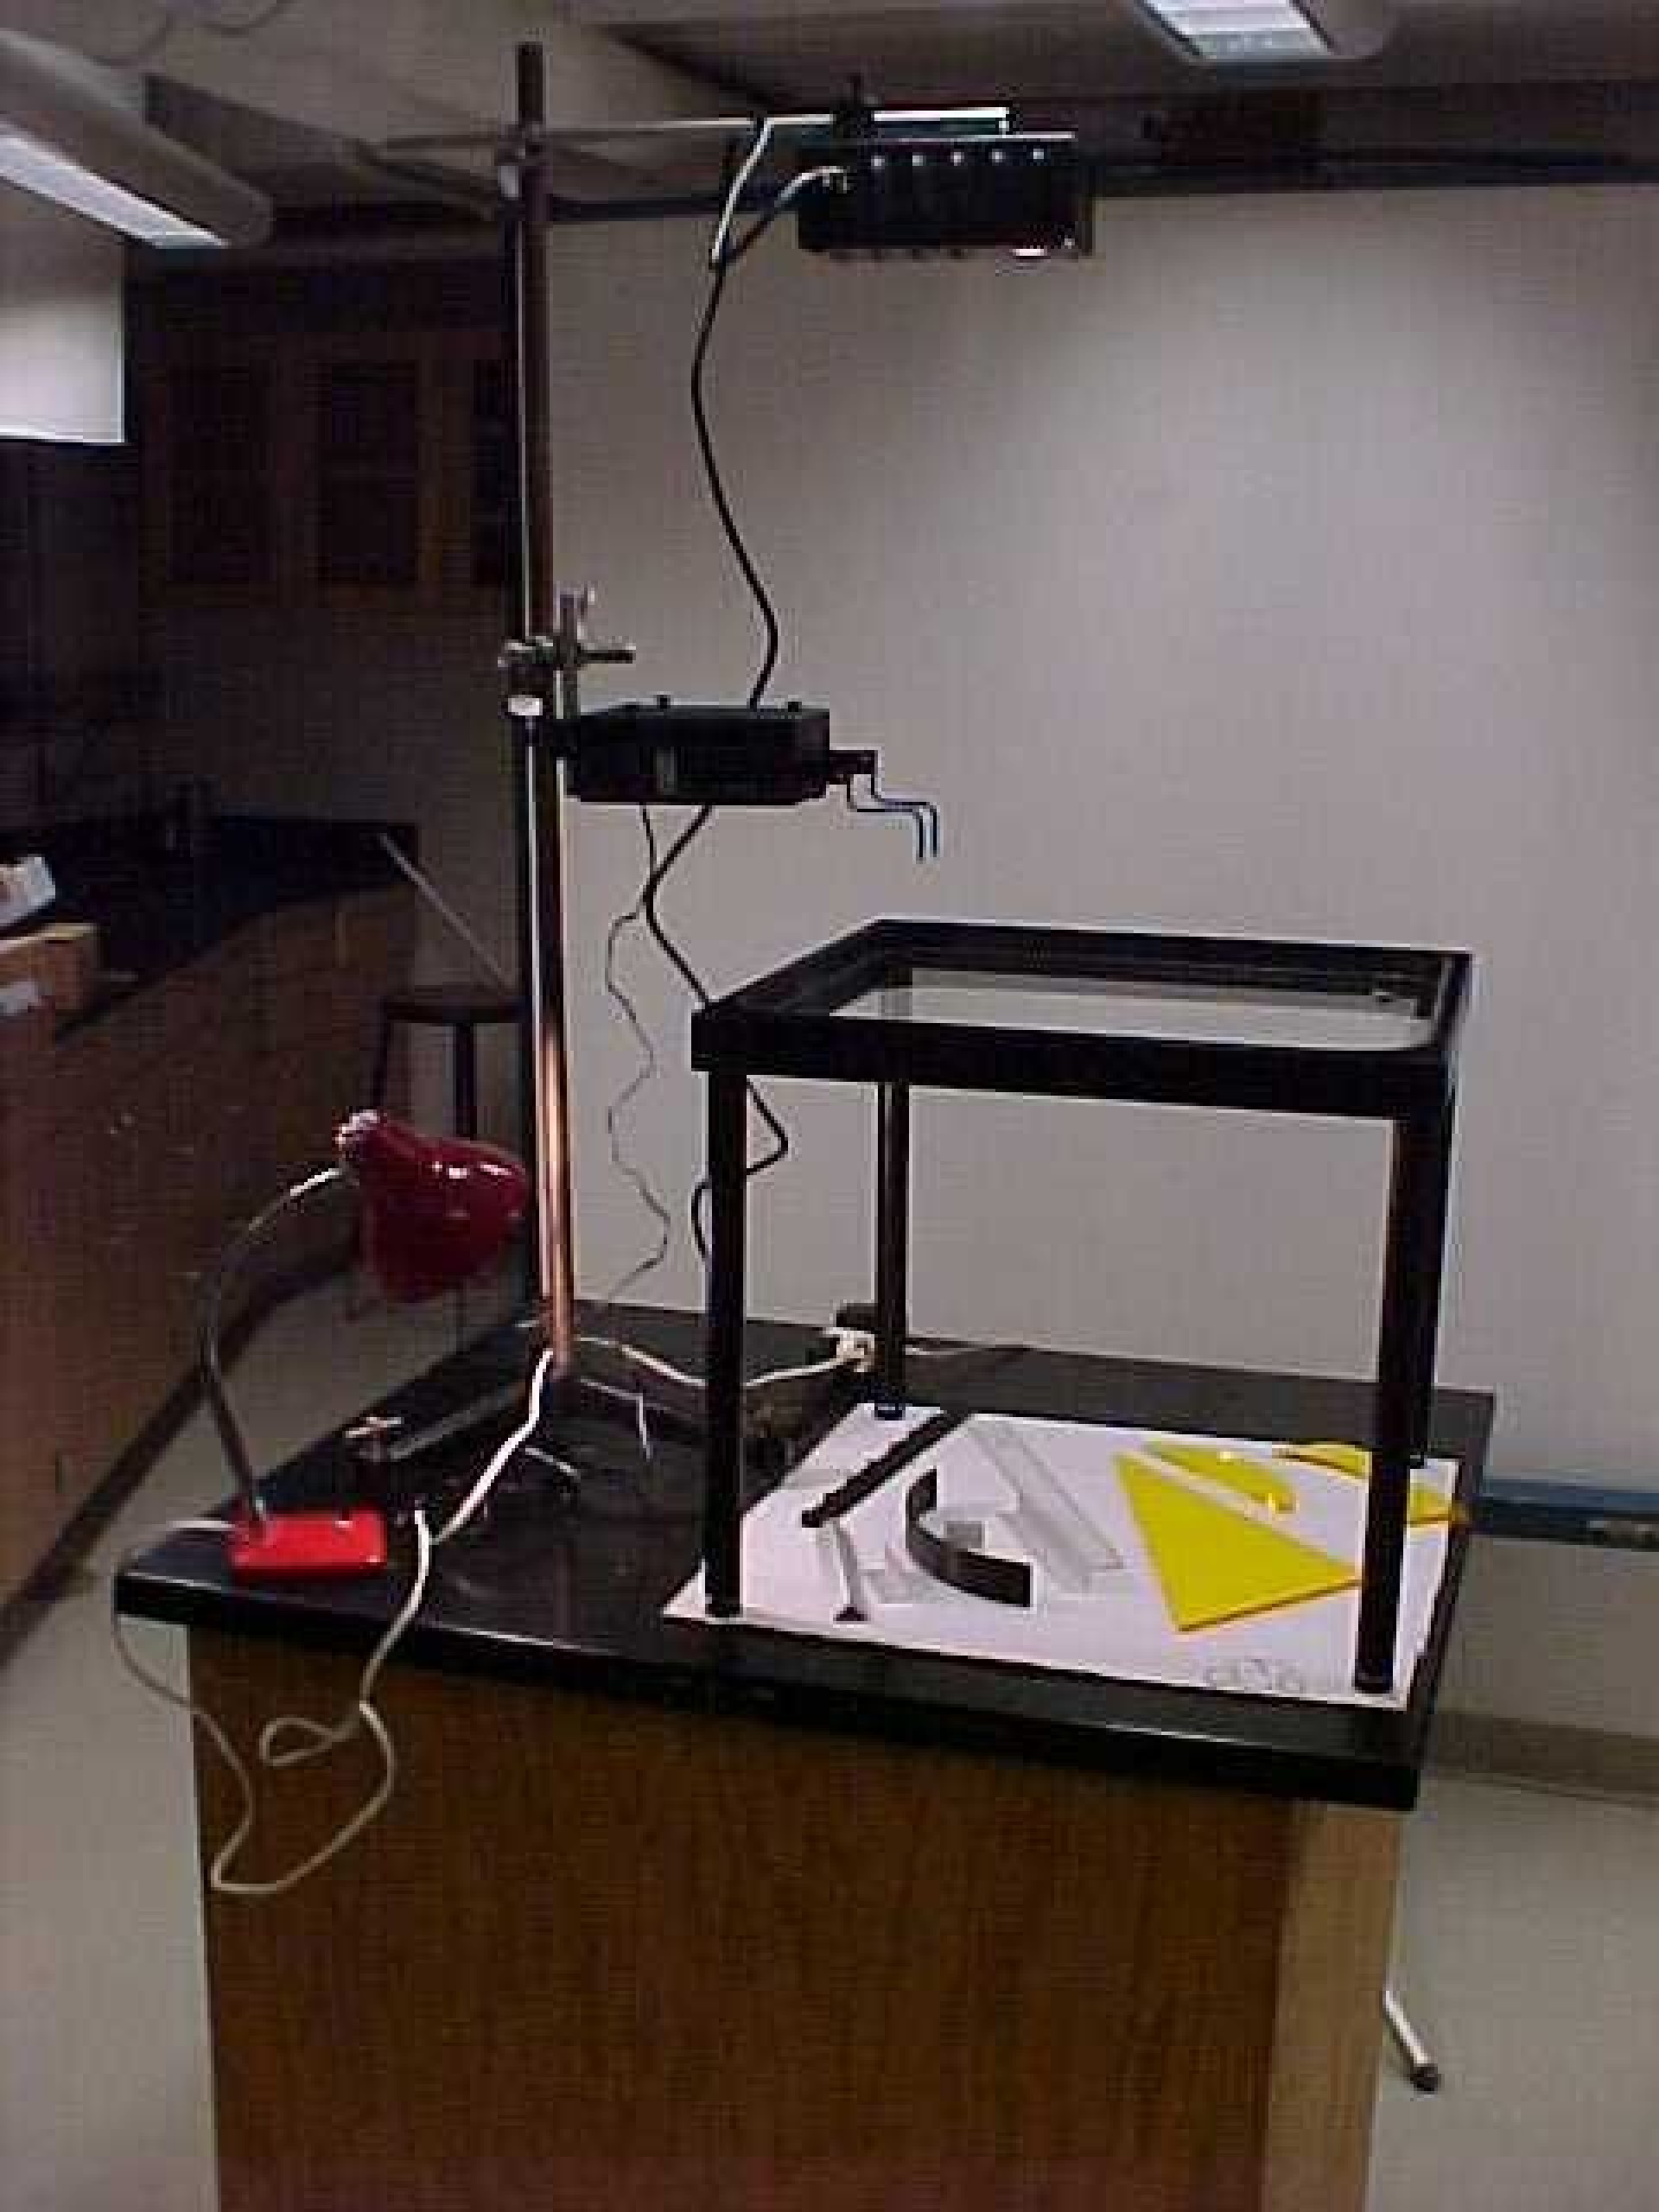
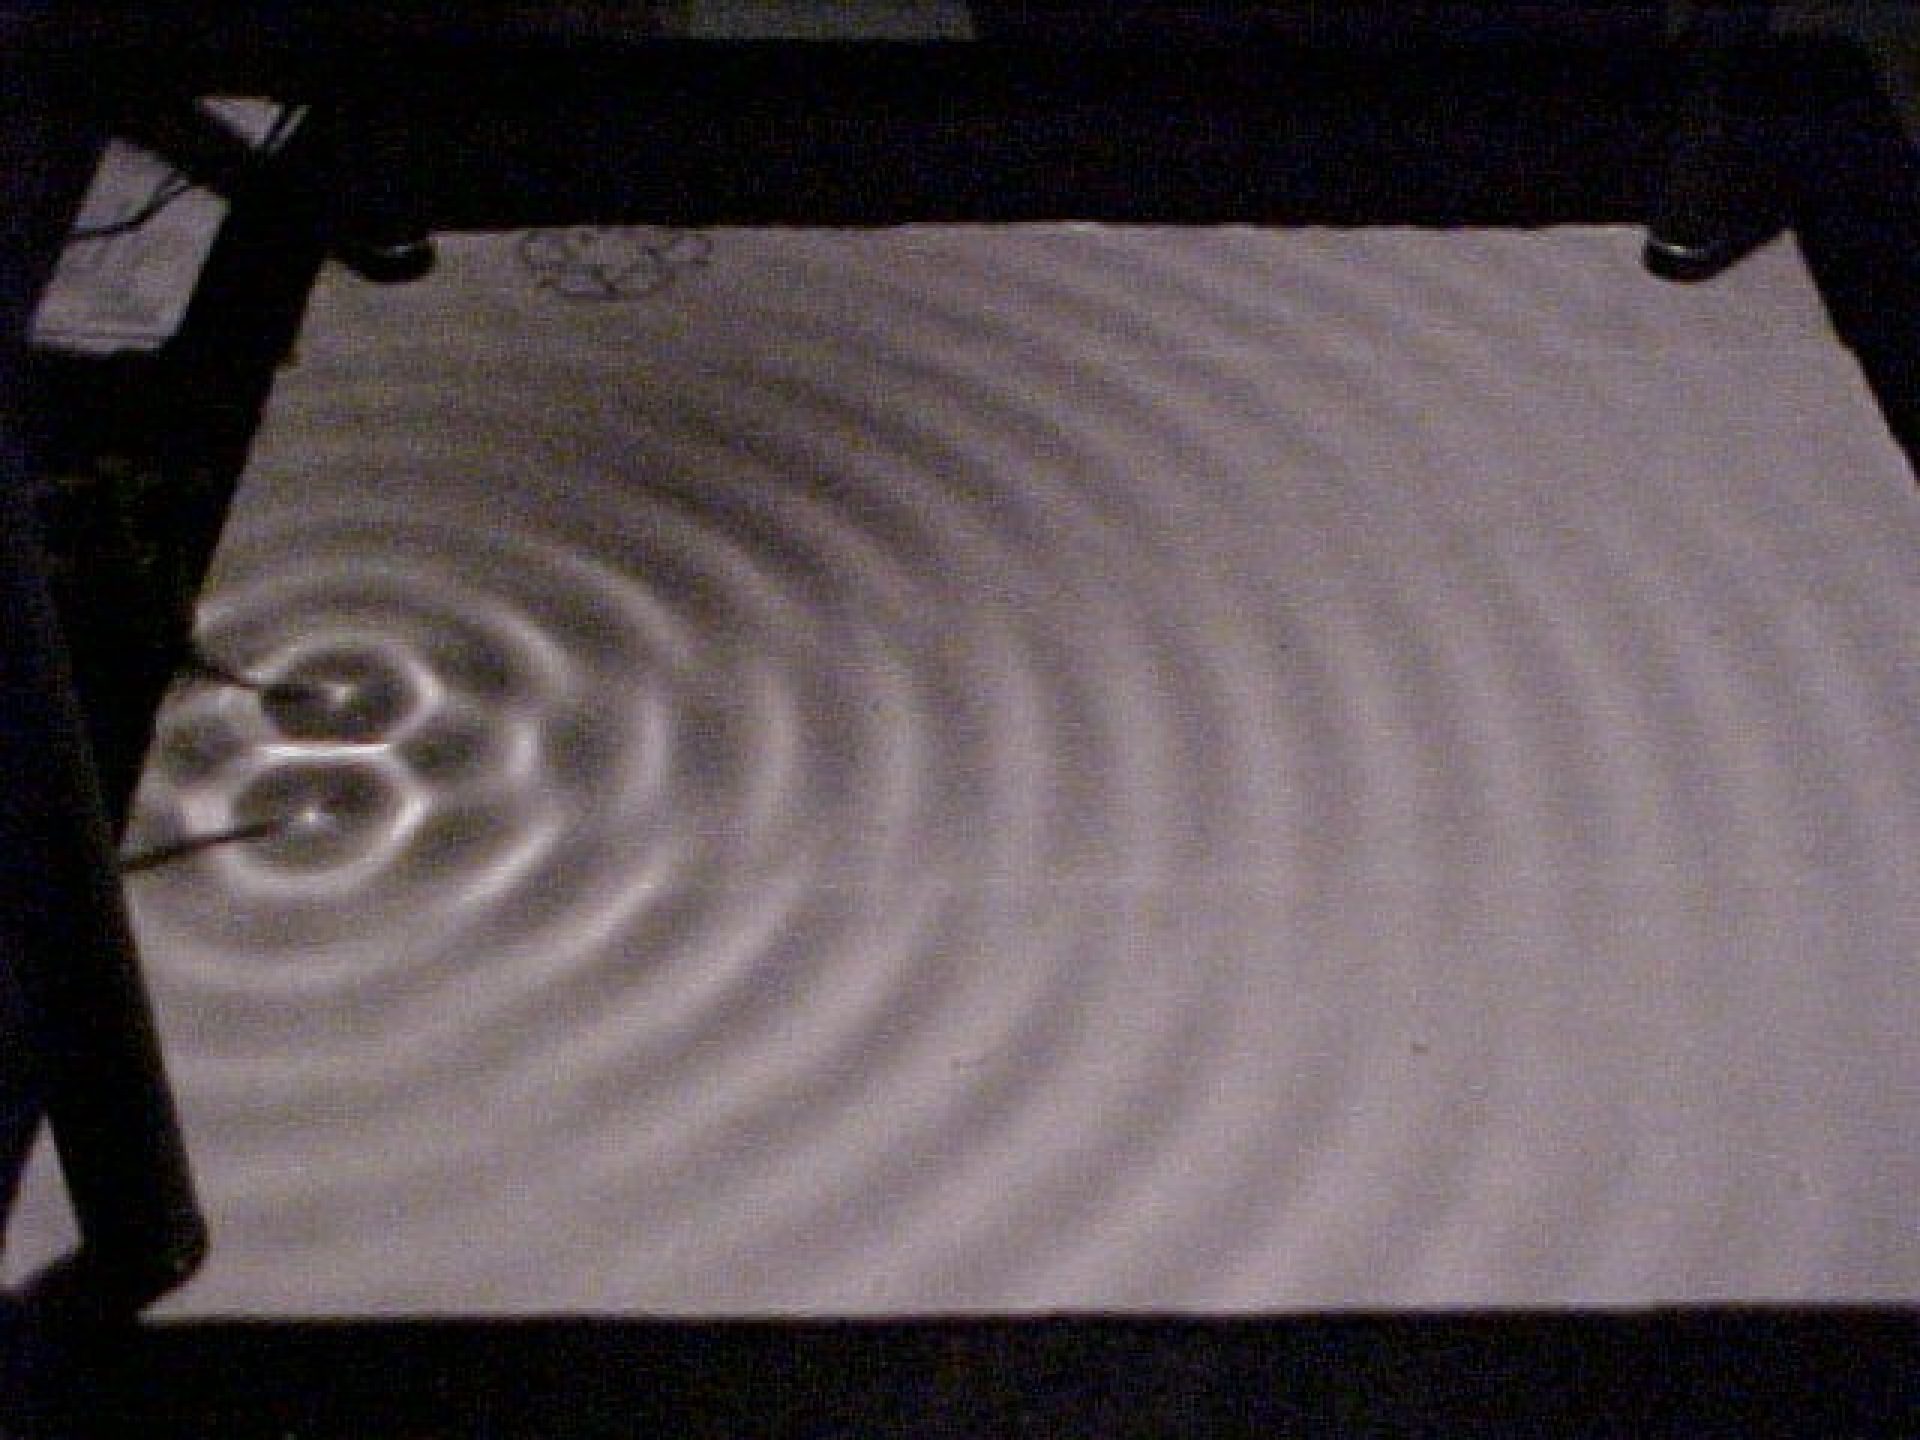
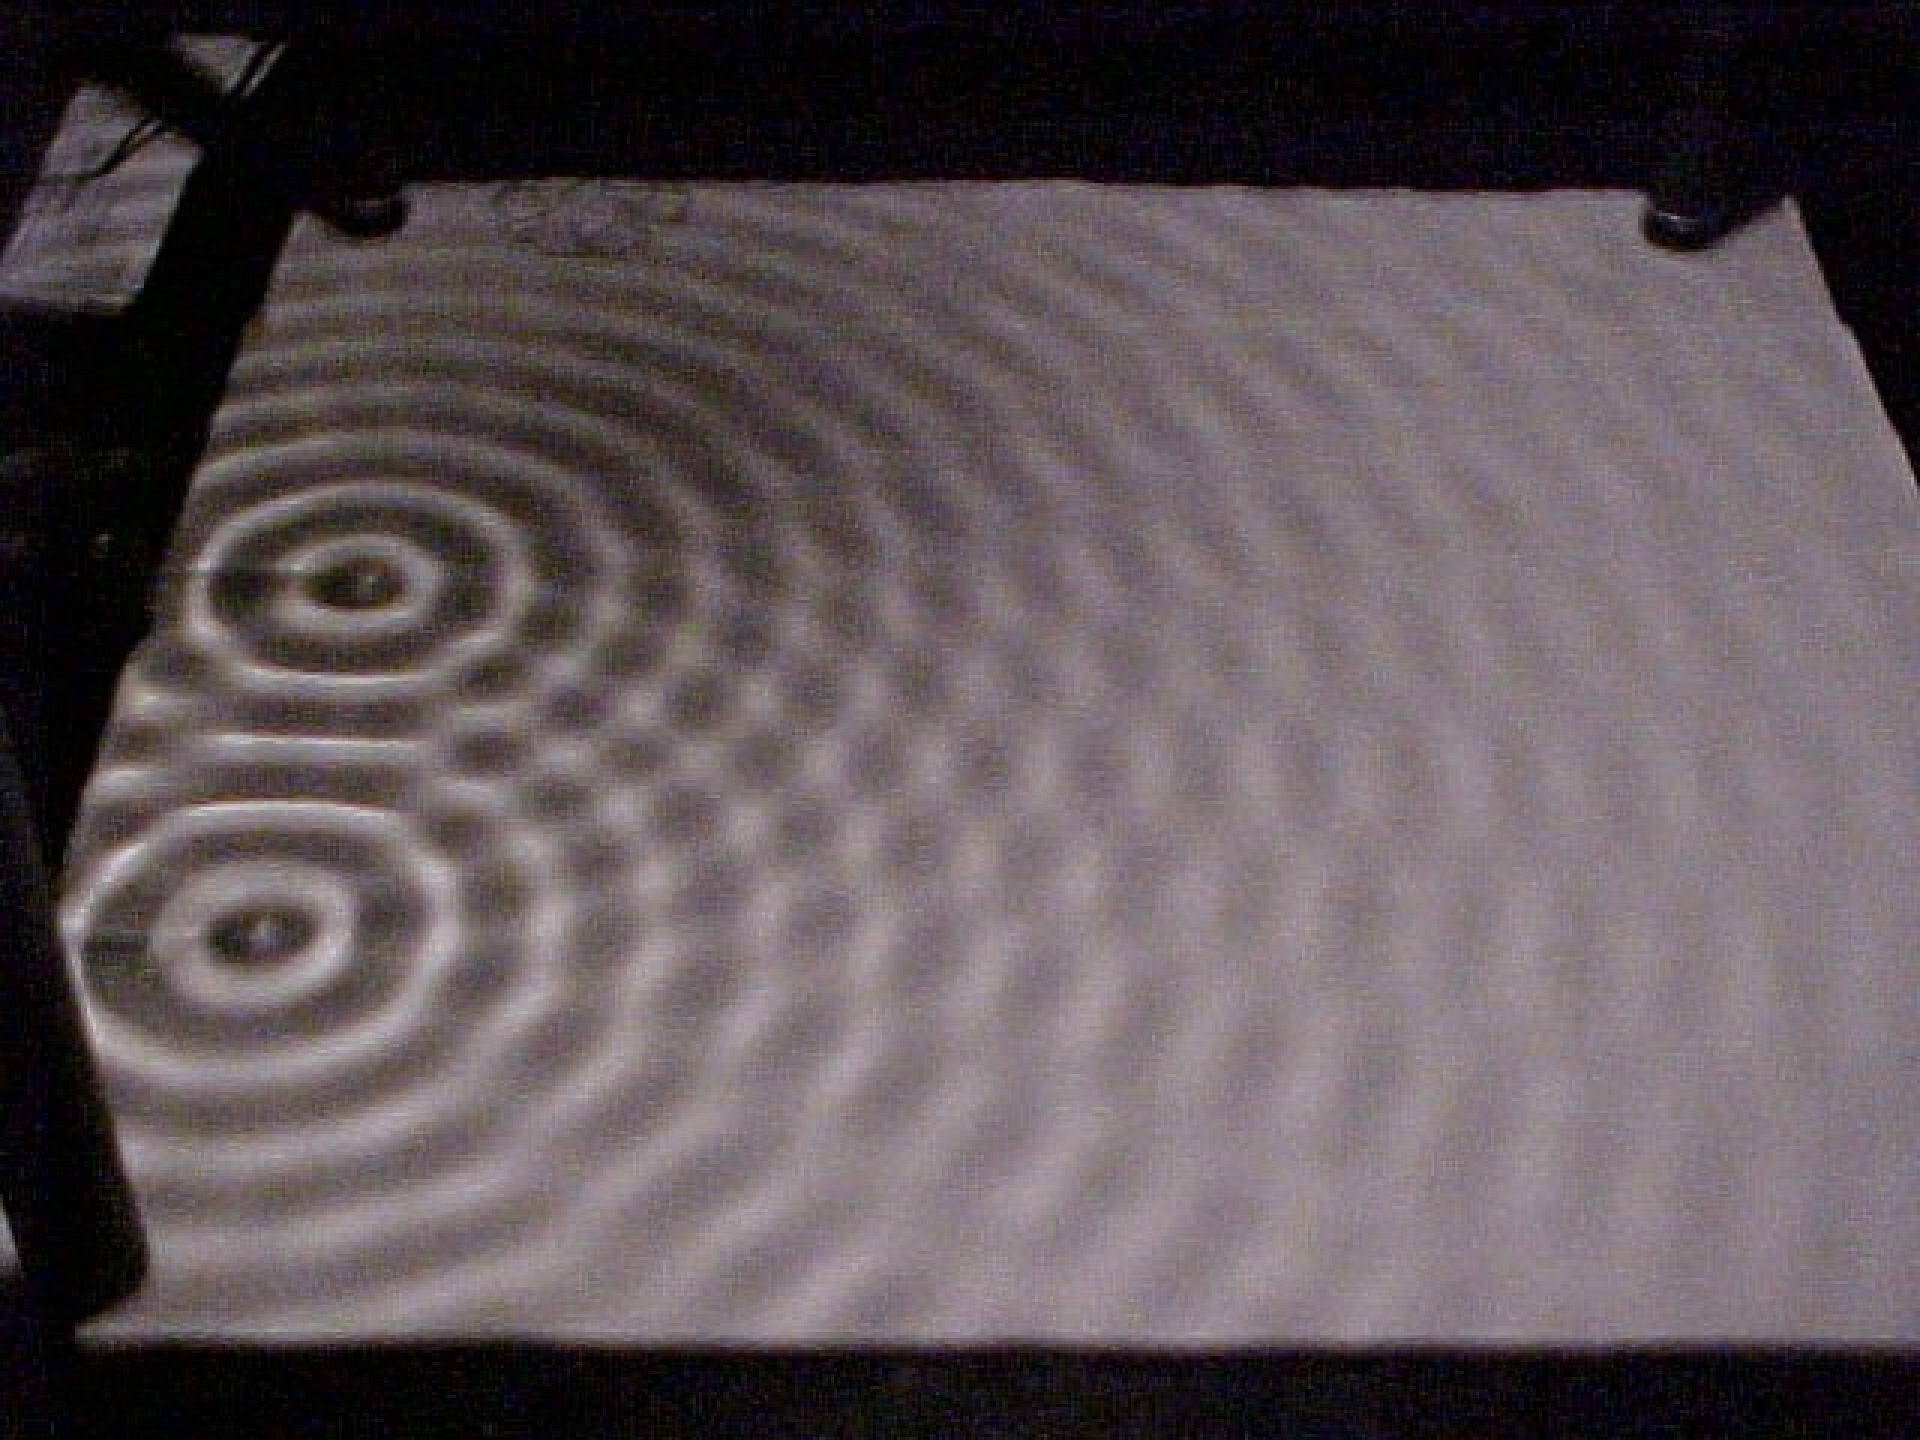
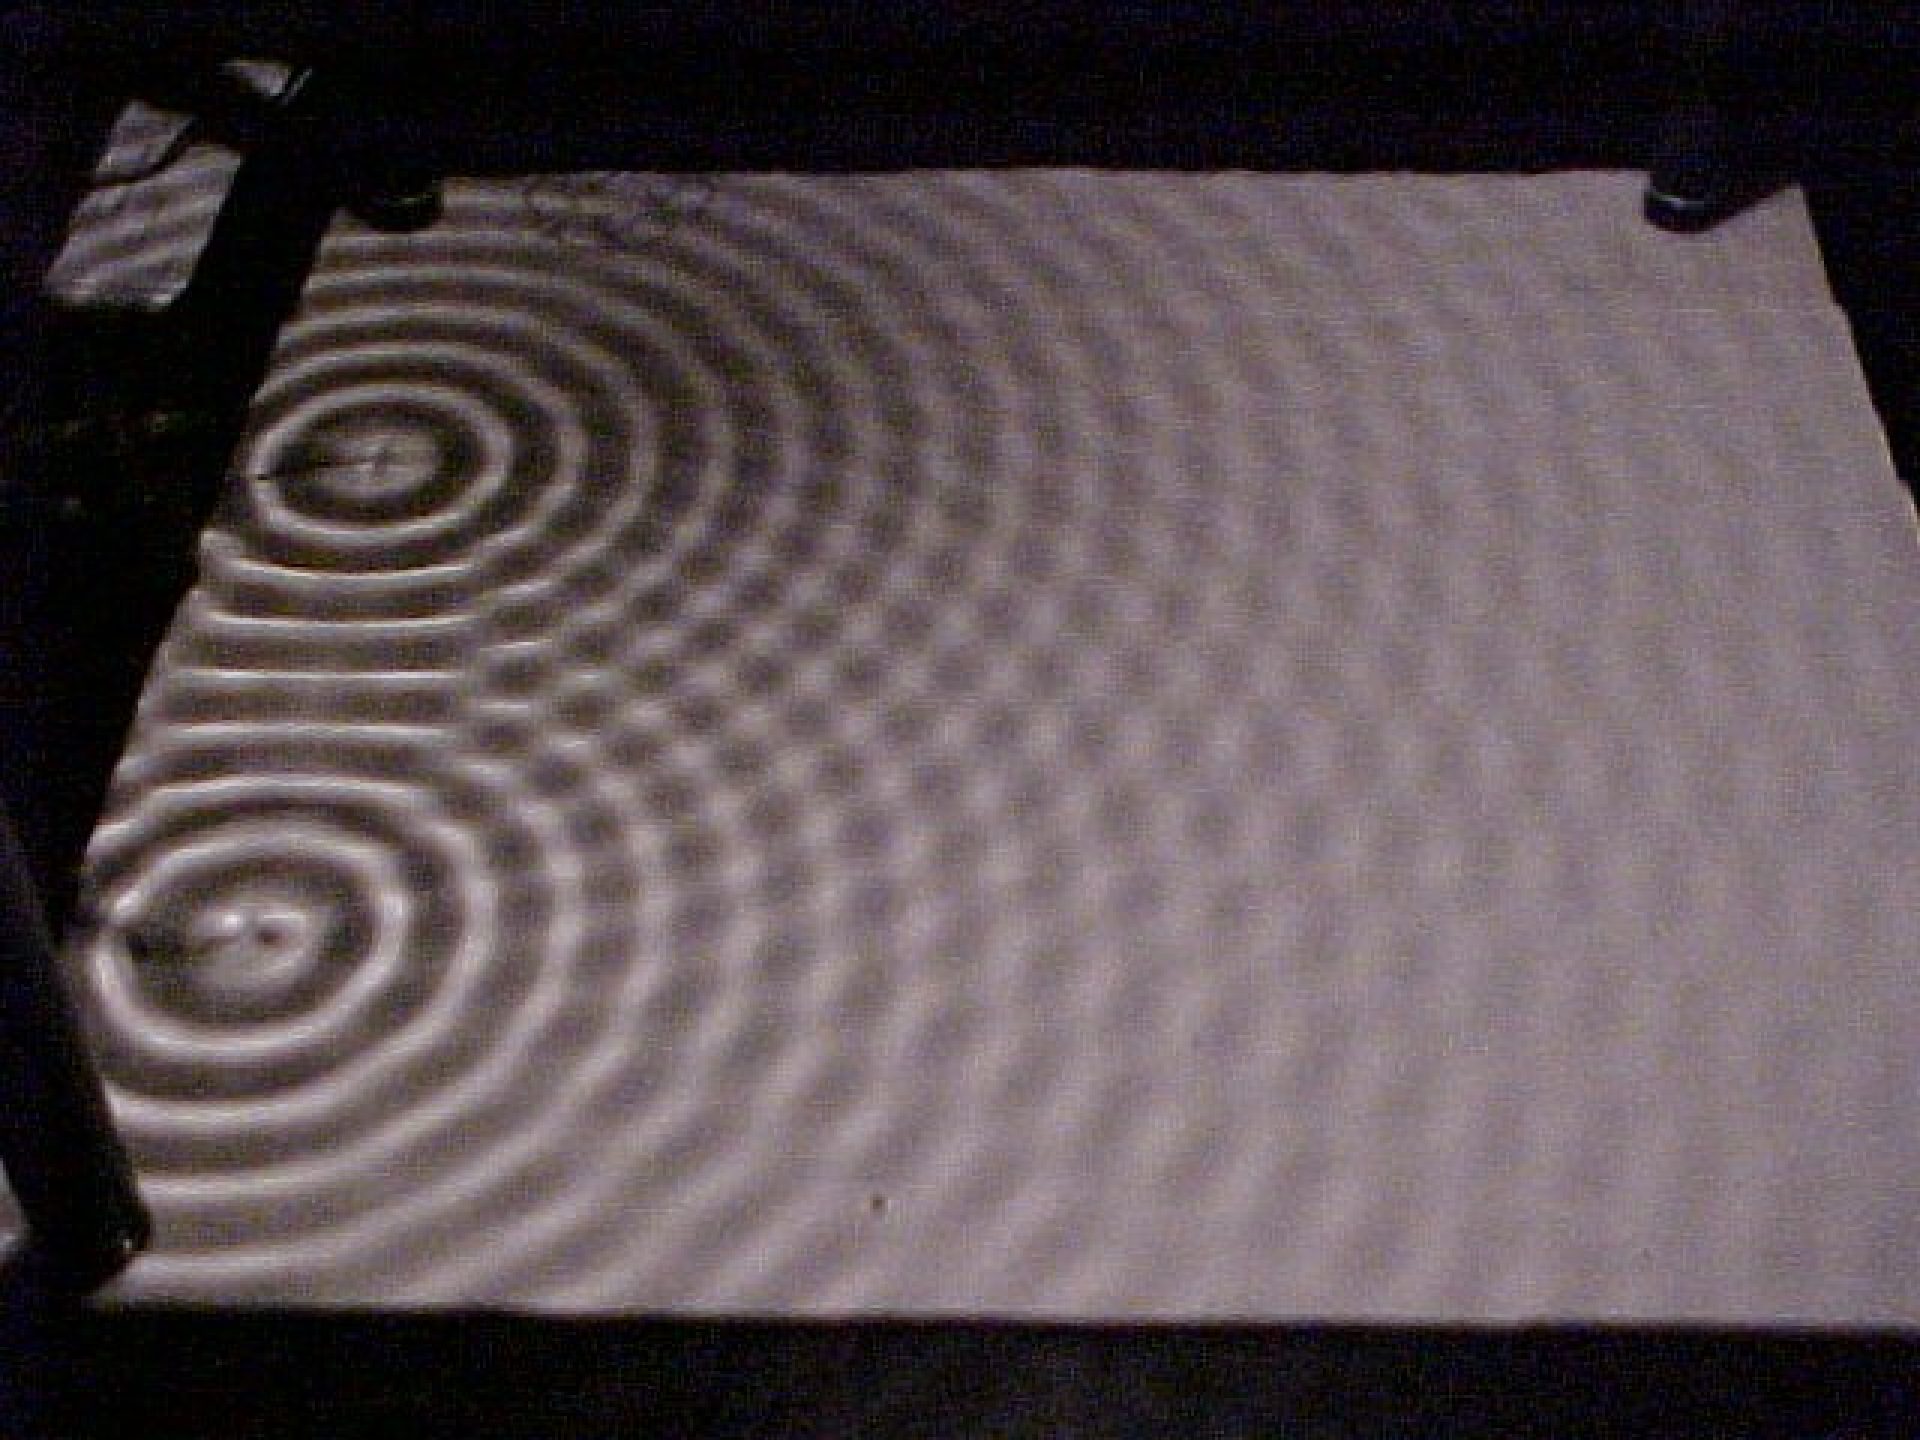
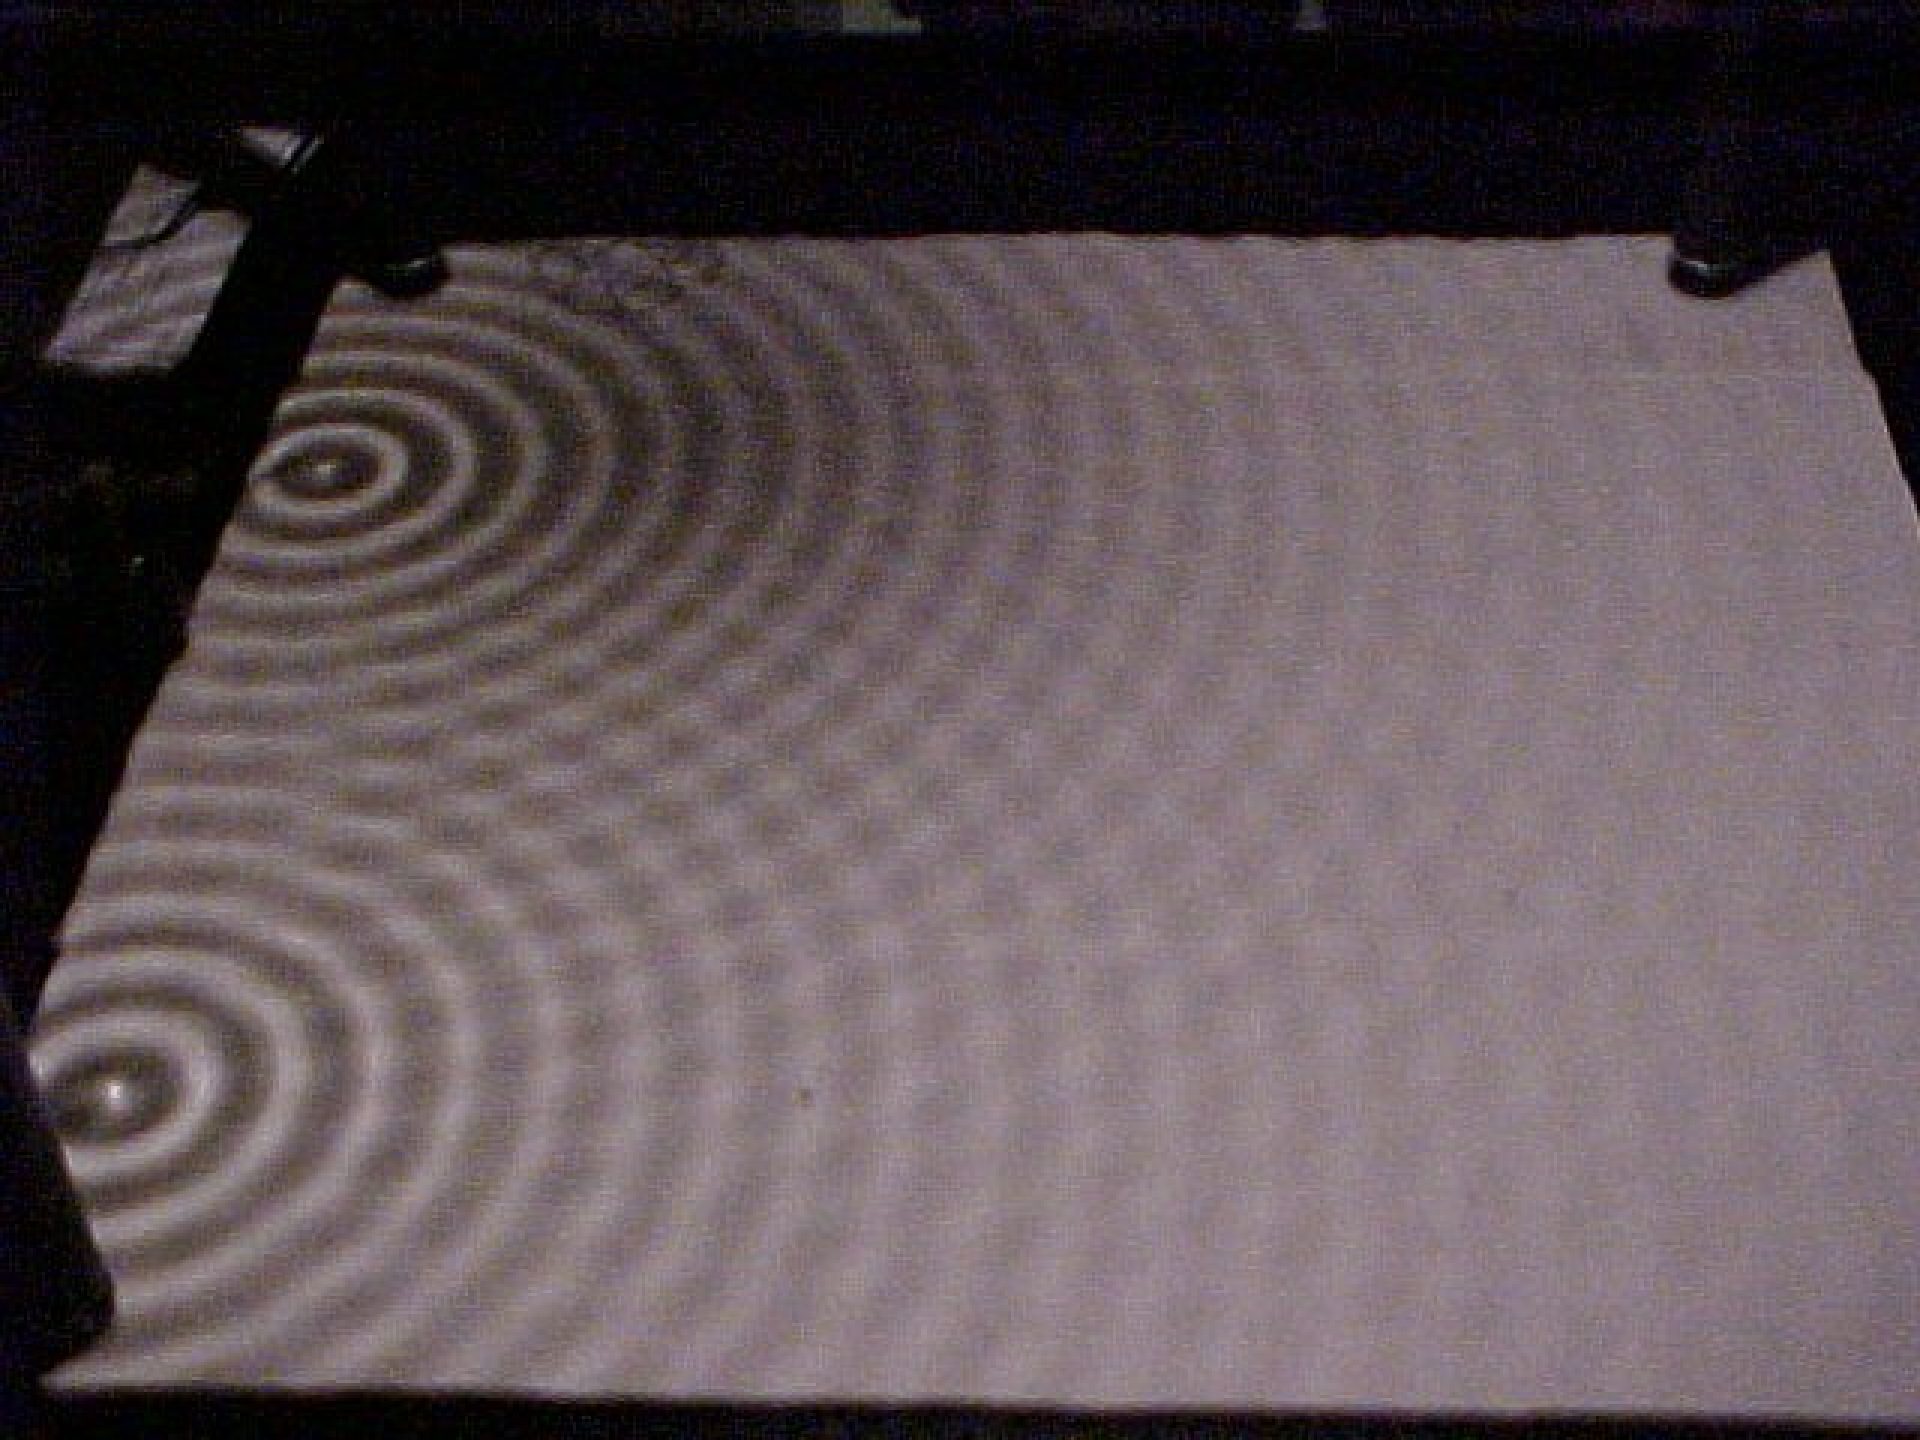
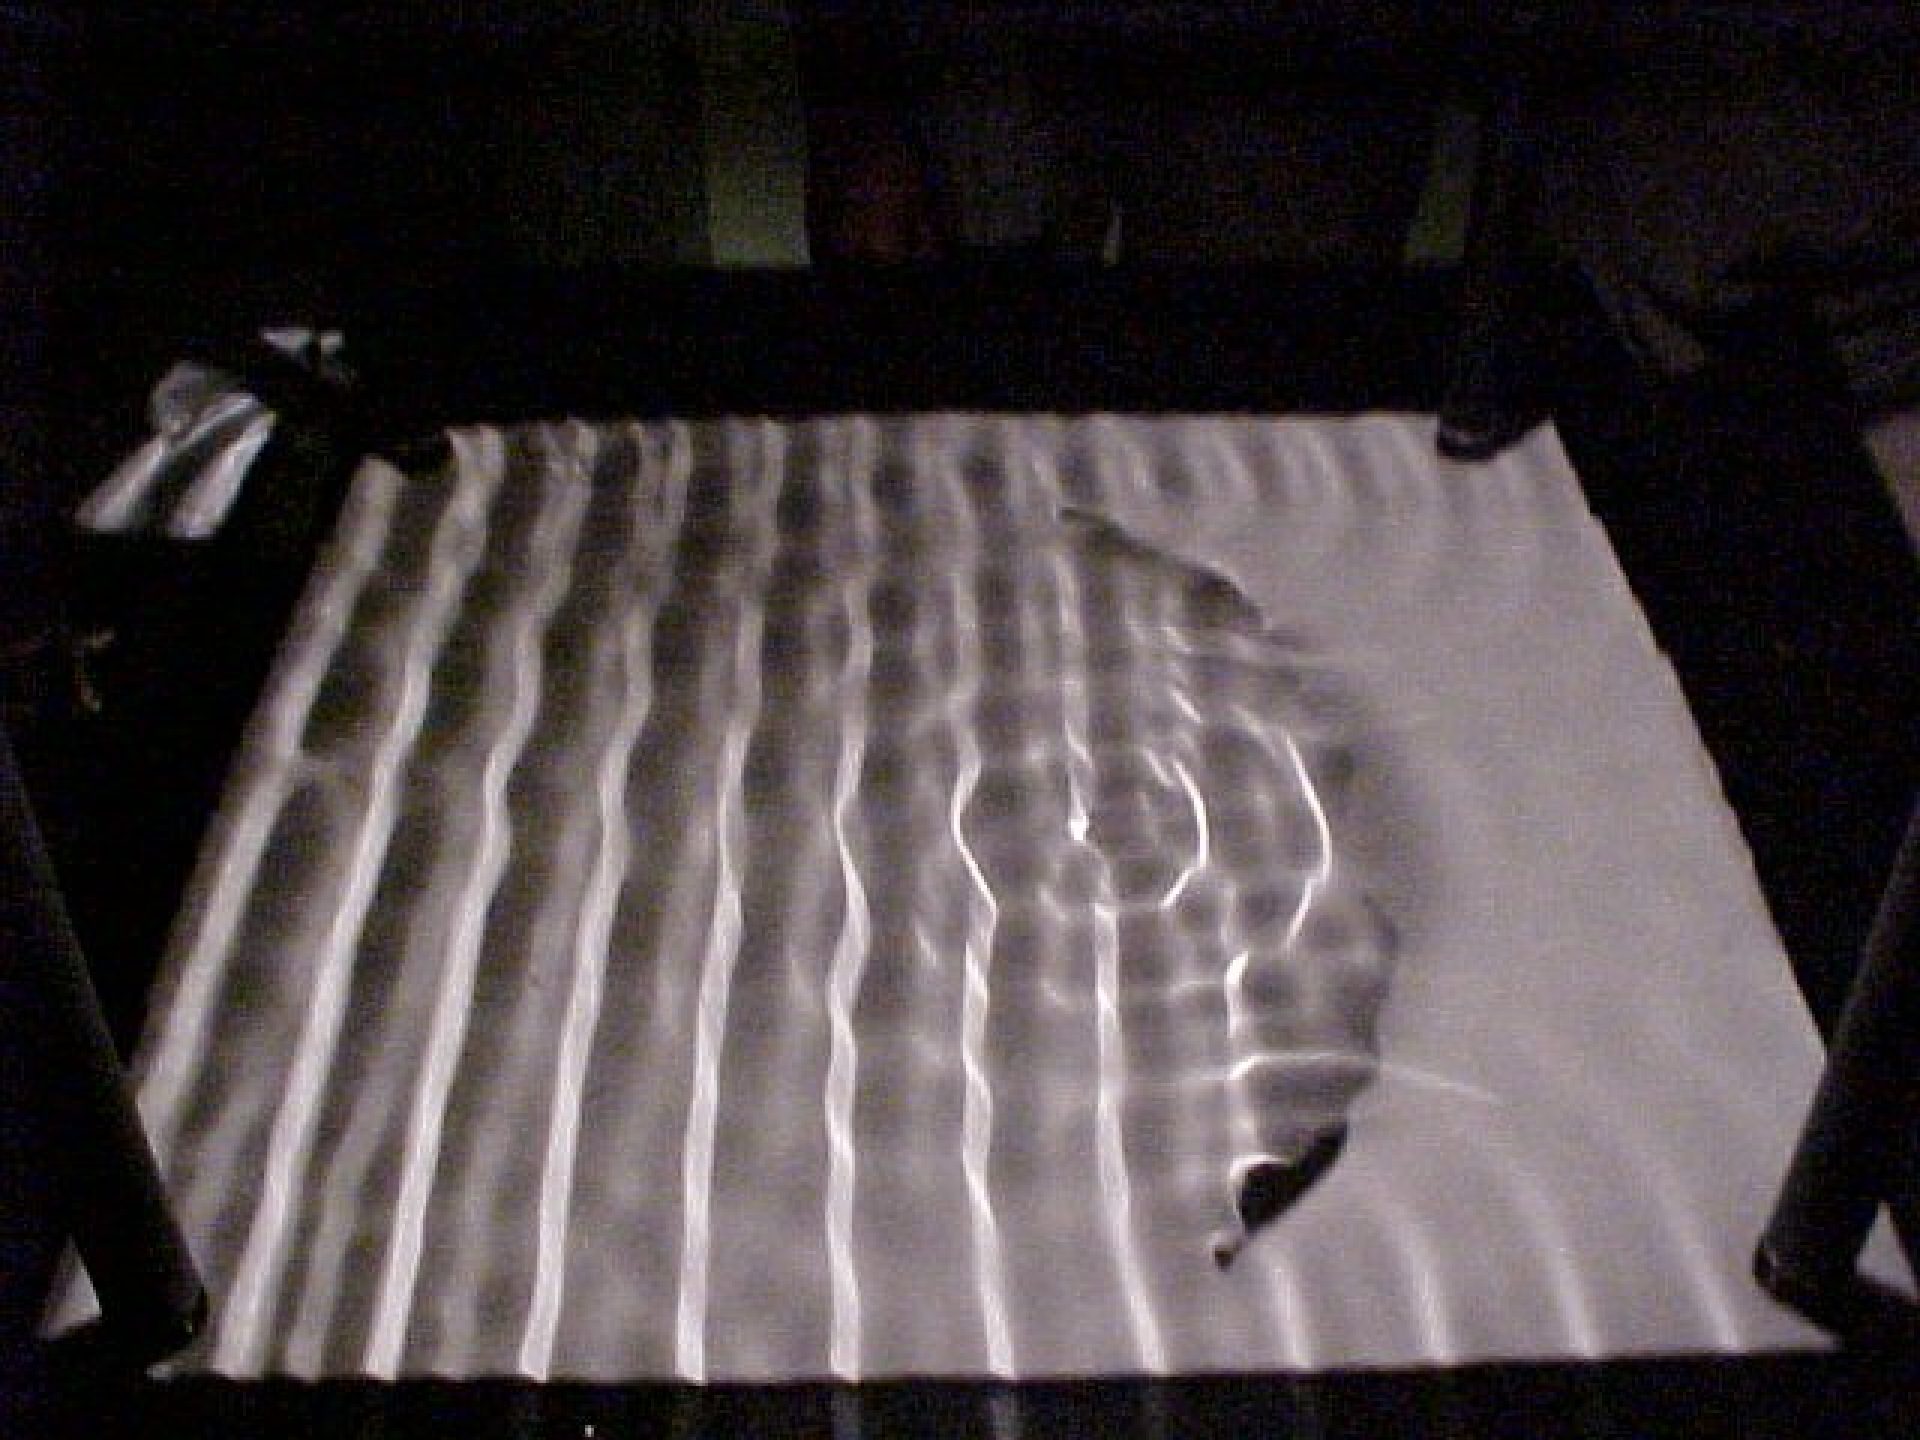
M-W6 : Large Ripple Tank
Unit
Waves
Purpose
Demonstrate: Huygens Principle, Young's Experiment interference pattern, focus by a concave "water mirror", etc.
Equipment
- PASCO Ripple tank apparatus (square tank on four legs, wave generator, halogen light source
- Assorted implements such as barriers, plungers, flat edge, etc.
- A white cardboard screen OR
- PASCO translucent screen attachent
- A pitcher with water
Suggestions
To obtain regular wave patterns it is necessary to keep the vibrating elements clean of grease so that
they are properly wetted by the water. The water depth for interference experiments should be about
1cm (deeper for refraction experiments). Best results with an amplitude setting of 2-4. Explore the role
of phase difference and frequency.
Discussion
Regarding the concave water mirror (Pic. 12 below), the focus point at half a radius is manifested
as a "Huygens source."
1. Set-up
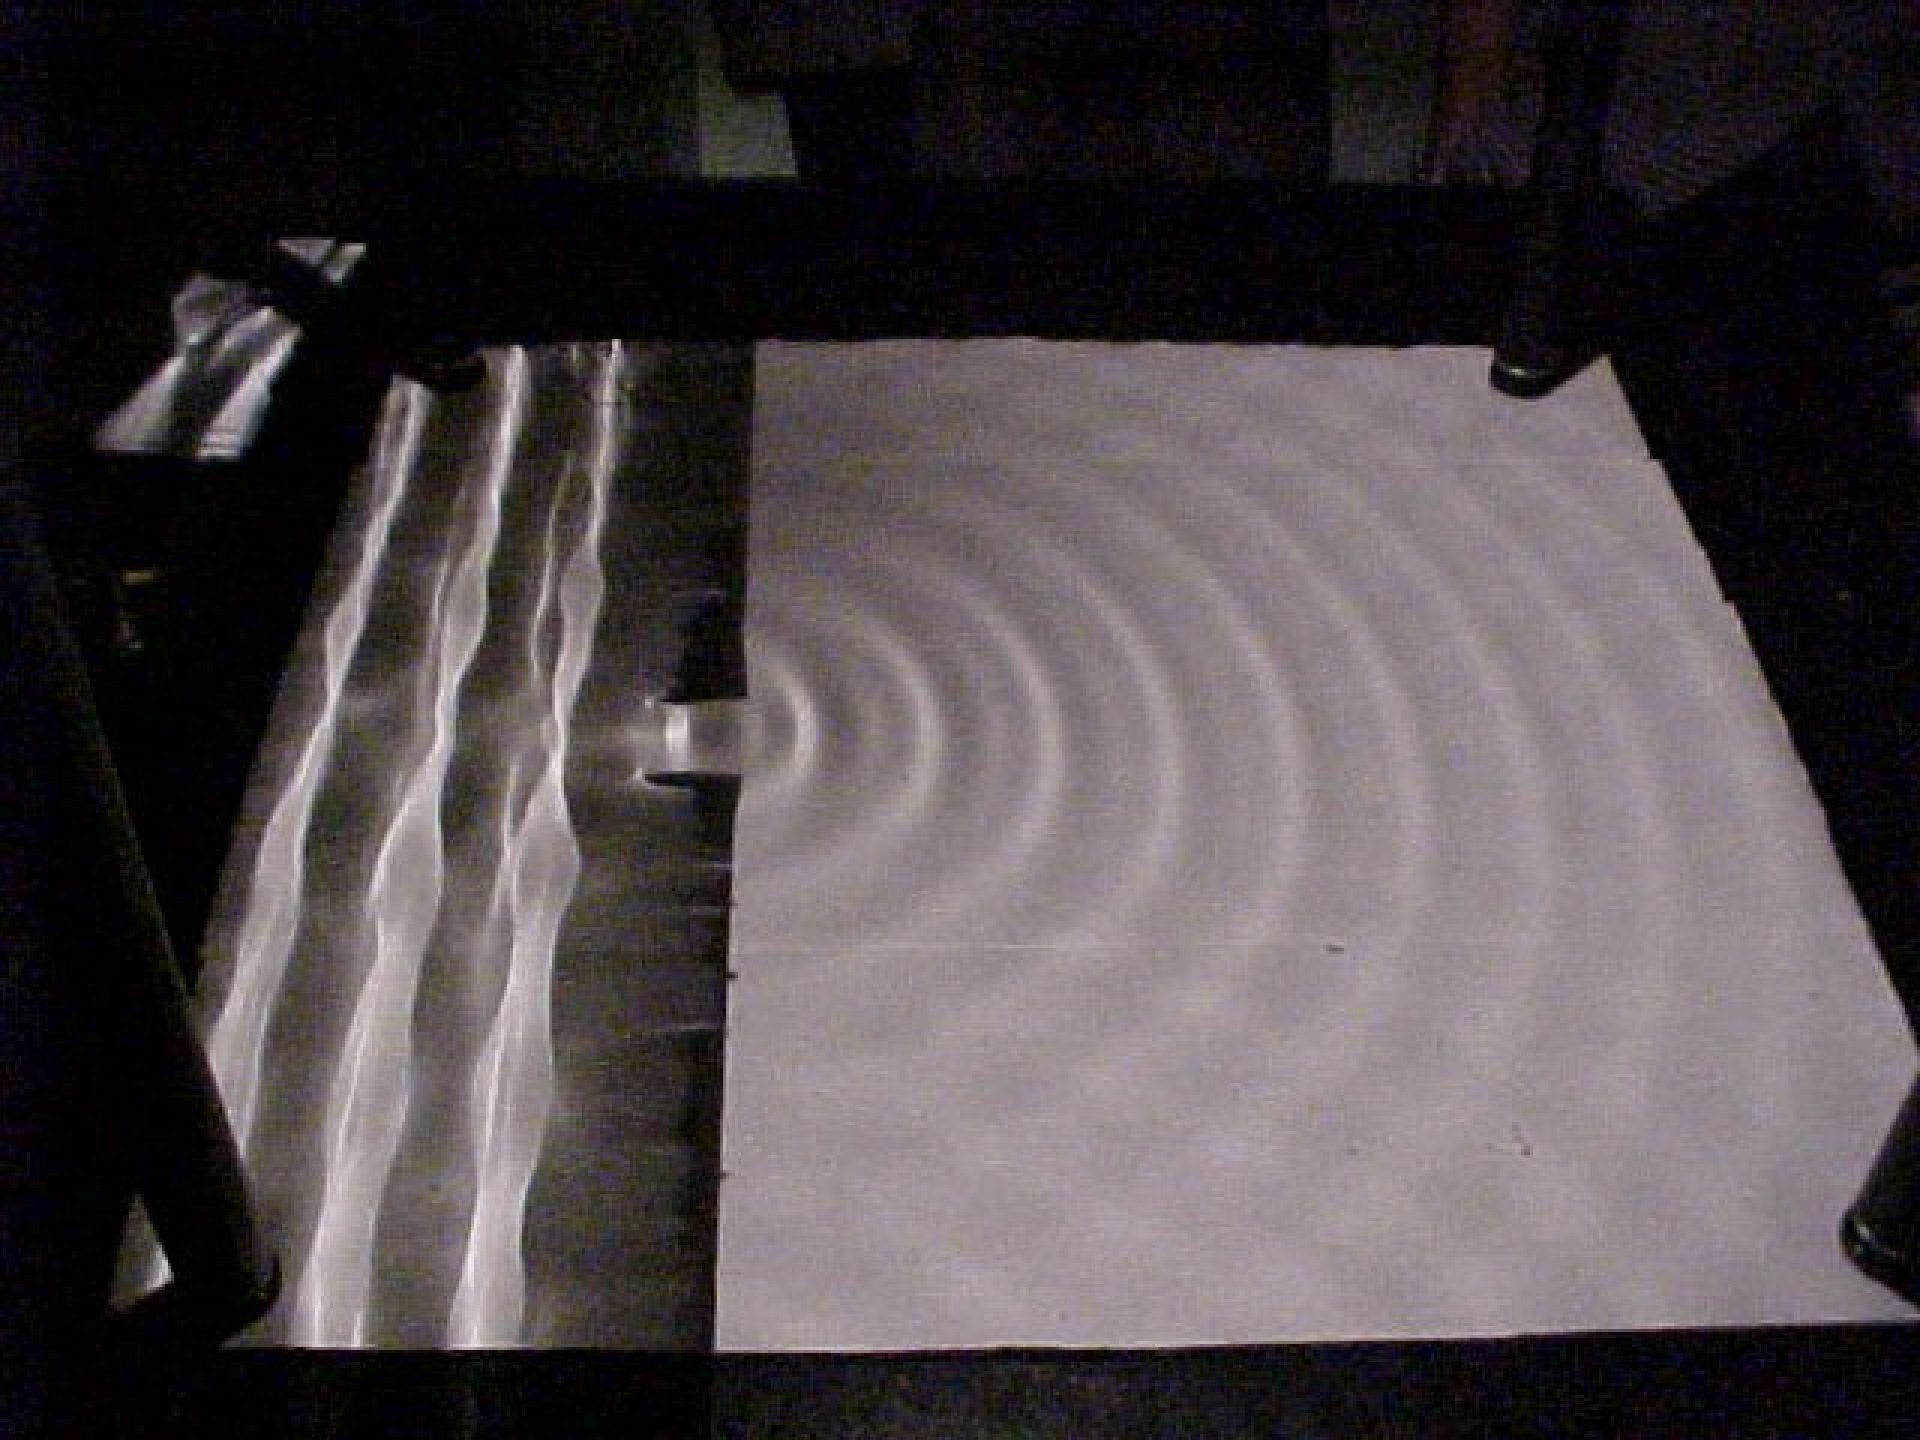
2-6. Two Huygens sources with increasing separation
7. Planar wave with a disturbance to be avoided
8. Correctly formed planar wave
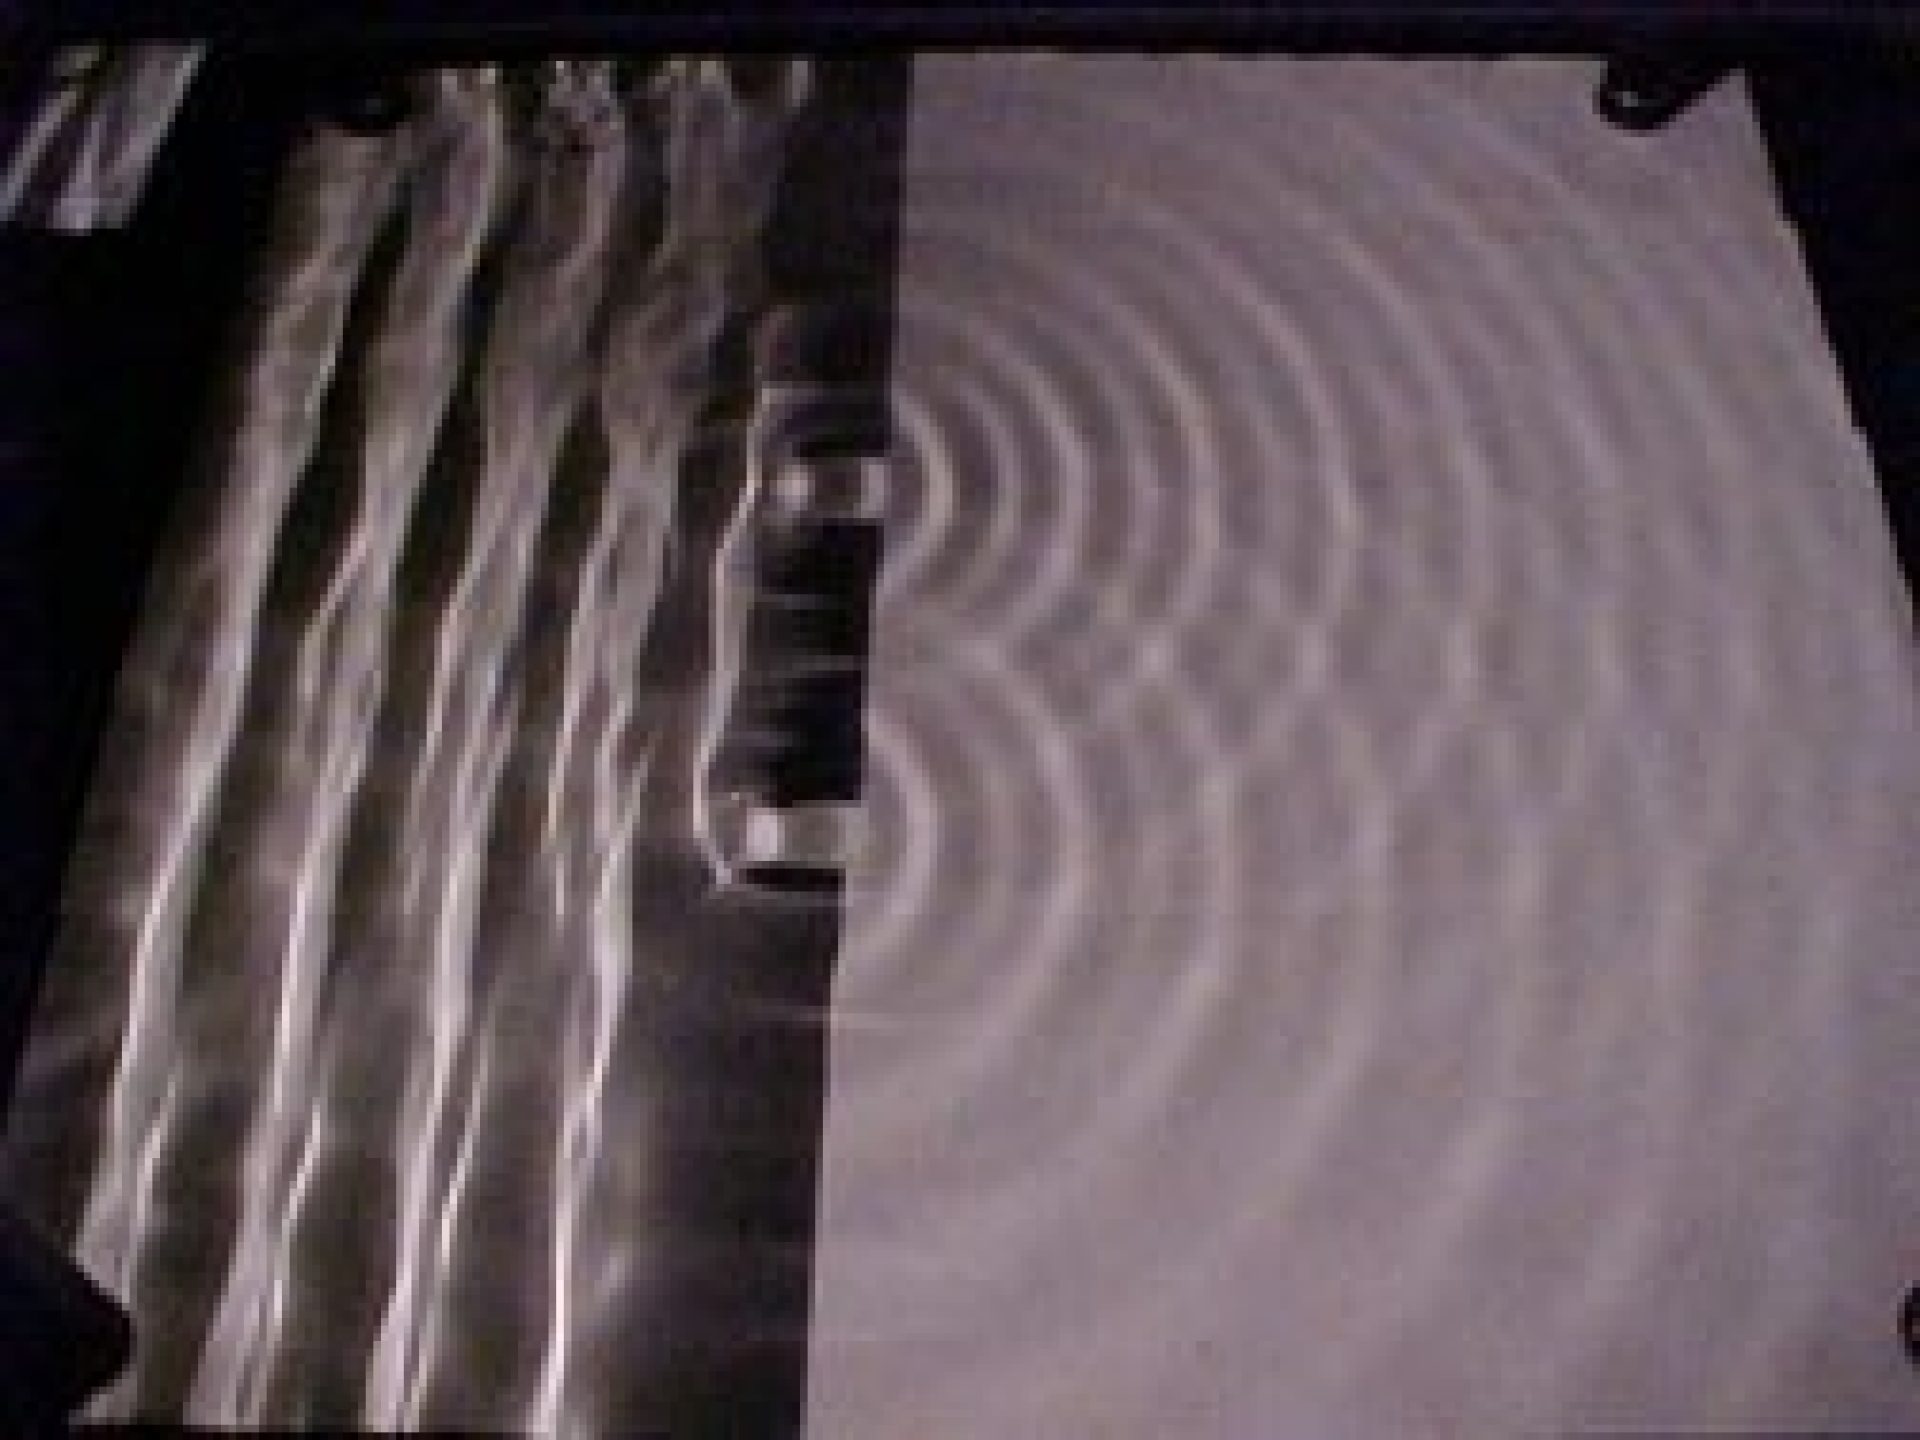
9. Huygens source created by a planar wave impacting a 1.5cm slit
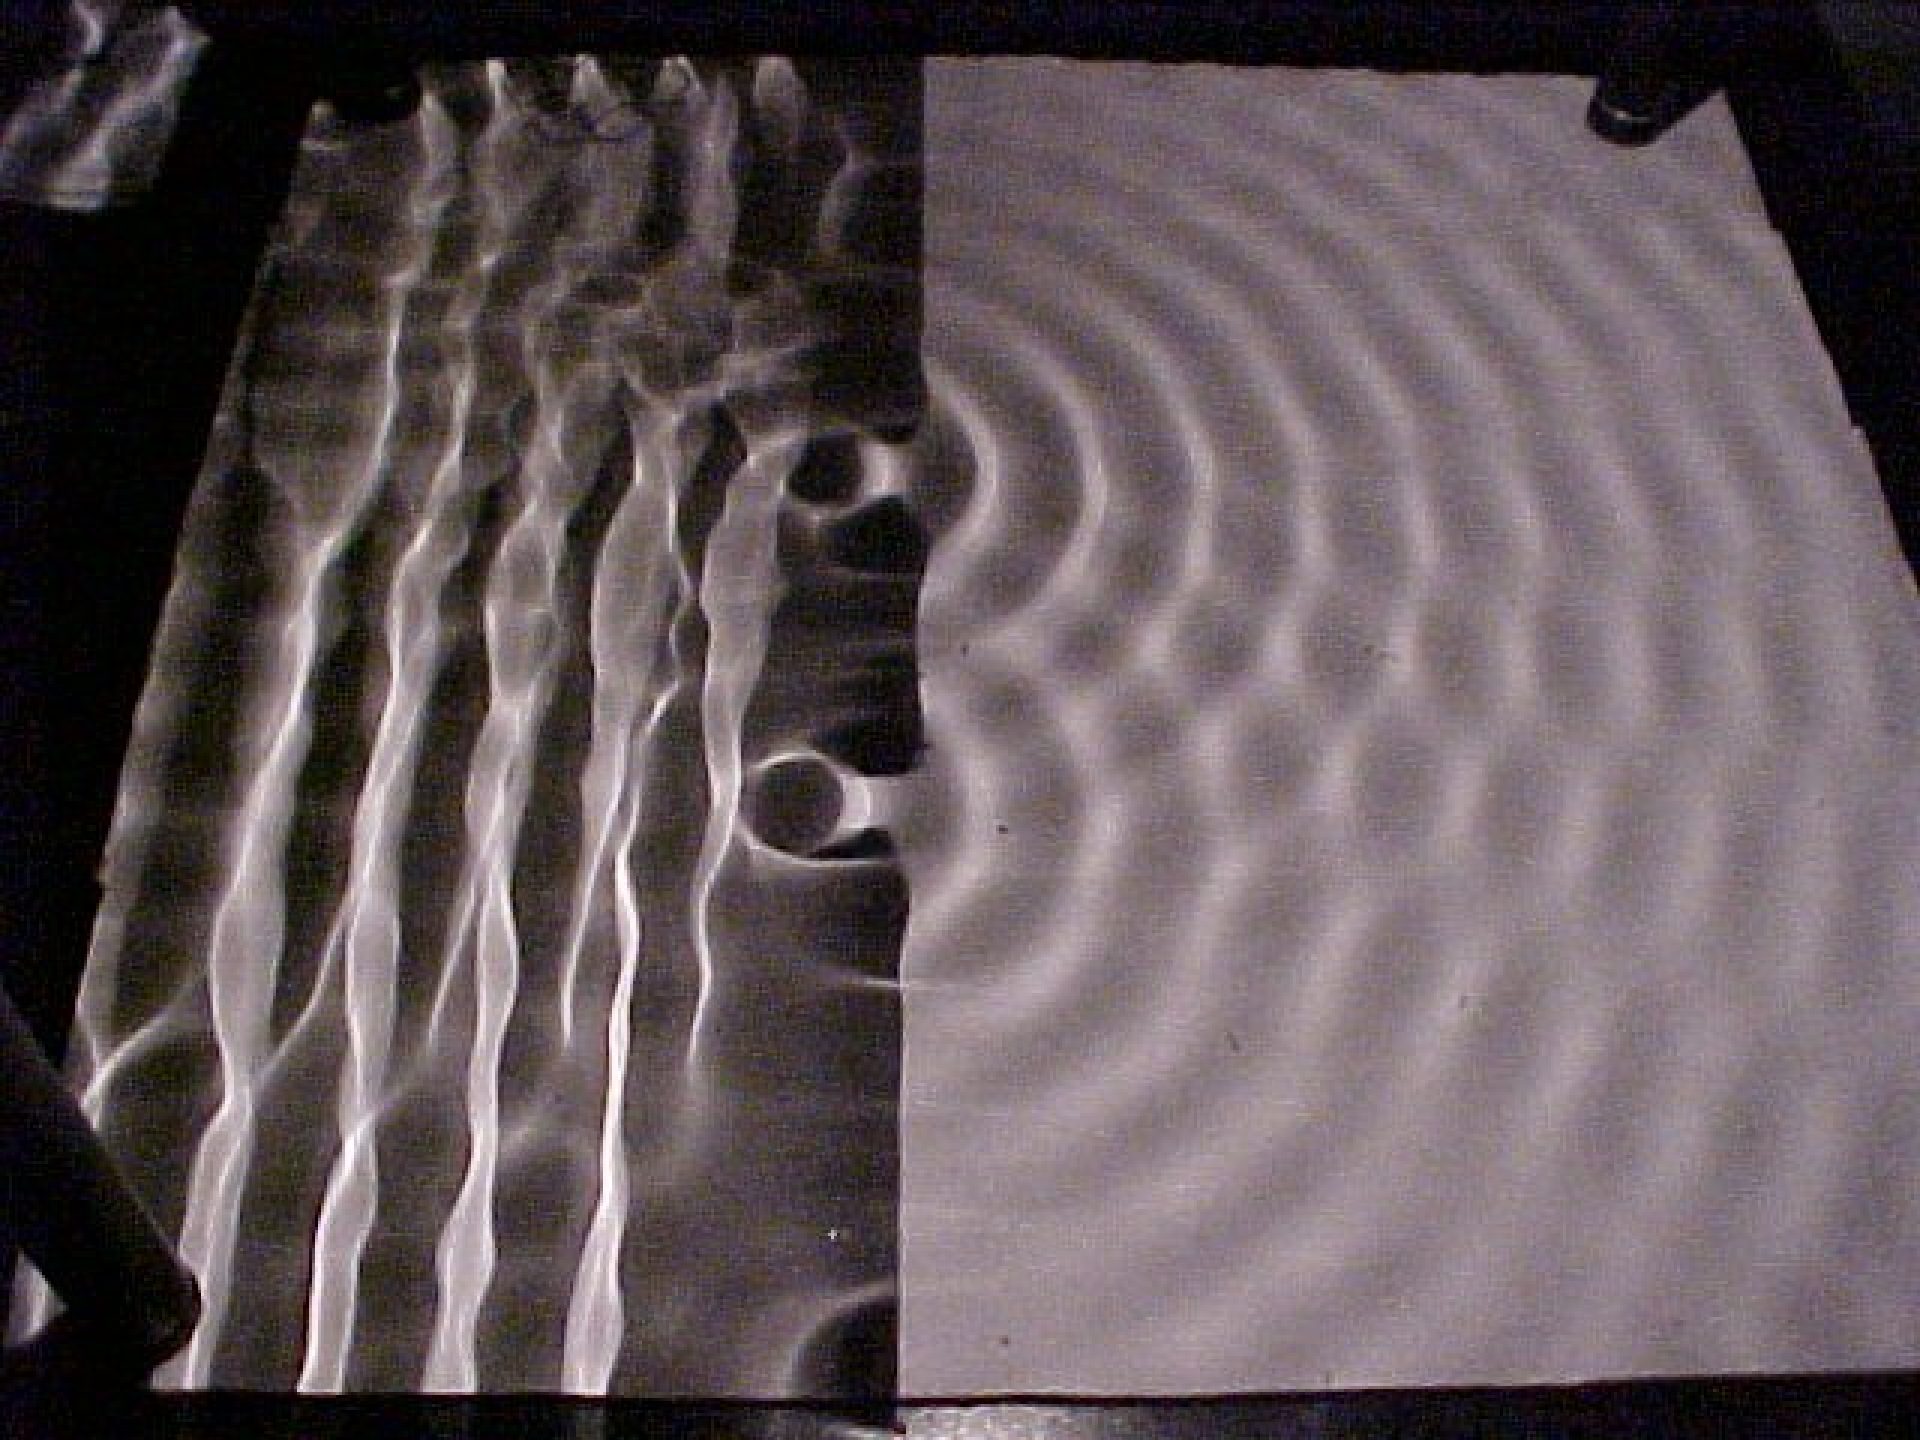
10-11. Two Huygens sources created by two 1.5cm slits and the interference pattern
12. A planar wave collides with a concave plate causing the incoming waves to reflect and converge at a focal point


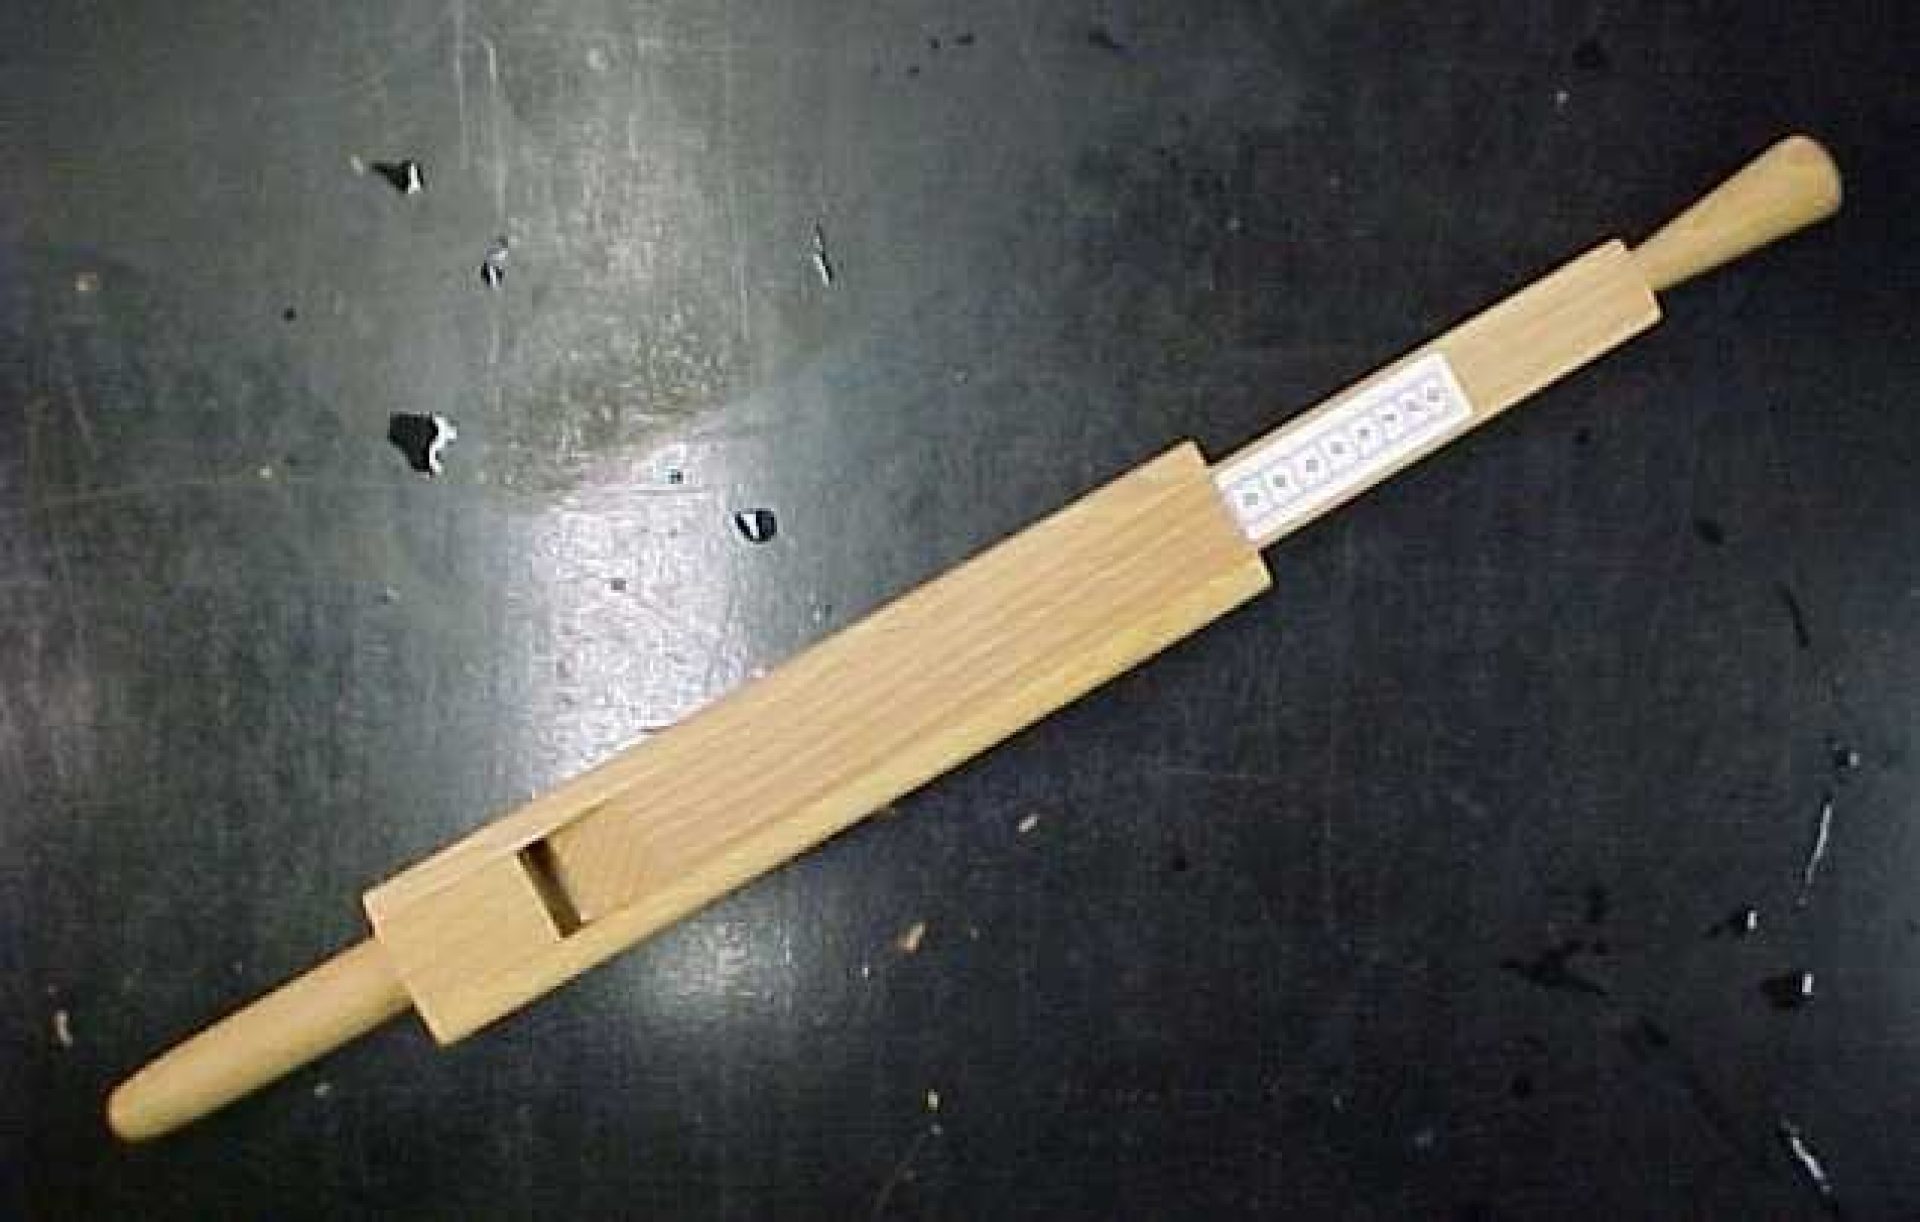
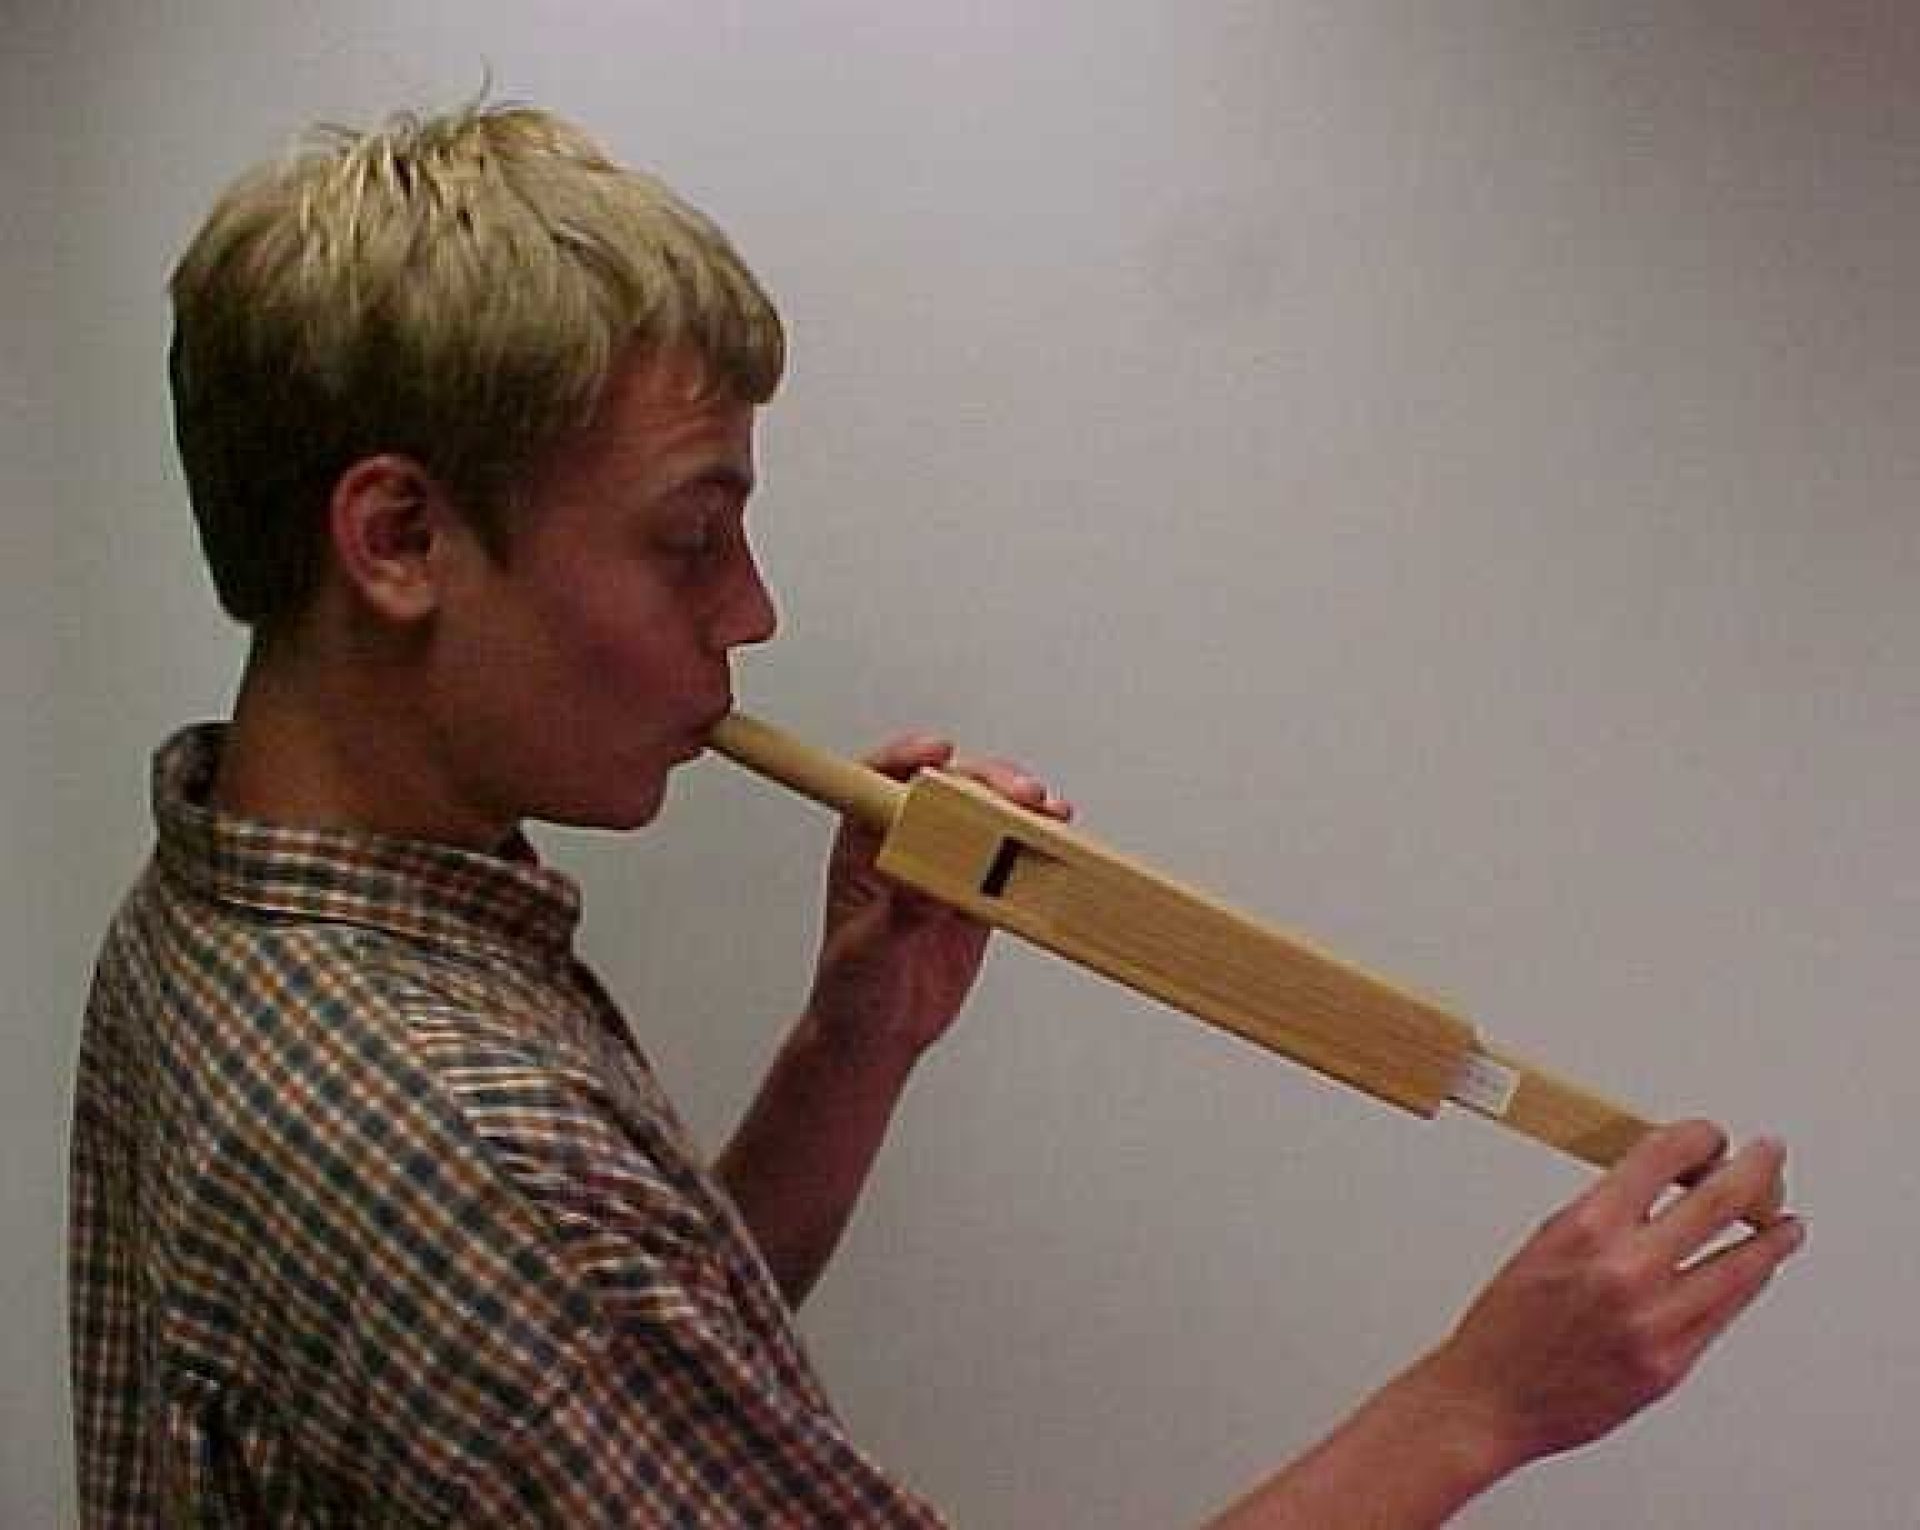
M-W7 : Organ Pipe
M-W8 : Acoustic Doppler
-sm-.jpg)
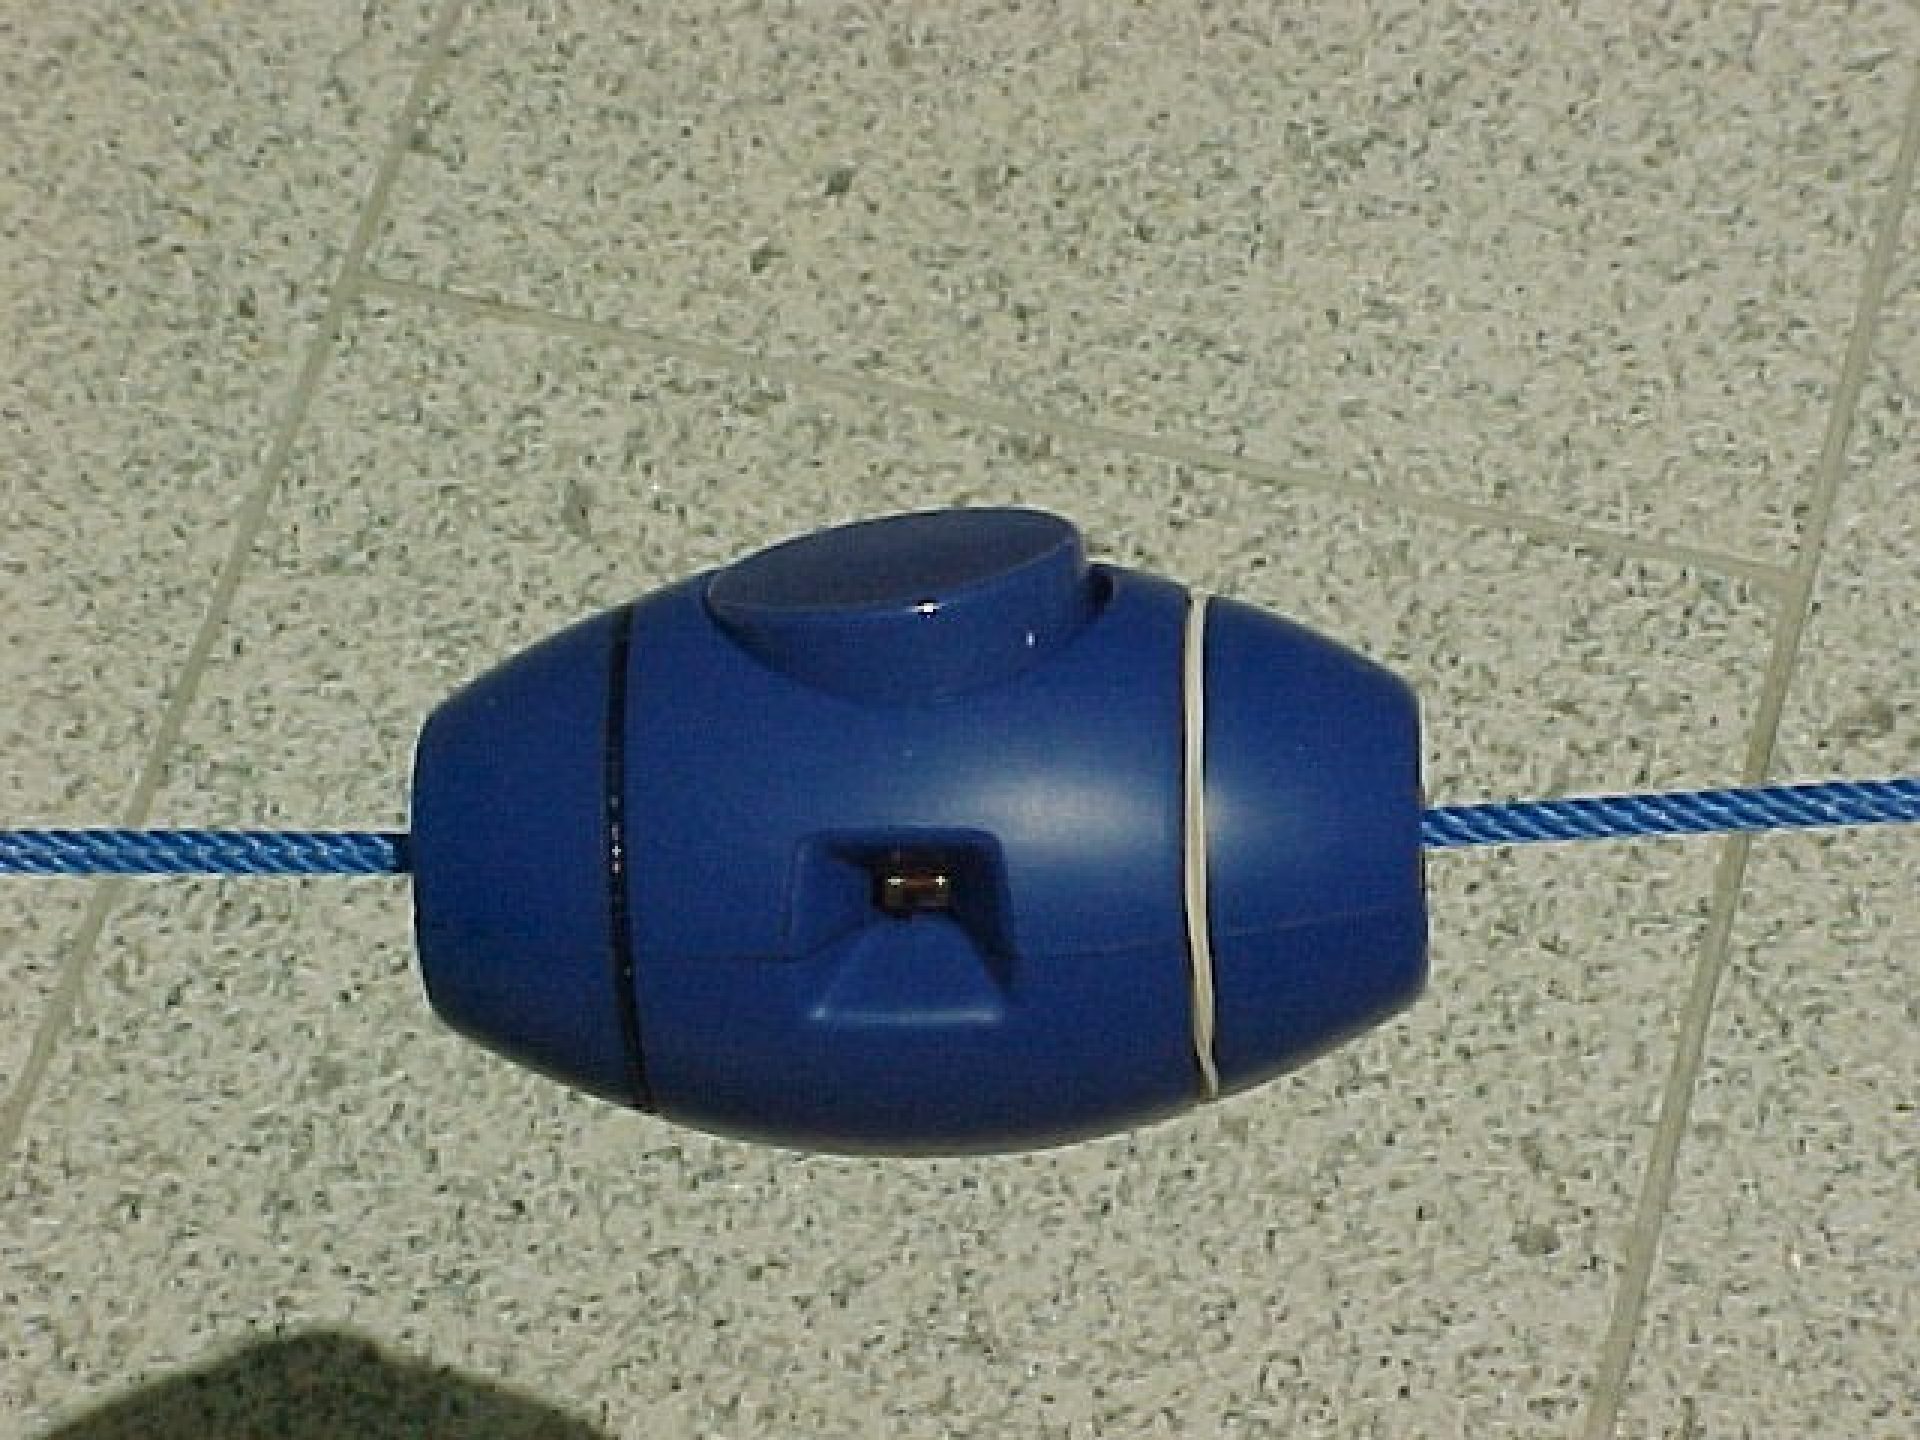
M-W9 : Dopler Rocket
Unit
Doppler Effect
Purpose
High speed demonstration of the Doppler Effect in sound waves
Equipment
- Pasco Dopler Rocket
- String with handles
Suggestions
- Stretch the strings along the aisles of the lecture hall (don't clip anyone's head)
- Pull before the rocket hits your handles so that the rocket is continuously moving.
Discussion
- Dopler Rocket
- Rocket moving Down
- Rocket moving Up

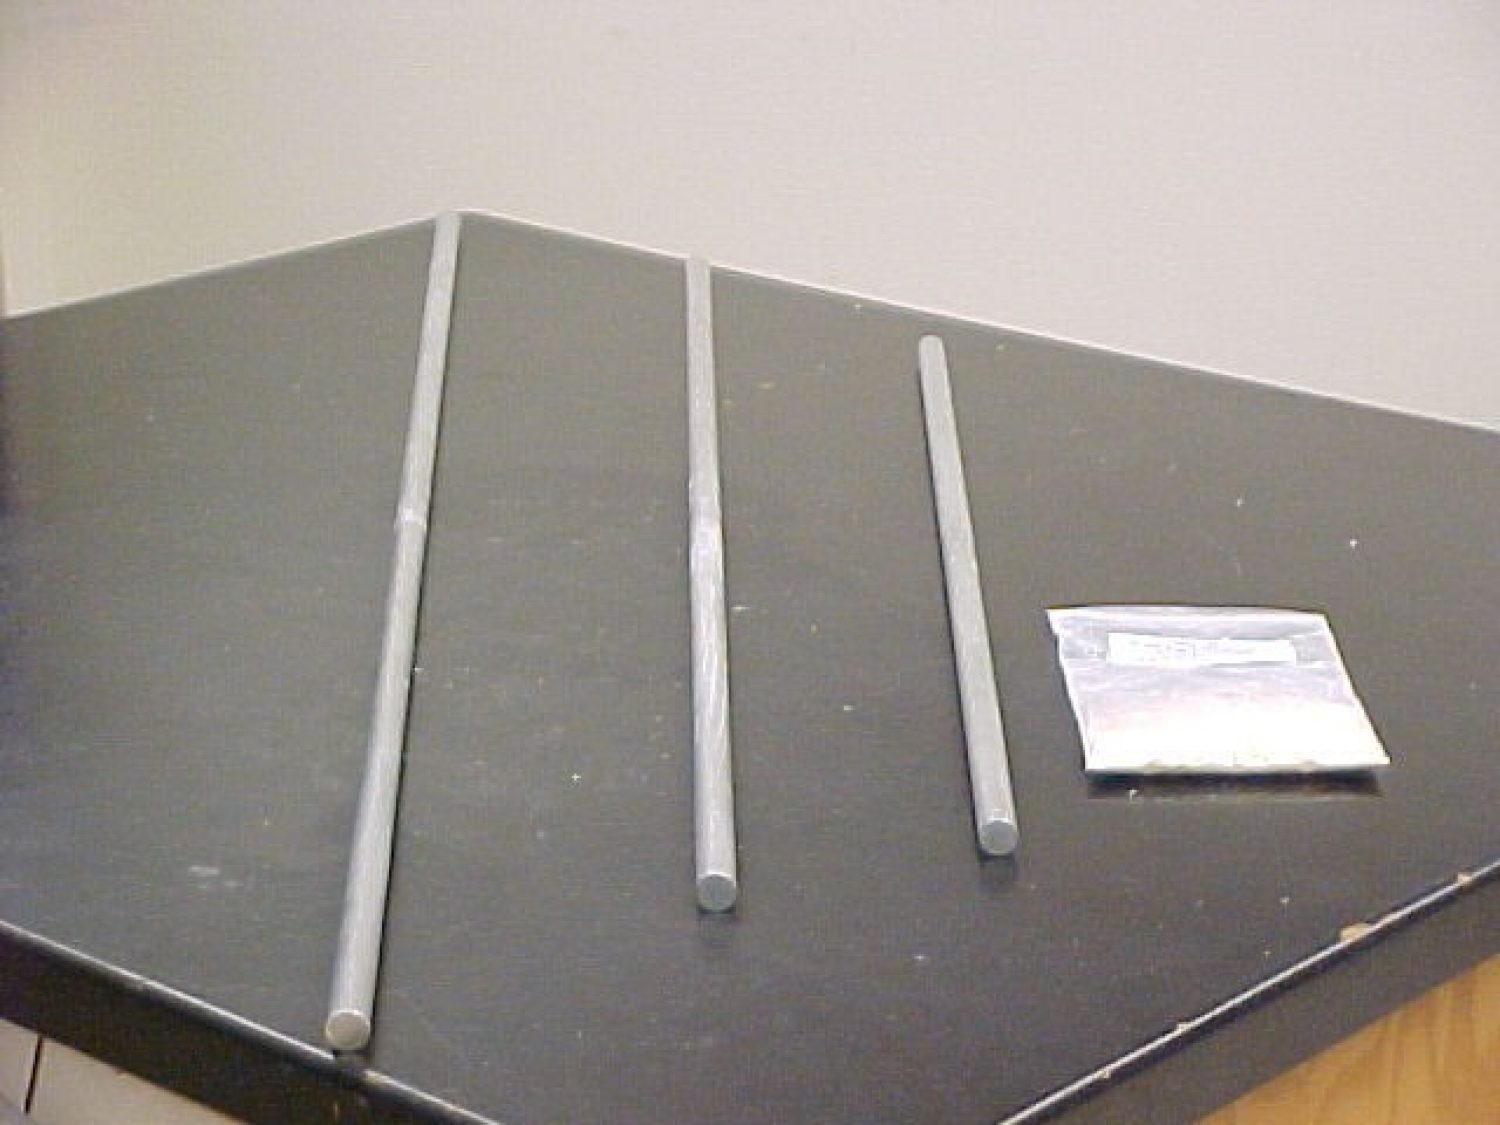
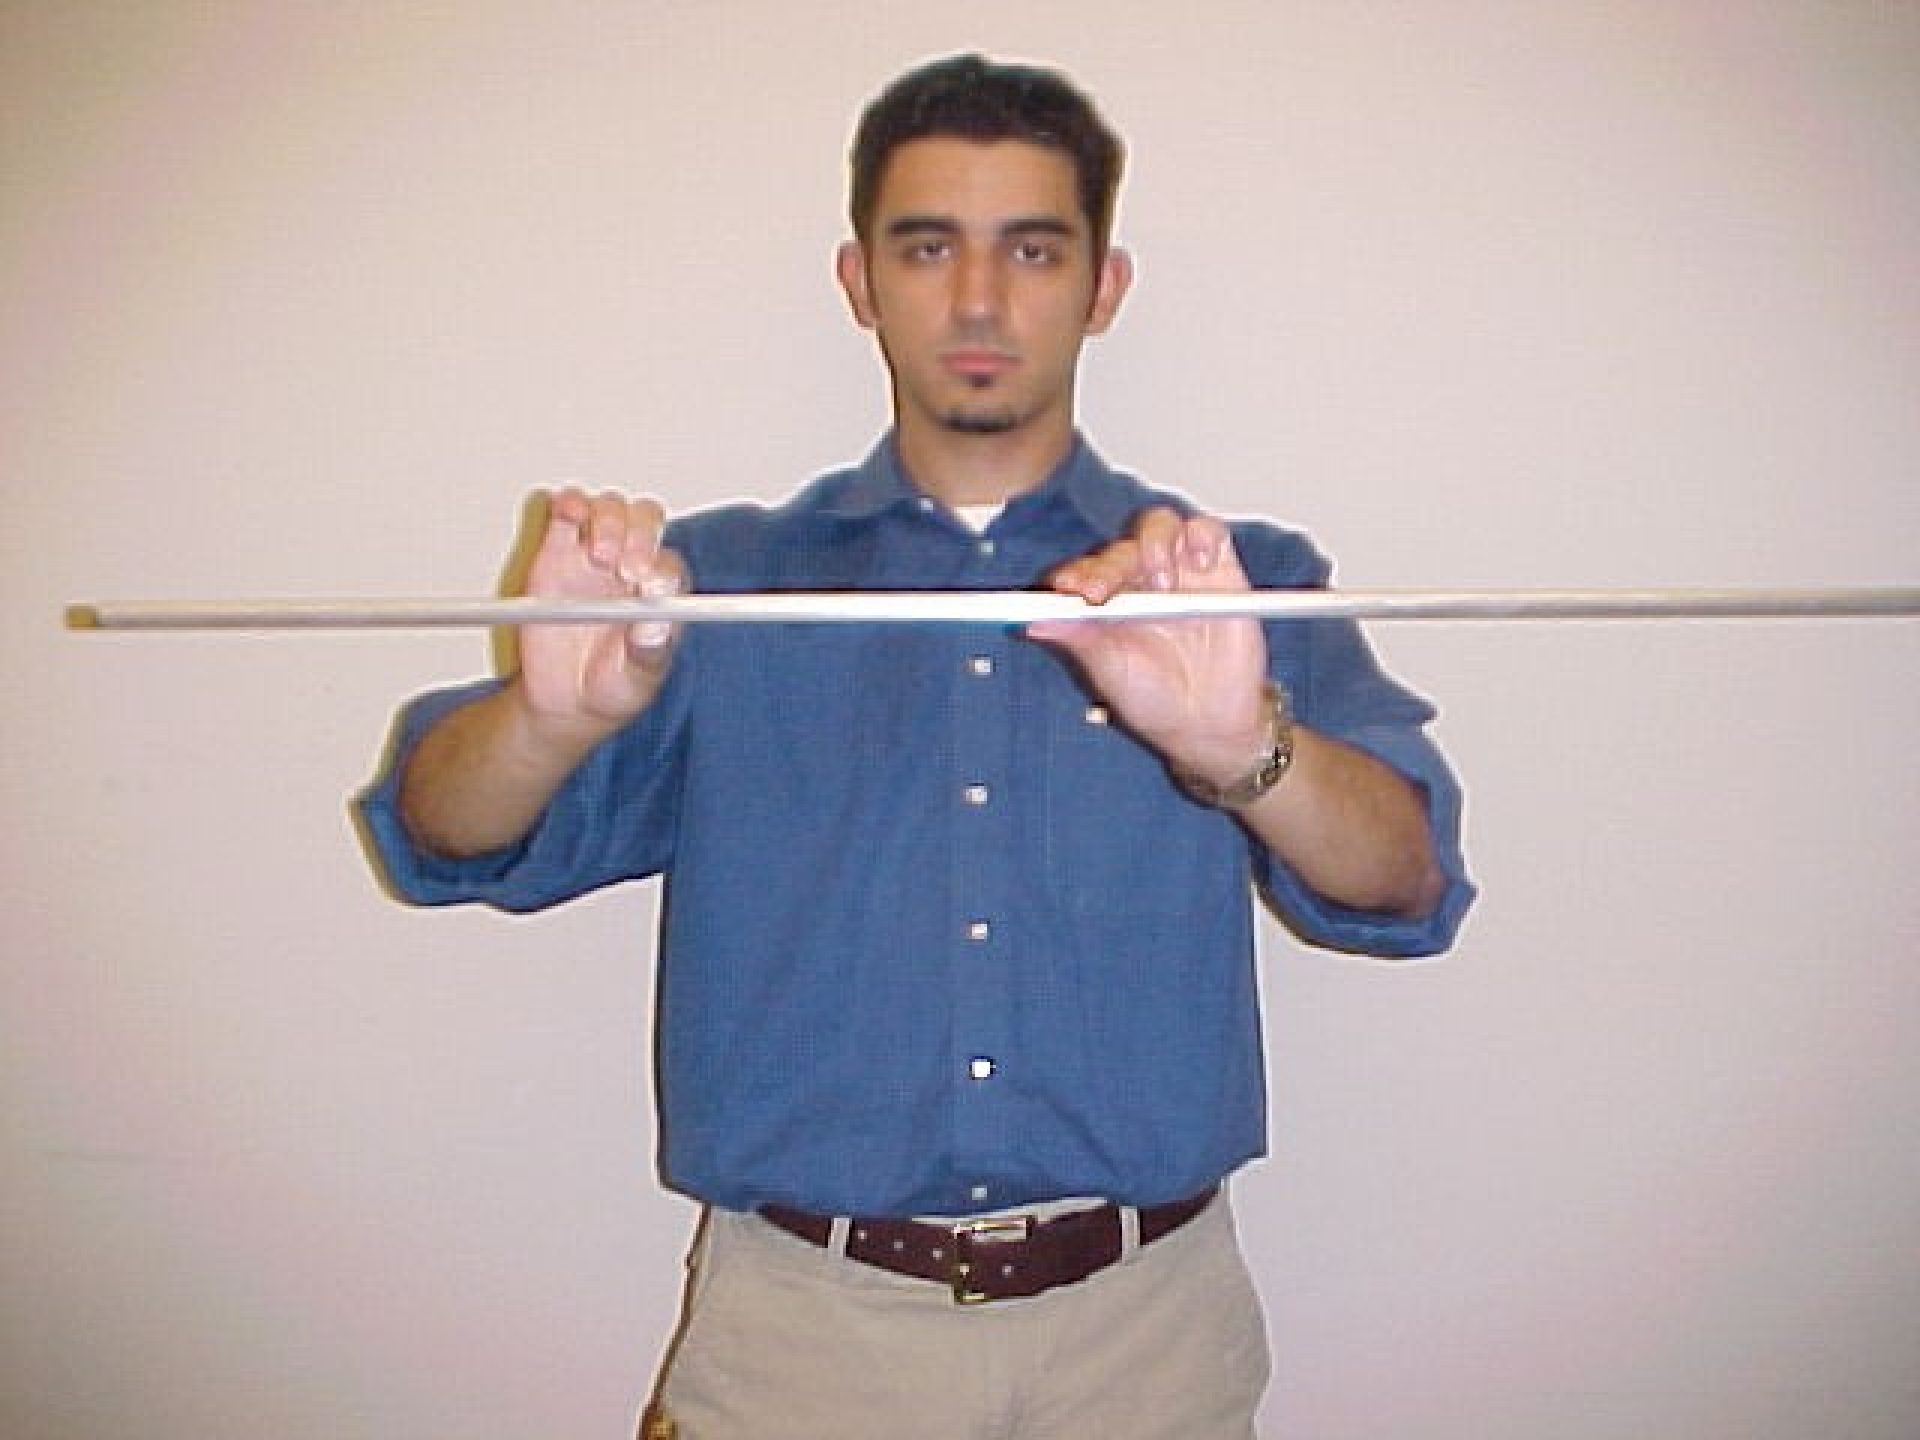
M-W10 : Singing Rod
Unit
Sound Waves
Purpose
To dramatically illustrate standing waves in a solid
Equipment
- Crushed Rosin
- Singing Rods (61, 76, 91 cm)
Suggestions
- Firmly hod the rod vertically at the midpoint
- Gently stroke the rod from the center to the end using your rosin covered thumb and forfinger
- Try holding the rod at other predicted nodes.
Discussion
- Equipment
- Singing rod in use